

1
Create a Database
Create a new database for data writing. Skip this step if you already have a database prepared.
- Log in to the MotherDuck account.
- Click the plus icon next to “Attached Databases”.
- Enter the desired name of your database.
2
Create an Access Token
Collect connection information and create an access token for the data transfer service.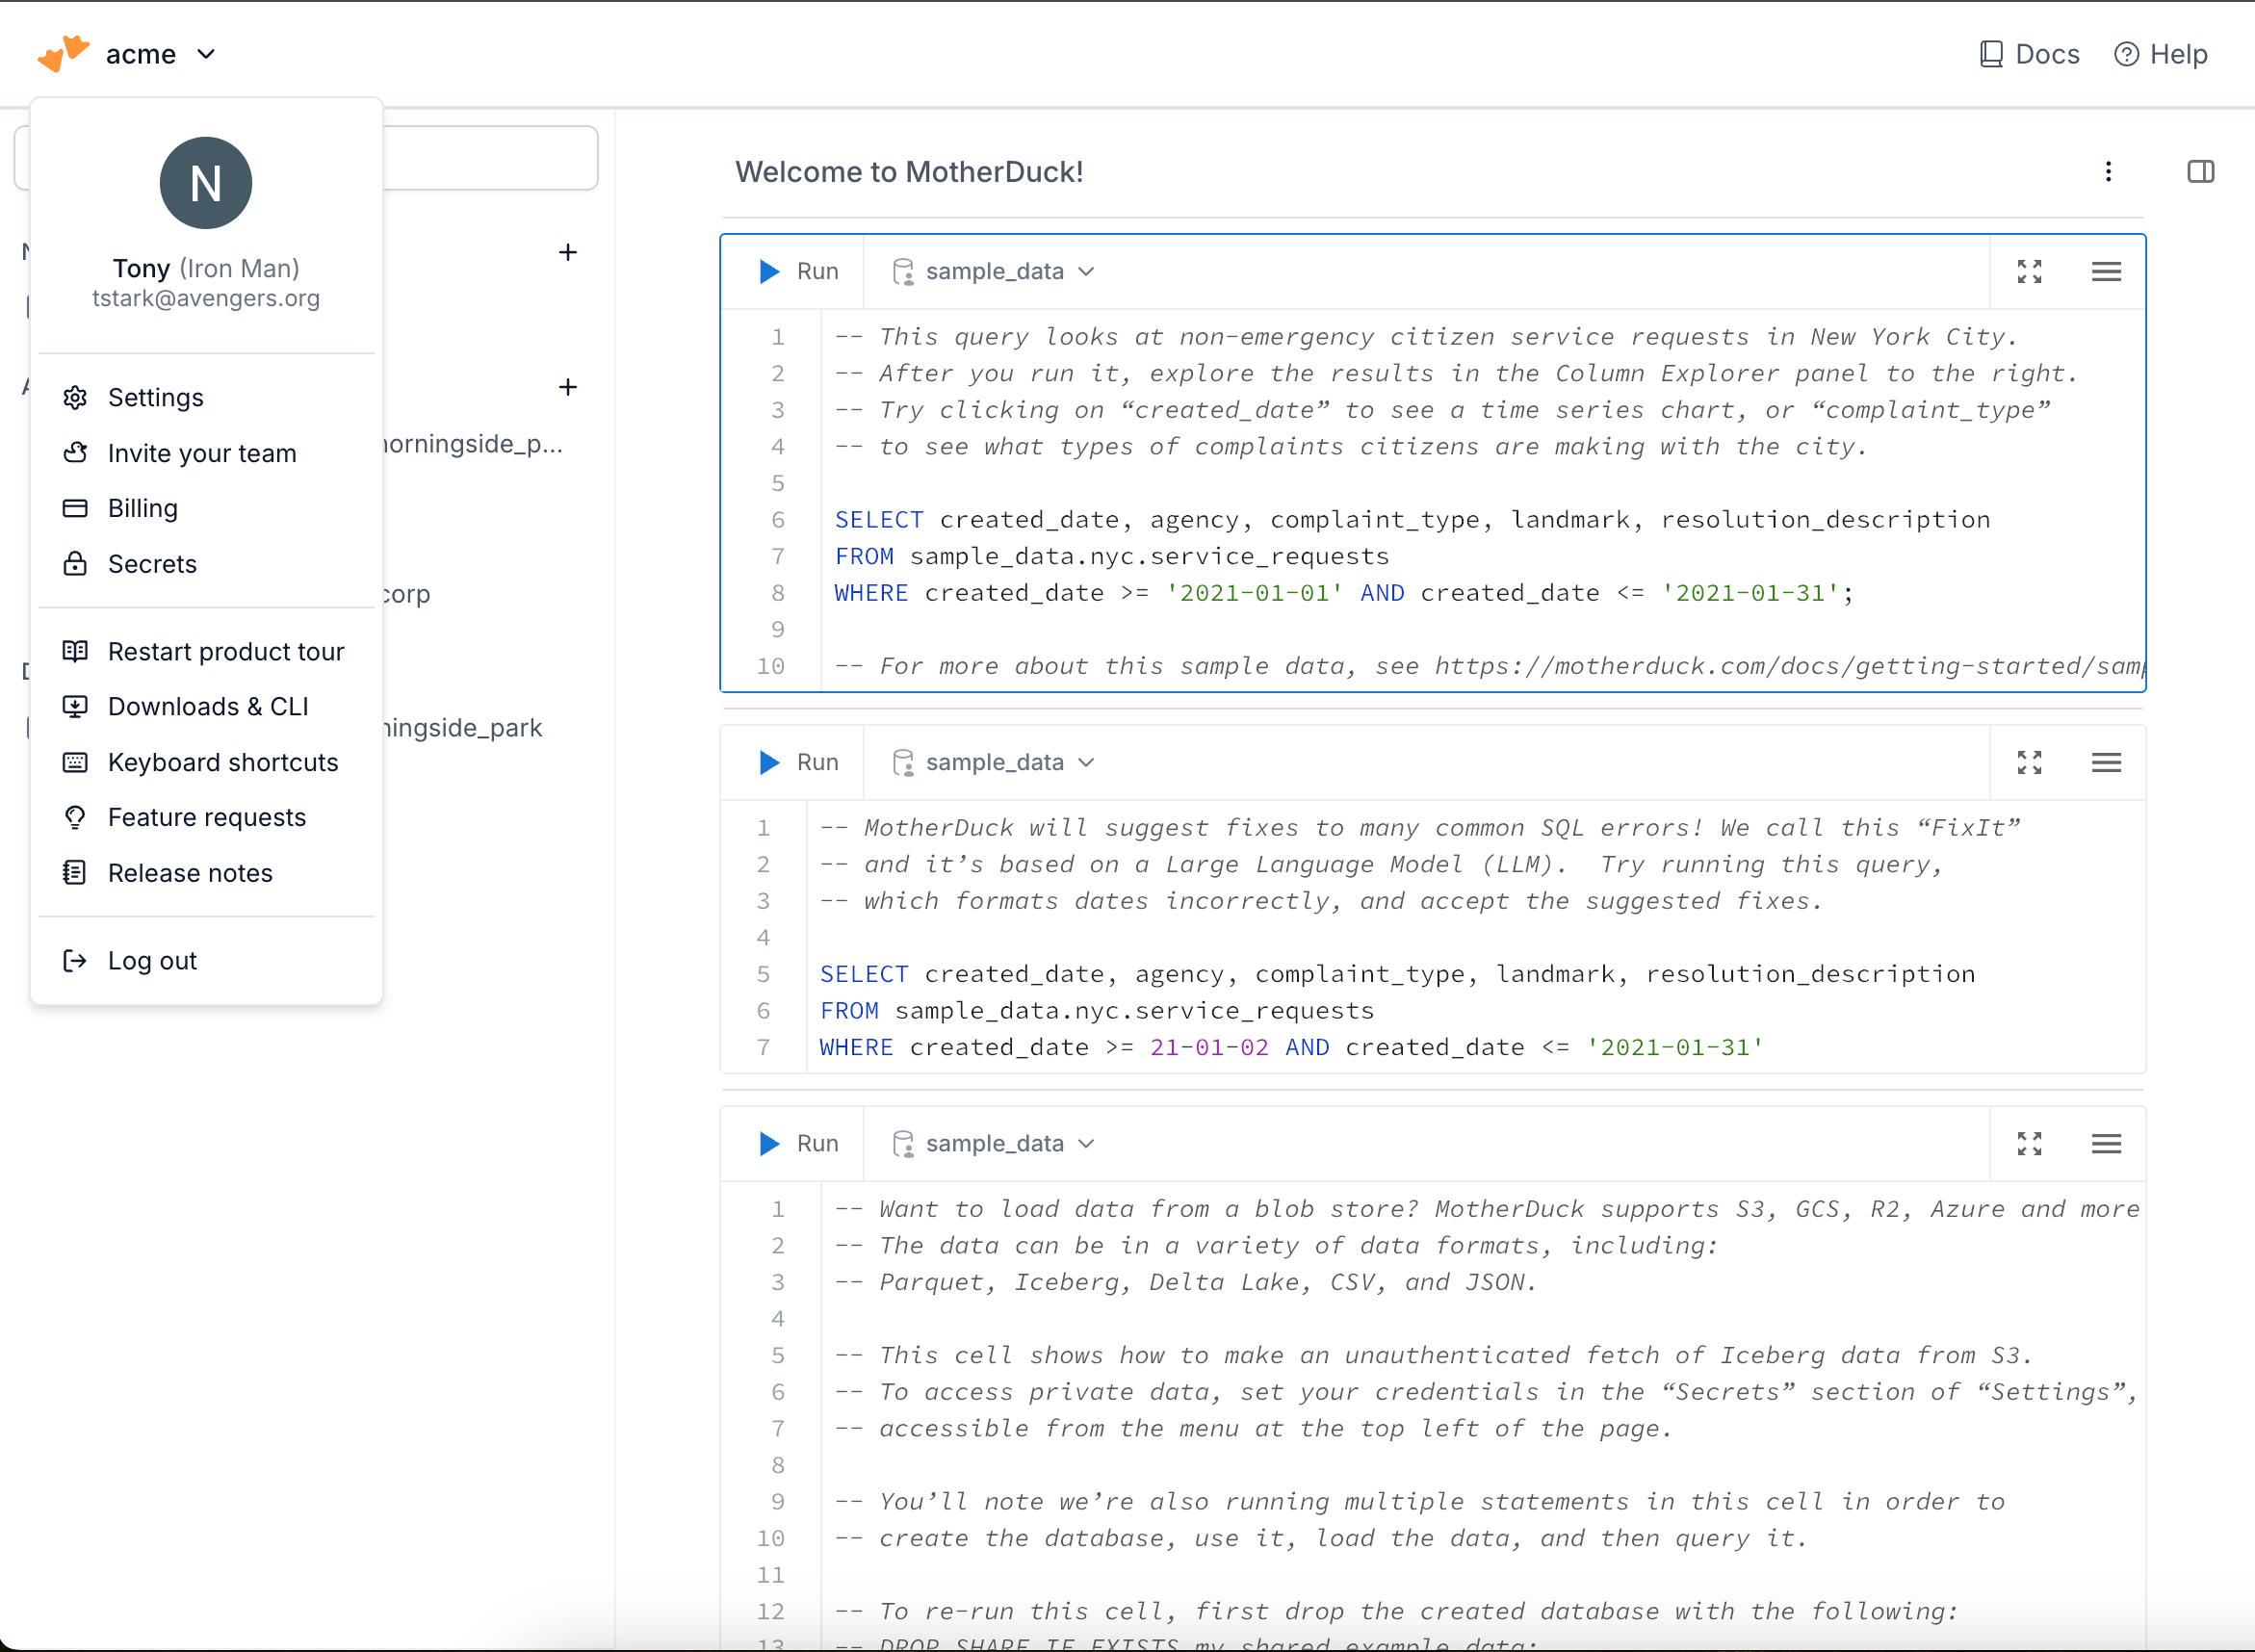
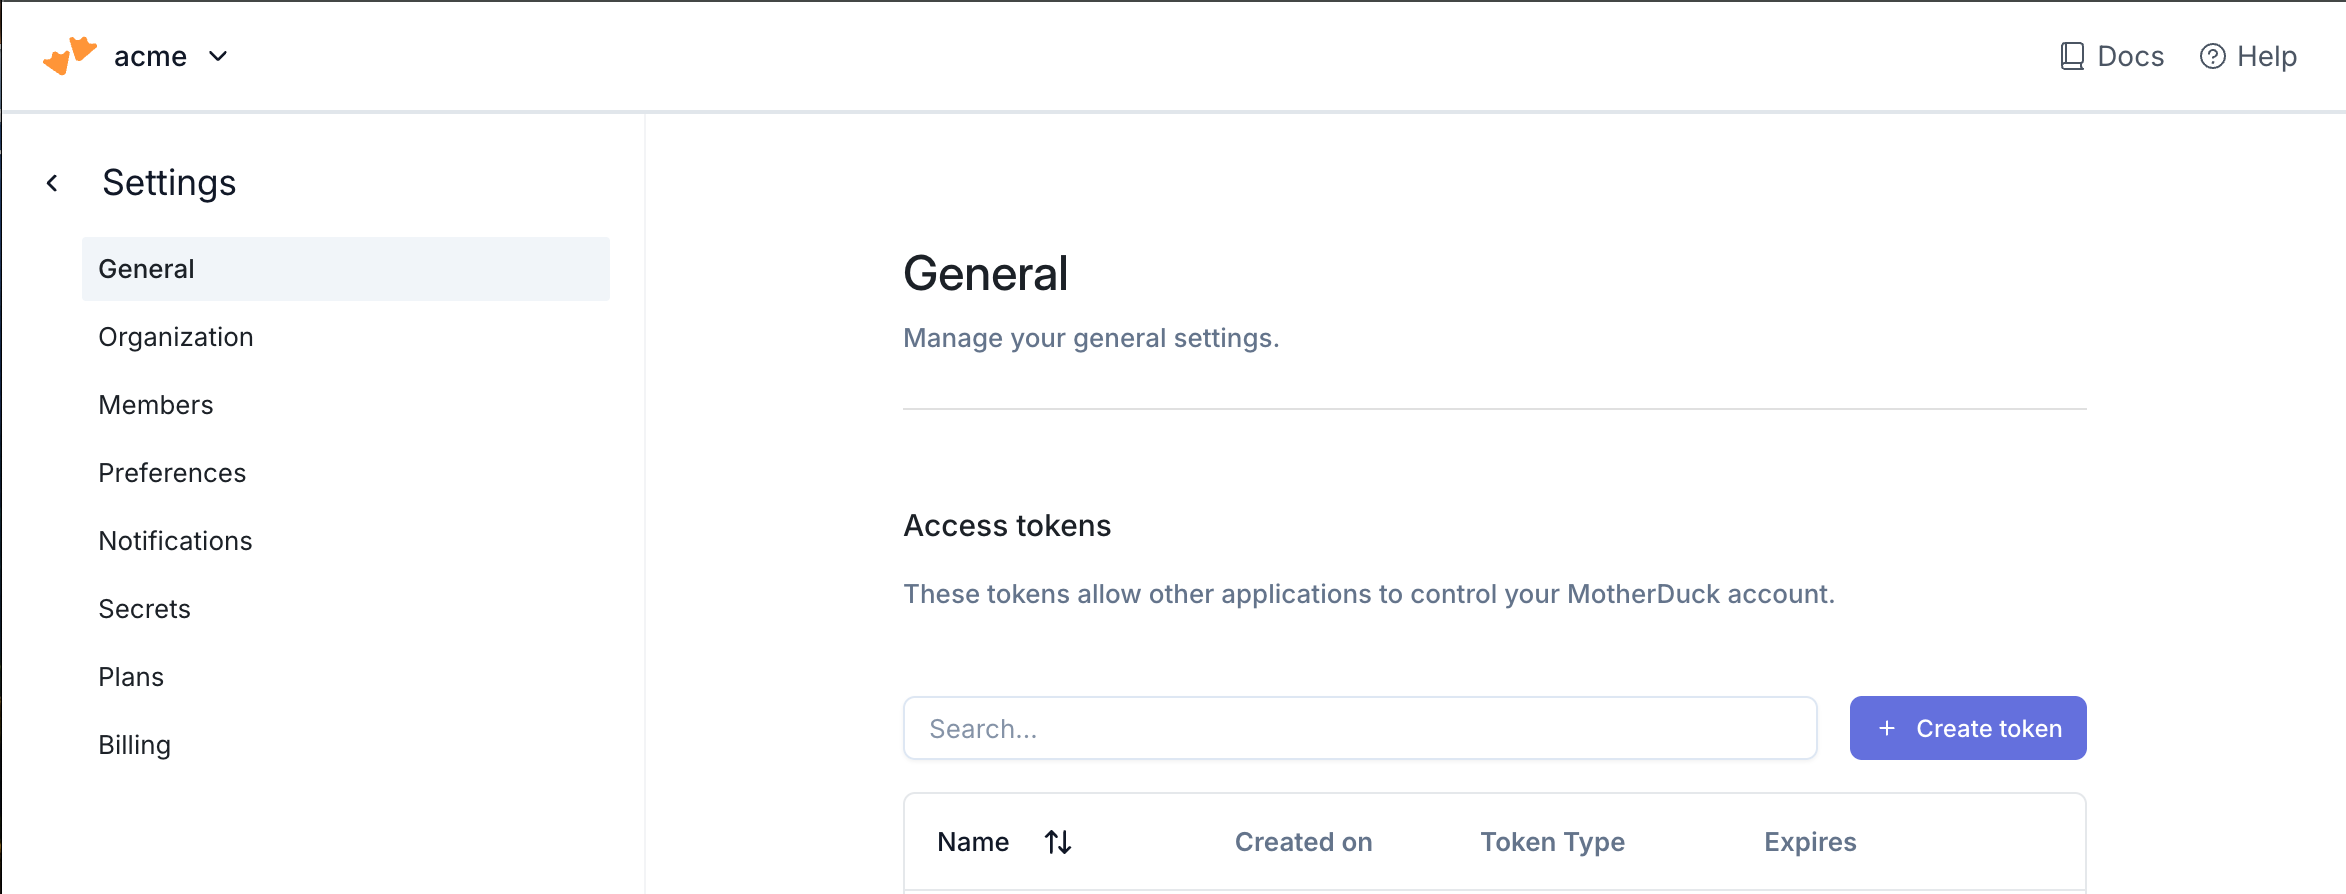
- In the navigation dropdown, select Settings.
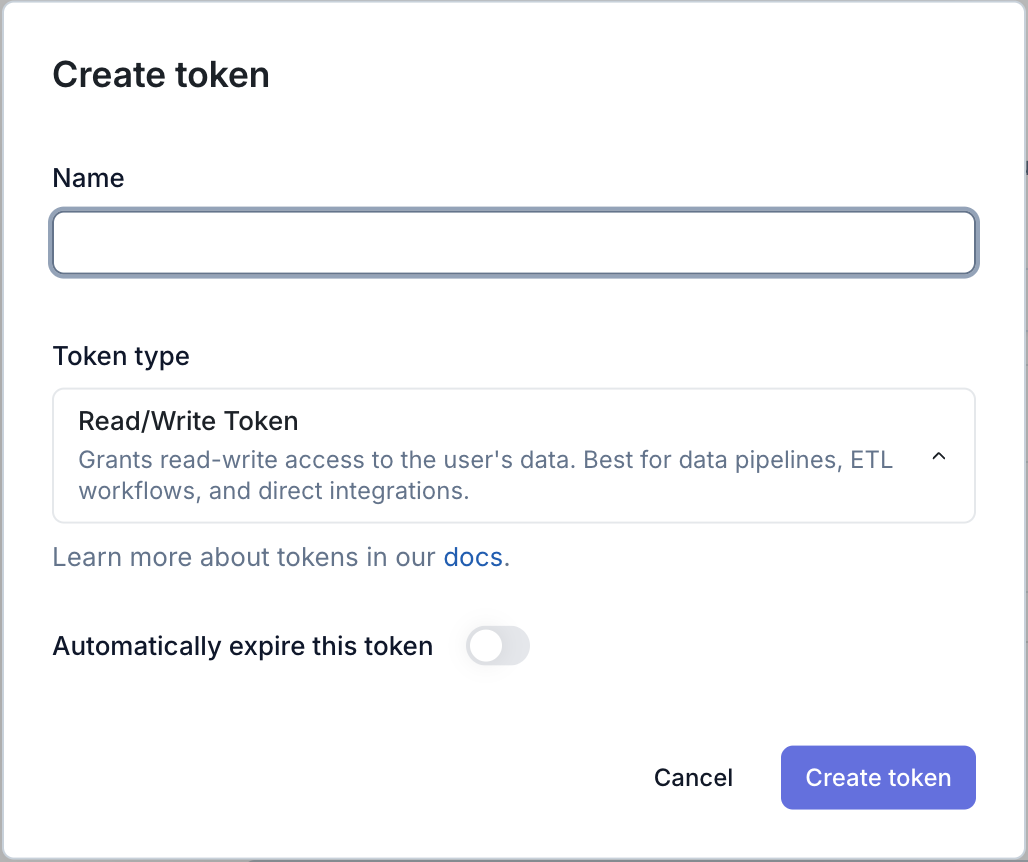
- Click the Create token button to create a ** access token**.
- Name the token with a descriptive comment and assign the token lifetime. A longer lifetime will ensure you do not have to update the token as often. Ensure that the Token Type is set to “Read/Write Token”. Click Generate.
- In the pop up that follows, copy the token and securely save the token.
3
Add your destination
Use the following details to complete the connection setup: database, your chosen schema name, and access token.
Permissions checklist
- Access token generated with Read/Write Token type.
- Token lifetime set according to your rotation policy.
- Target database exists in MotherDuck.
FAQ
How is the MotherDuck connection secured?
How is the MotherDuck connection secured?
We authenticate using a MotherDuck access token. Generate a dedicated Read/Write token in MotherDuck Settings and provide it during destination setup. The token grants scoped access without sharing your account credentials.
How do I update my access token?
How do I update my access token?
Generate a new token in MotherDuck Settings, update the destination configuration with the new token, and revoke the old one.
Do I need to pre-create the schema?
Do I need to pre-create the schema?
No. The schema provided in the destination configuration is created automatically on first sync.