Databricks
Prerequisites
-
An existing SQL Warehouse in your Databricks workspace that you want to connect to Prequel. You'll need to access its Connection details to get the Server hostname, Port, and HTTP Path. (Databricks Documentation, Microsoft Learn)
-
Permissions to create a Personal Access Token (PAT) in your Databricks workspace. You can use a user PAT or a service-principal PAT. Step #2 below describes how to generate a user PAT. For a service-principal PAT, see our guide on Creating a service principal PAT (Azure Databricks)
-
For Hive Metastore users: An S3 staging bucket with proper IAM credentials that your SQL warehouse can write to and that Prequel can access for temporary data staging during transfer. See Step #3B below for detailed setup instructions.
-
Optional networking: If your organization restricts inbound traffic, ensure HTTPS 443 access to your workspace hostname is allowed for Prequel's connector. (Databricks Documentation)
Step 1: Identify your SQL Warehouse connection details
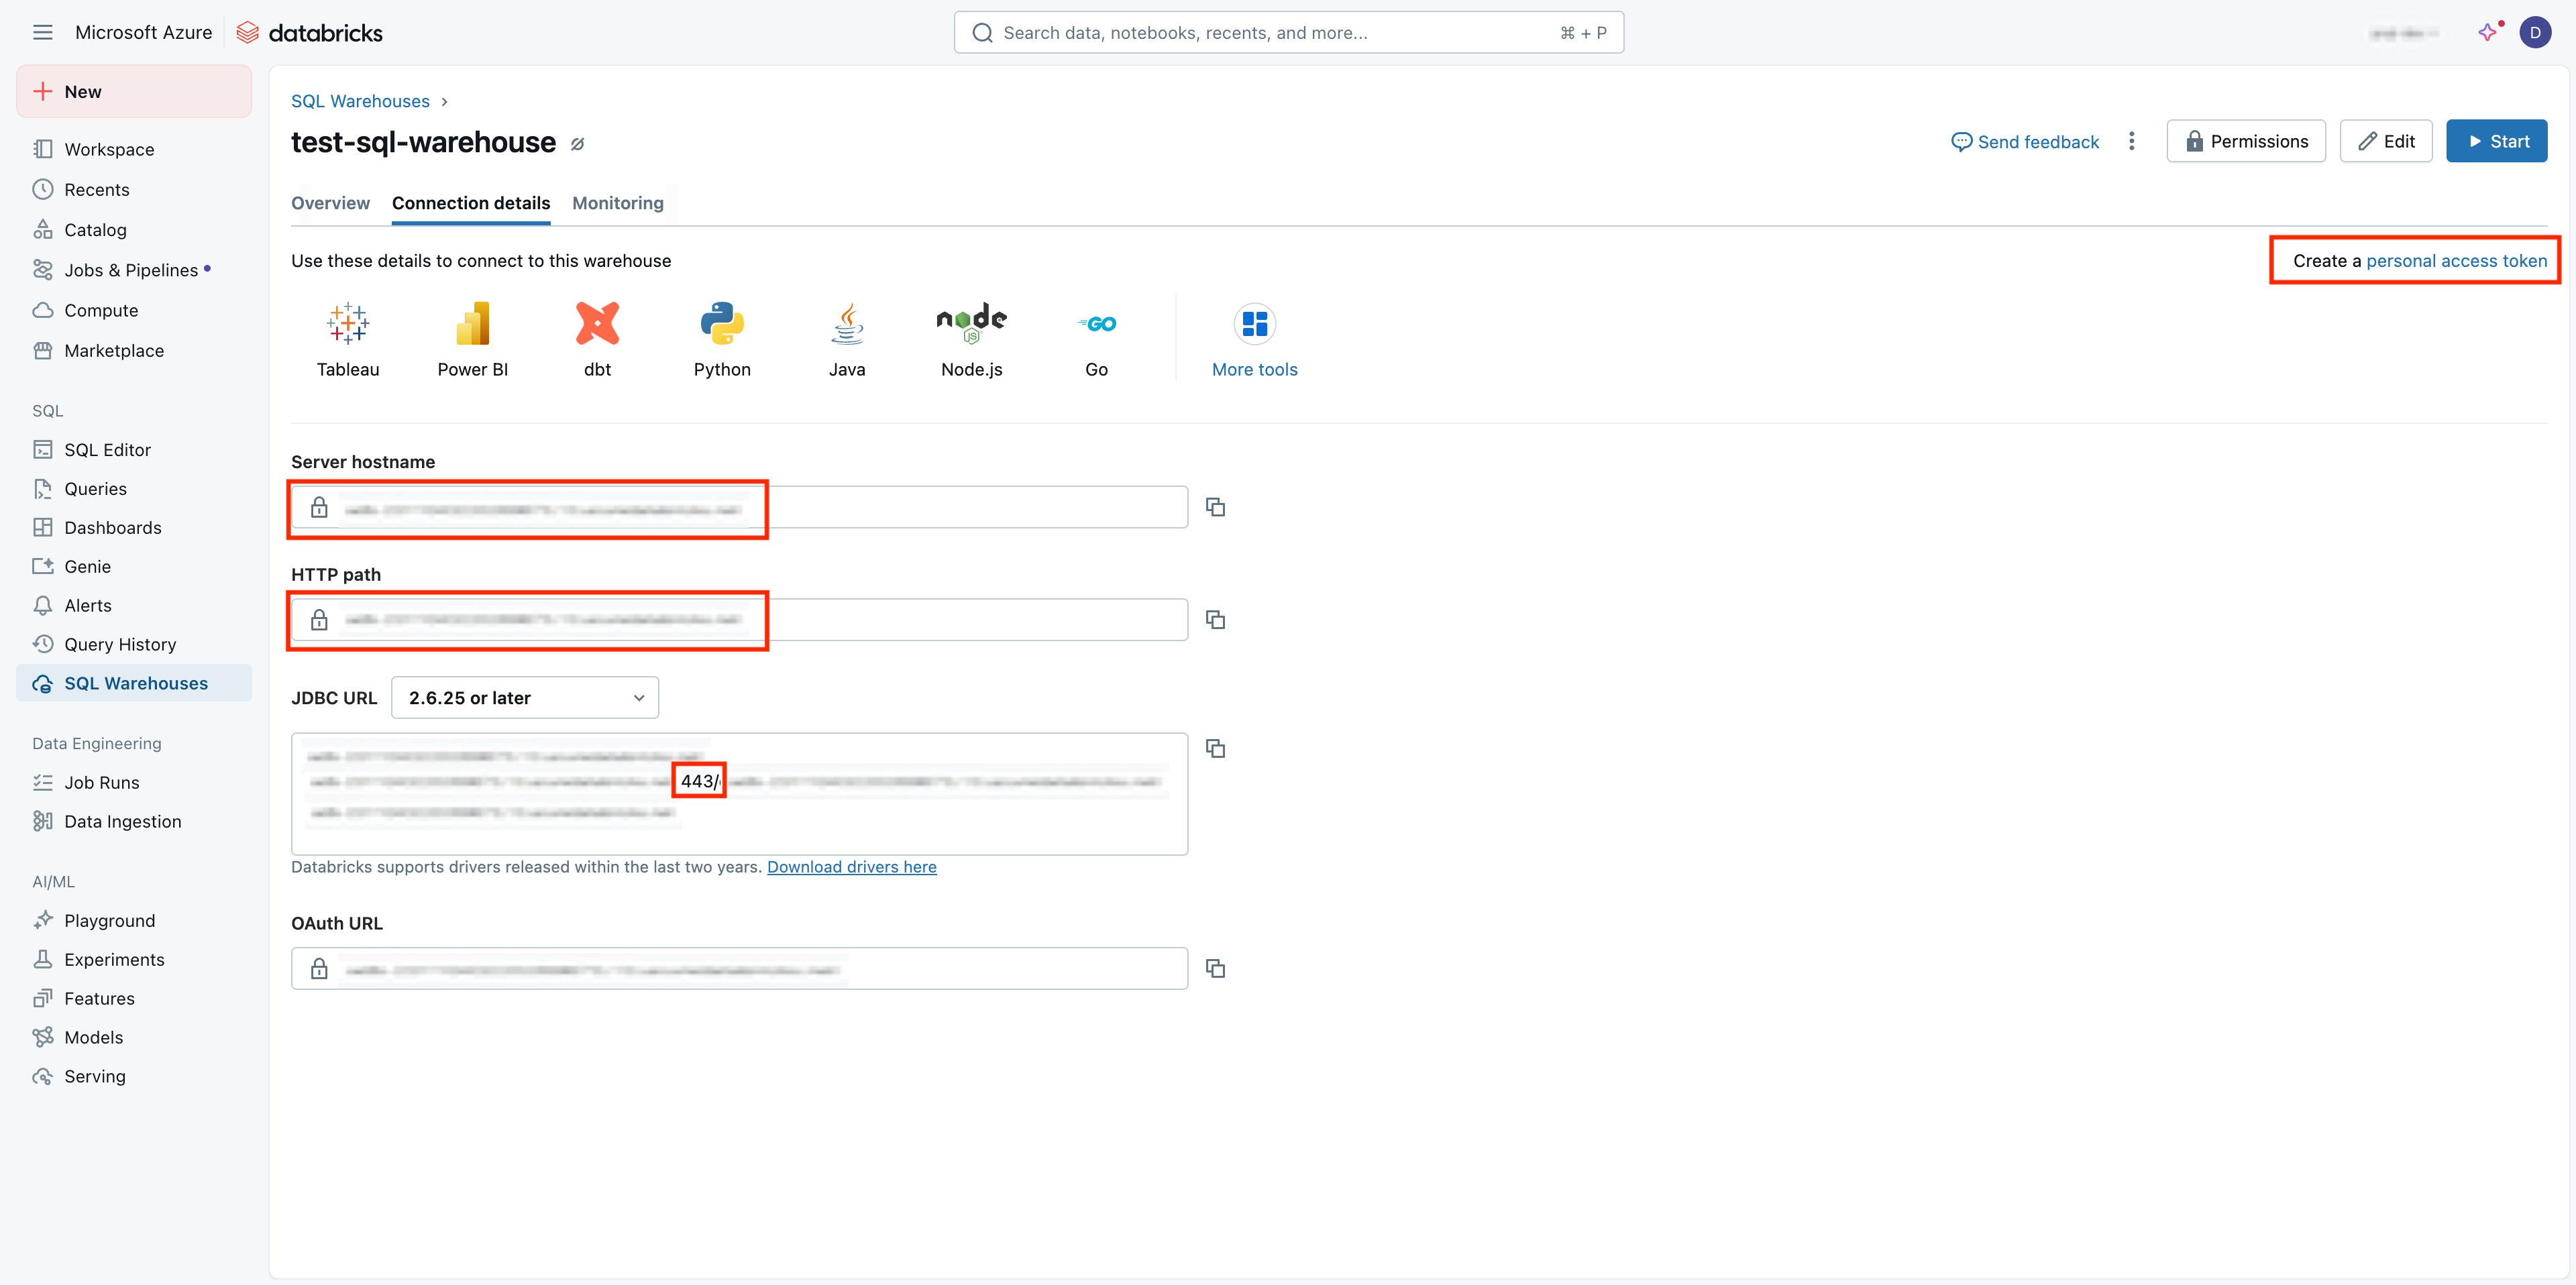
- In your Databricks workspace, go to SQL → SQL Warehouses and select the warehouse you want to connect to Prequel.
- Click Connection details and copy the Server hostname, Port (typically 443), and HTTP Path. (Databricks Documentation, Microsoft Learn). Note that the port is contained within the JDBC url populated.

Step 2: Create a Personal Access Token
Option A — User PAT
- In your Databricks workspace, go to Settings → Developer → Access tokens and create a new PAT. (Databricks Documentation)

Option B — Service-principal PAT (recommended)
- Use an existing Databricks service principal in your workspace and generate a PAT for the service principal. See Create and rotate a service principal PAT guide. (Microsoft Learn)
Step 3: Identify your metastore configuration
Your Databricks workspace uses one of two metastore types. Follow the corresponding steps based on your metastore:
A. Unity Catalog (recommended)
If your data is in Unity Catalog:
- No external staging bucket required. Prequel will create temporary Unity Catalog volumes for data staging and clean them up automatically. (Databricks Documentation, Microsoft Learn)
- You'll need to specify which catalog and optionally which schema contains your data.
B. Hive Metastore
If your data is in the Hive Metastore:
- You'll need to provide an S3 staging bucket that your SQL warehouse can write to and that Prequel can access for temporary data staging during transfer.
- You'll also need AWS access credentials (Access Key ID and Secret Access Key) that have permissions to read/write to this staging bucket.
Setup S3 staging bucket for Hive Metastore
Follow these steps to create and configure the required S3 staging bucket:
-
Create the staging bucket:
- Navigate to the S3 service page in AWS console
- Click Create bucket
- Enter a Bucket name and select an AWS Region (select the same region as your Databricks workspace)
- Set Object Ownership to "ACLs disabled" and Block Public Access settings to "Block all public access" as recommended by AWS. Leave the default encryption method of SSE-S3 selected.
- Click Create bucket
-
Create IAM policy for bucket access:
- Navigate to the IAM service page, click Policies, and click Create policy
- Click the JSON tab and paste the following policy, replacing
BUCKET_NAMEwith your staging bucket name:
{
    "Version": "2012-10-17",
    "Statement": [
        {
            "Effect": "Allow",
            "Action": "s3:ListBucket",
            "Resource": "arn:aws:s3:::BUCKET_NAME"
        },
        {
            "Effect": "Allow",
            "Action": [
                "s3:PutObject",
                "s3:GetObject",
                "s3:DeleteObject"
            ],
            "Resource": "arn:aws:s3:::BUCKET_NAME/*"
        }
    ]
}- Create IAM user and access keys:
- Navigate to IAM → Users and click Create user
- Enter a User name (e.g.,
databricks-prequel-staging) - Click Next, select Attach policies directly, select the policy created above, and click Create user
- Click on the created user, go to Security credentials tab
- Click Create access key, choose Application running outside AWS, and create the key
- Important: Save the Access Key ID and Secret Access Key - you'll need these for Prequel configuration
Step 4: Configure the source in Prequel
In Prequel, create a new Databricks source with the following configuration:
- Name: Descriptive name for your Databricks source
- Vendor:
databricks - Server hostname: From Step 1
- Port:
443(from Step 1) - HTTP Path: From Step 1
- Authentication: Personal Access Token (from Step 2)
- Metastore: Select
unity_catalogorhivebased on your setup
For Unity Catalog workspaces
- Catalog: Name of the catalog containing your data
- Schema (optional): Default schema to use
For Hive Metastore workspaces
- Database: Name of the database containing your data
- S3 staging bucket:
- Bucket name: Name of the S3 staging bucket created above
- Bucket region: AWS region of the staging bucket
- Access Key ID: AWS access key ID with permissions to the staging bucket
- Secret Access Key: AWS secret access key corresponding to the access key ID
Step 5: Test the connection
- In Prequel, click Test connection to verify the setup.
- If your SQL warehouse is currently stopped, it will restart automatically when Prequel runs a test query. Ensure your PAT has permission to use the specified warehouse. (Databricks Documentation, Microsoft Learn)
Notes and known behaviors
- If your tables are in the Hive Metastore, make sure to select "hive" as the metastore type, as
information_schemadoes not listhive_metastoreobjects. (Databricks Documentation) - Unity Catalog volumes used for staging are temporary and automatically cleaned up after each transfer. (Databricks Documentation)
Related guides
Updated 5 months ago