
AWS to GCP Role Assumption
Prerequisites
- You will need the name of the GCP service account that you previously created as part of your destination configuration. The name should look like
[email protected]. - You will need the provided AWS ARN and AWS Account ID of the role that will impersonate your GCP service account.
- The ARN value should look like:
arn:aws:iam::123456789012:role/SomeRoleName. - The AWS Account ID is the 12 digit number from the ARN value, e.g.,
123456789012.
- The ARN value should look like:
Step 1: Confirm the permissions of your GCP service account
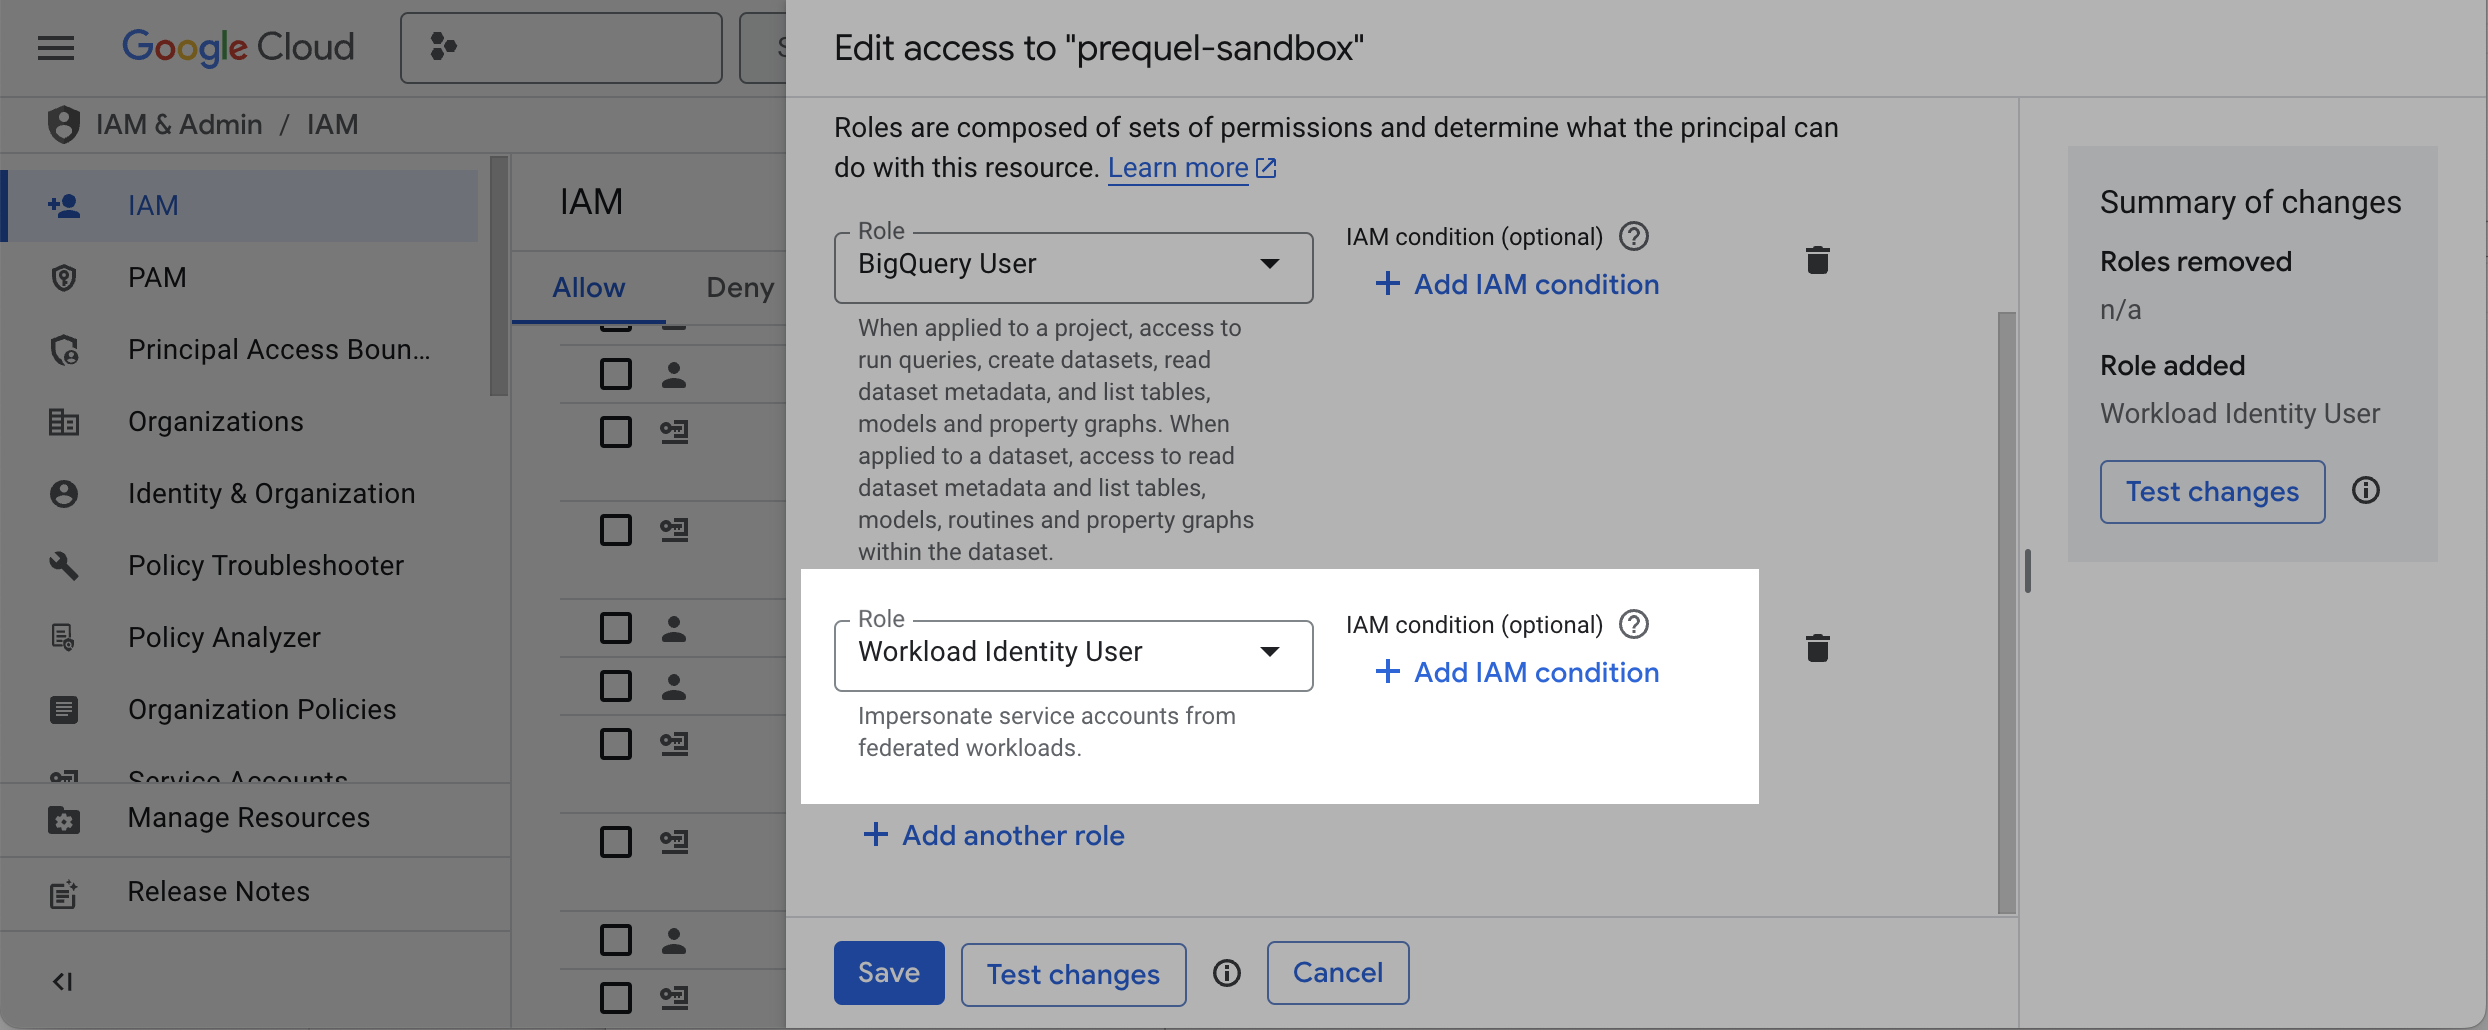
- In the GCP console, navigate to the IAM & Admin menu, click into the IAM tab, and find the GCP service account that you previously created as part of the Prerequisites. Click Edit principal.
- In the menu that appears, click + Add Another Role. Search for and add the "Workload Identity User" role to the service account.
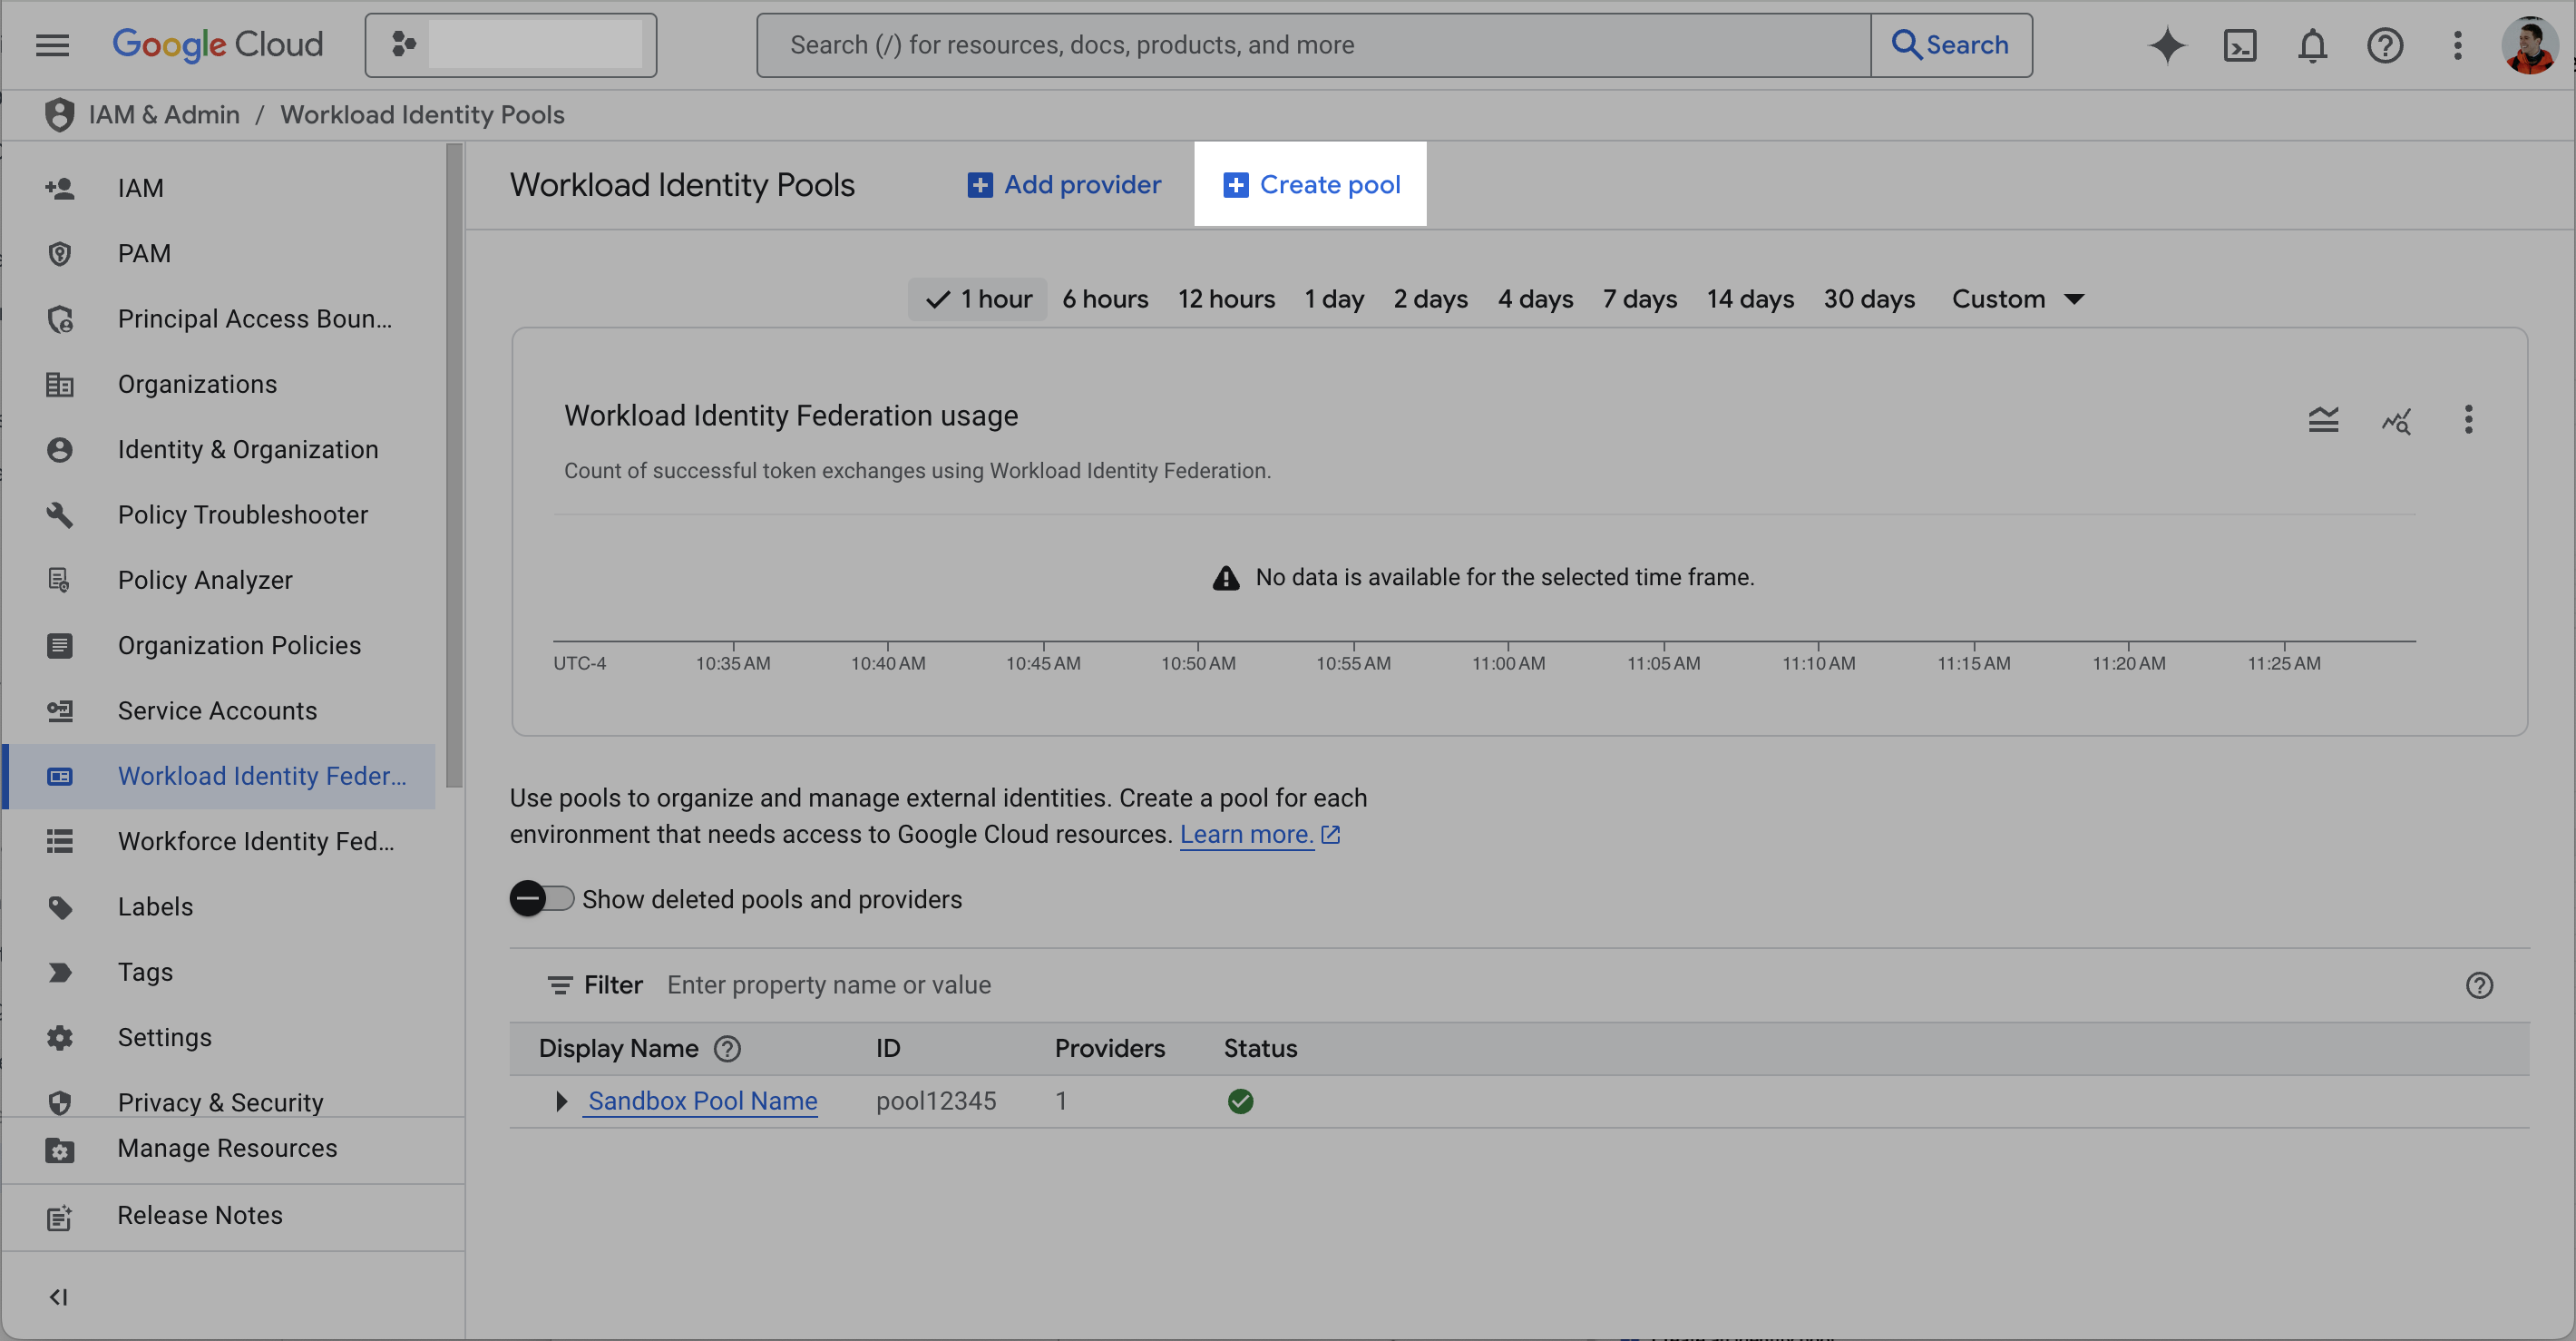
Step 2: Create a Workload Identity Pool
-
In the GCP console, navigate to IAM & Admin menu, click into the Workload Identity Federation tab, and click Create Pool.

-
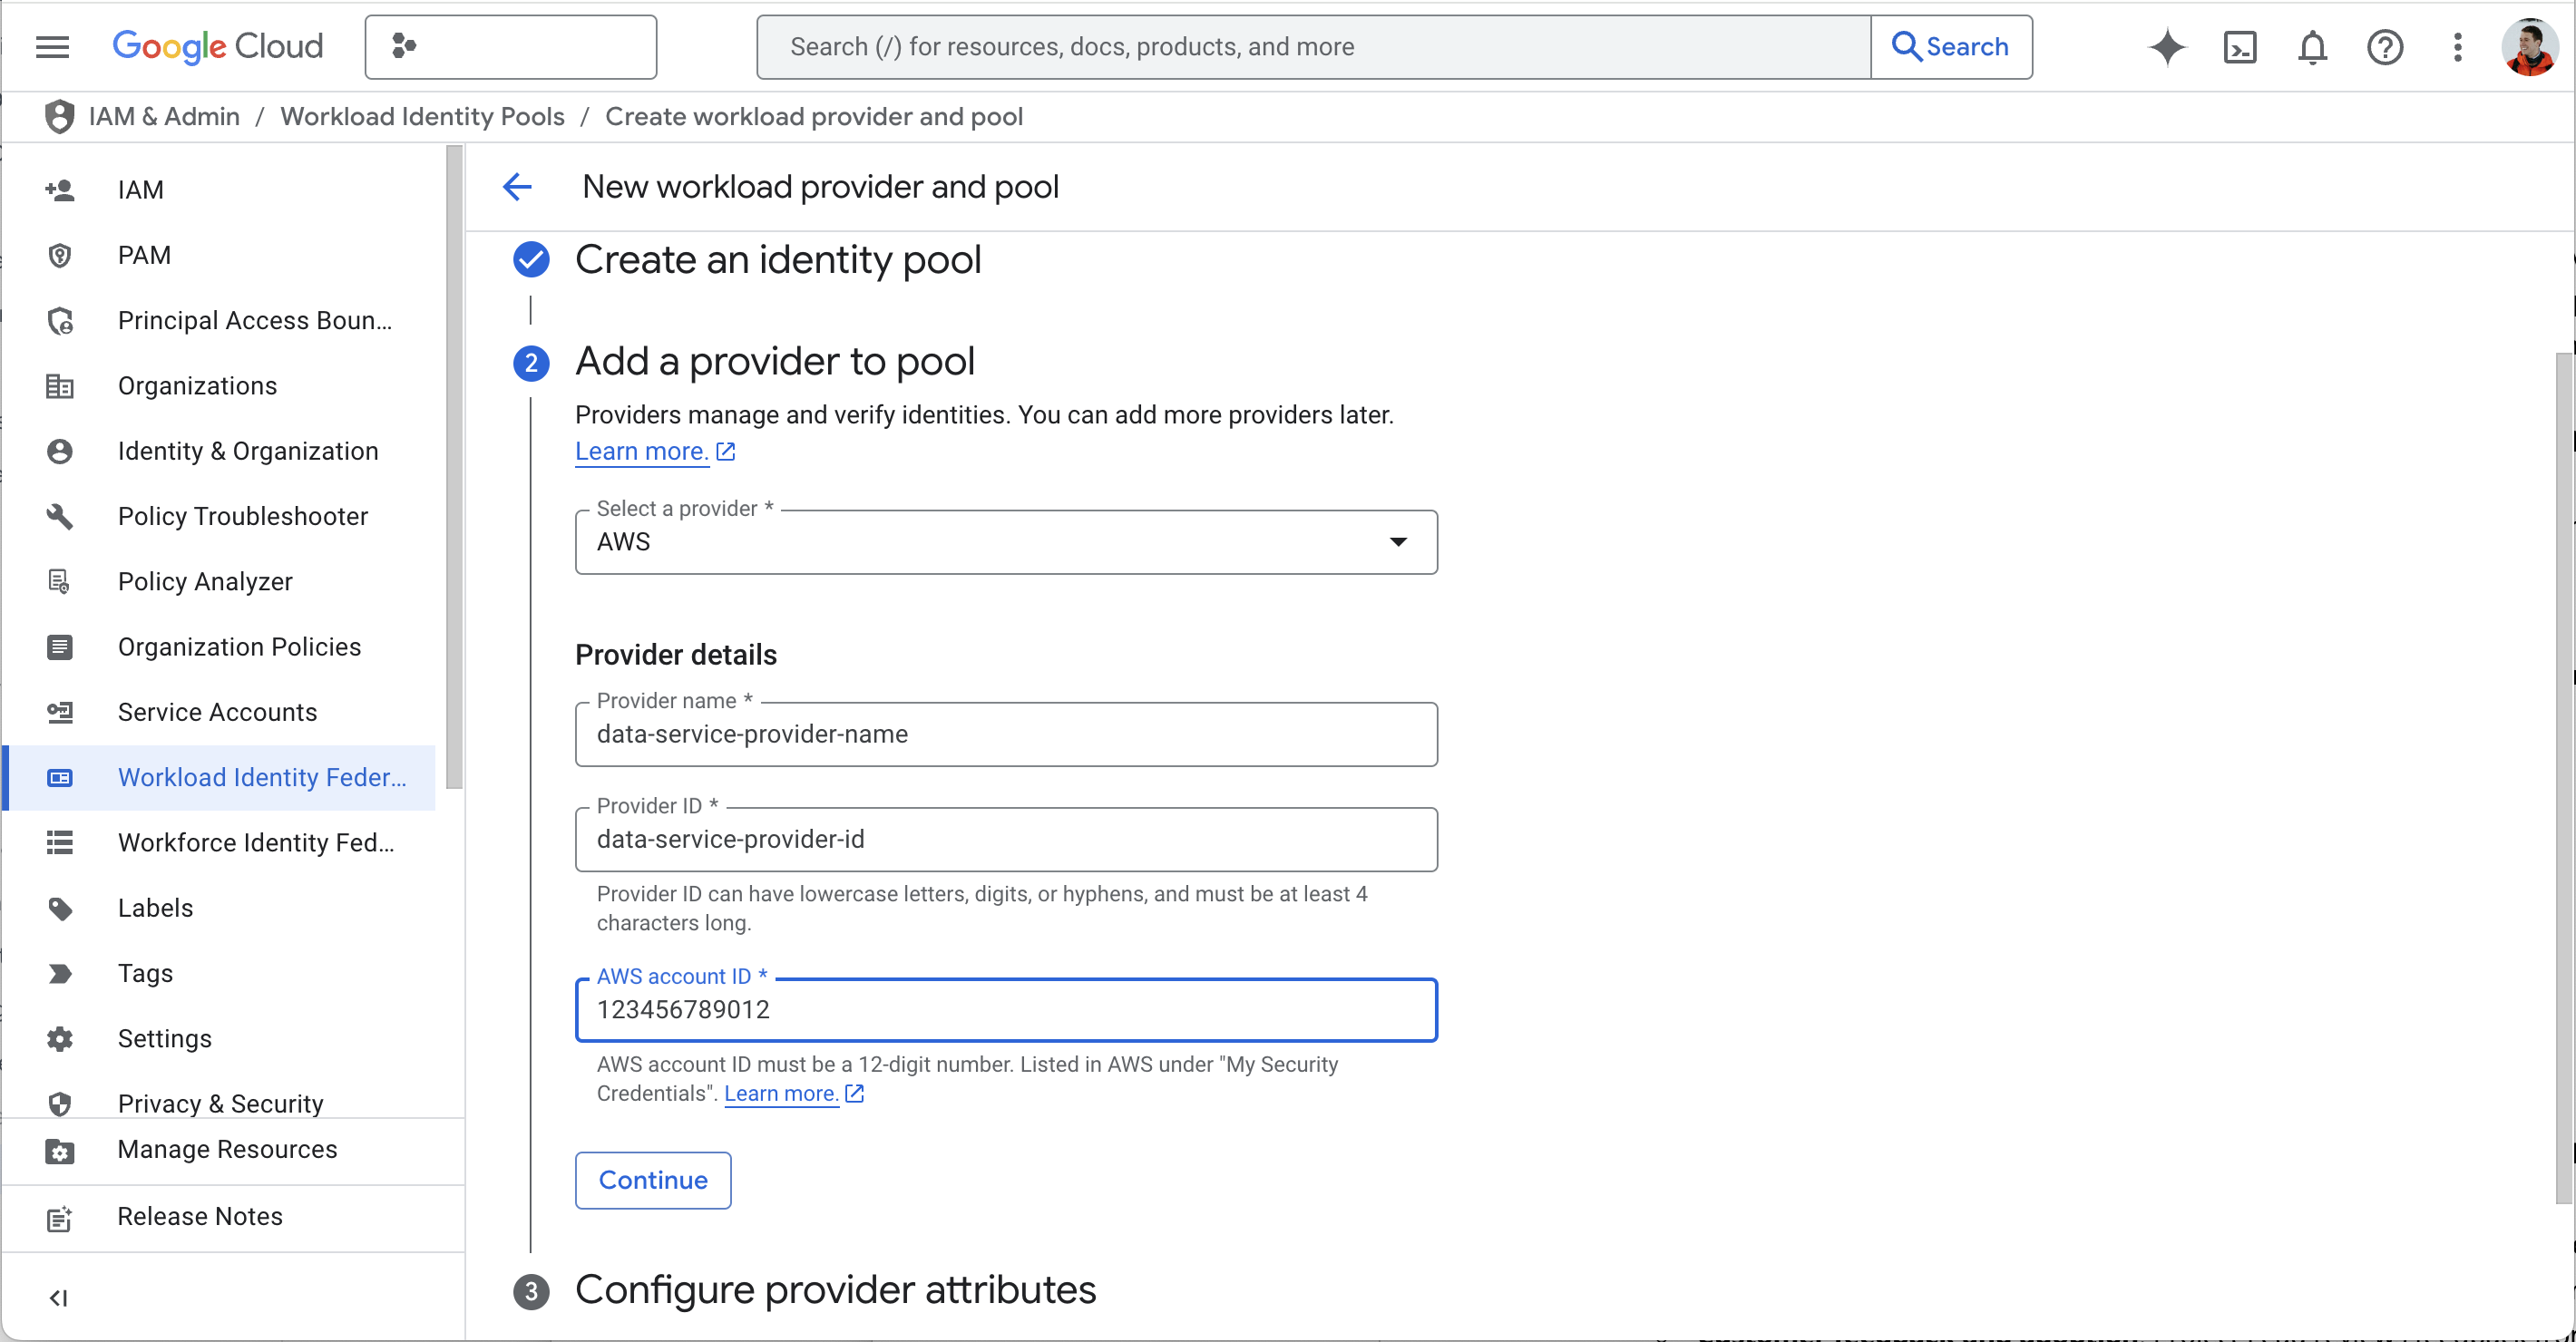
Complete the details in the first step. For example, you may want to use a name like "transfer-service-pool" and a pool ID called "transfer-pool". Click Continue.
-
Complete the details in the second step.
-
For Select Provider, select AWS in the dropdown.
-
For Provider Name, enter a descriptive name of your data source.
-
For AWS Account ID, enter the Account ID (from the Prerequisite).
-
-
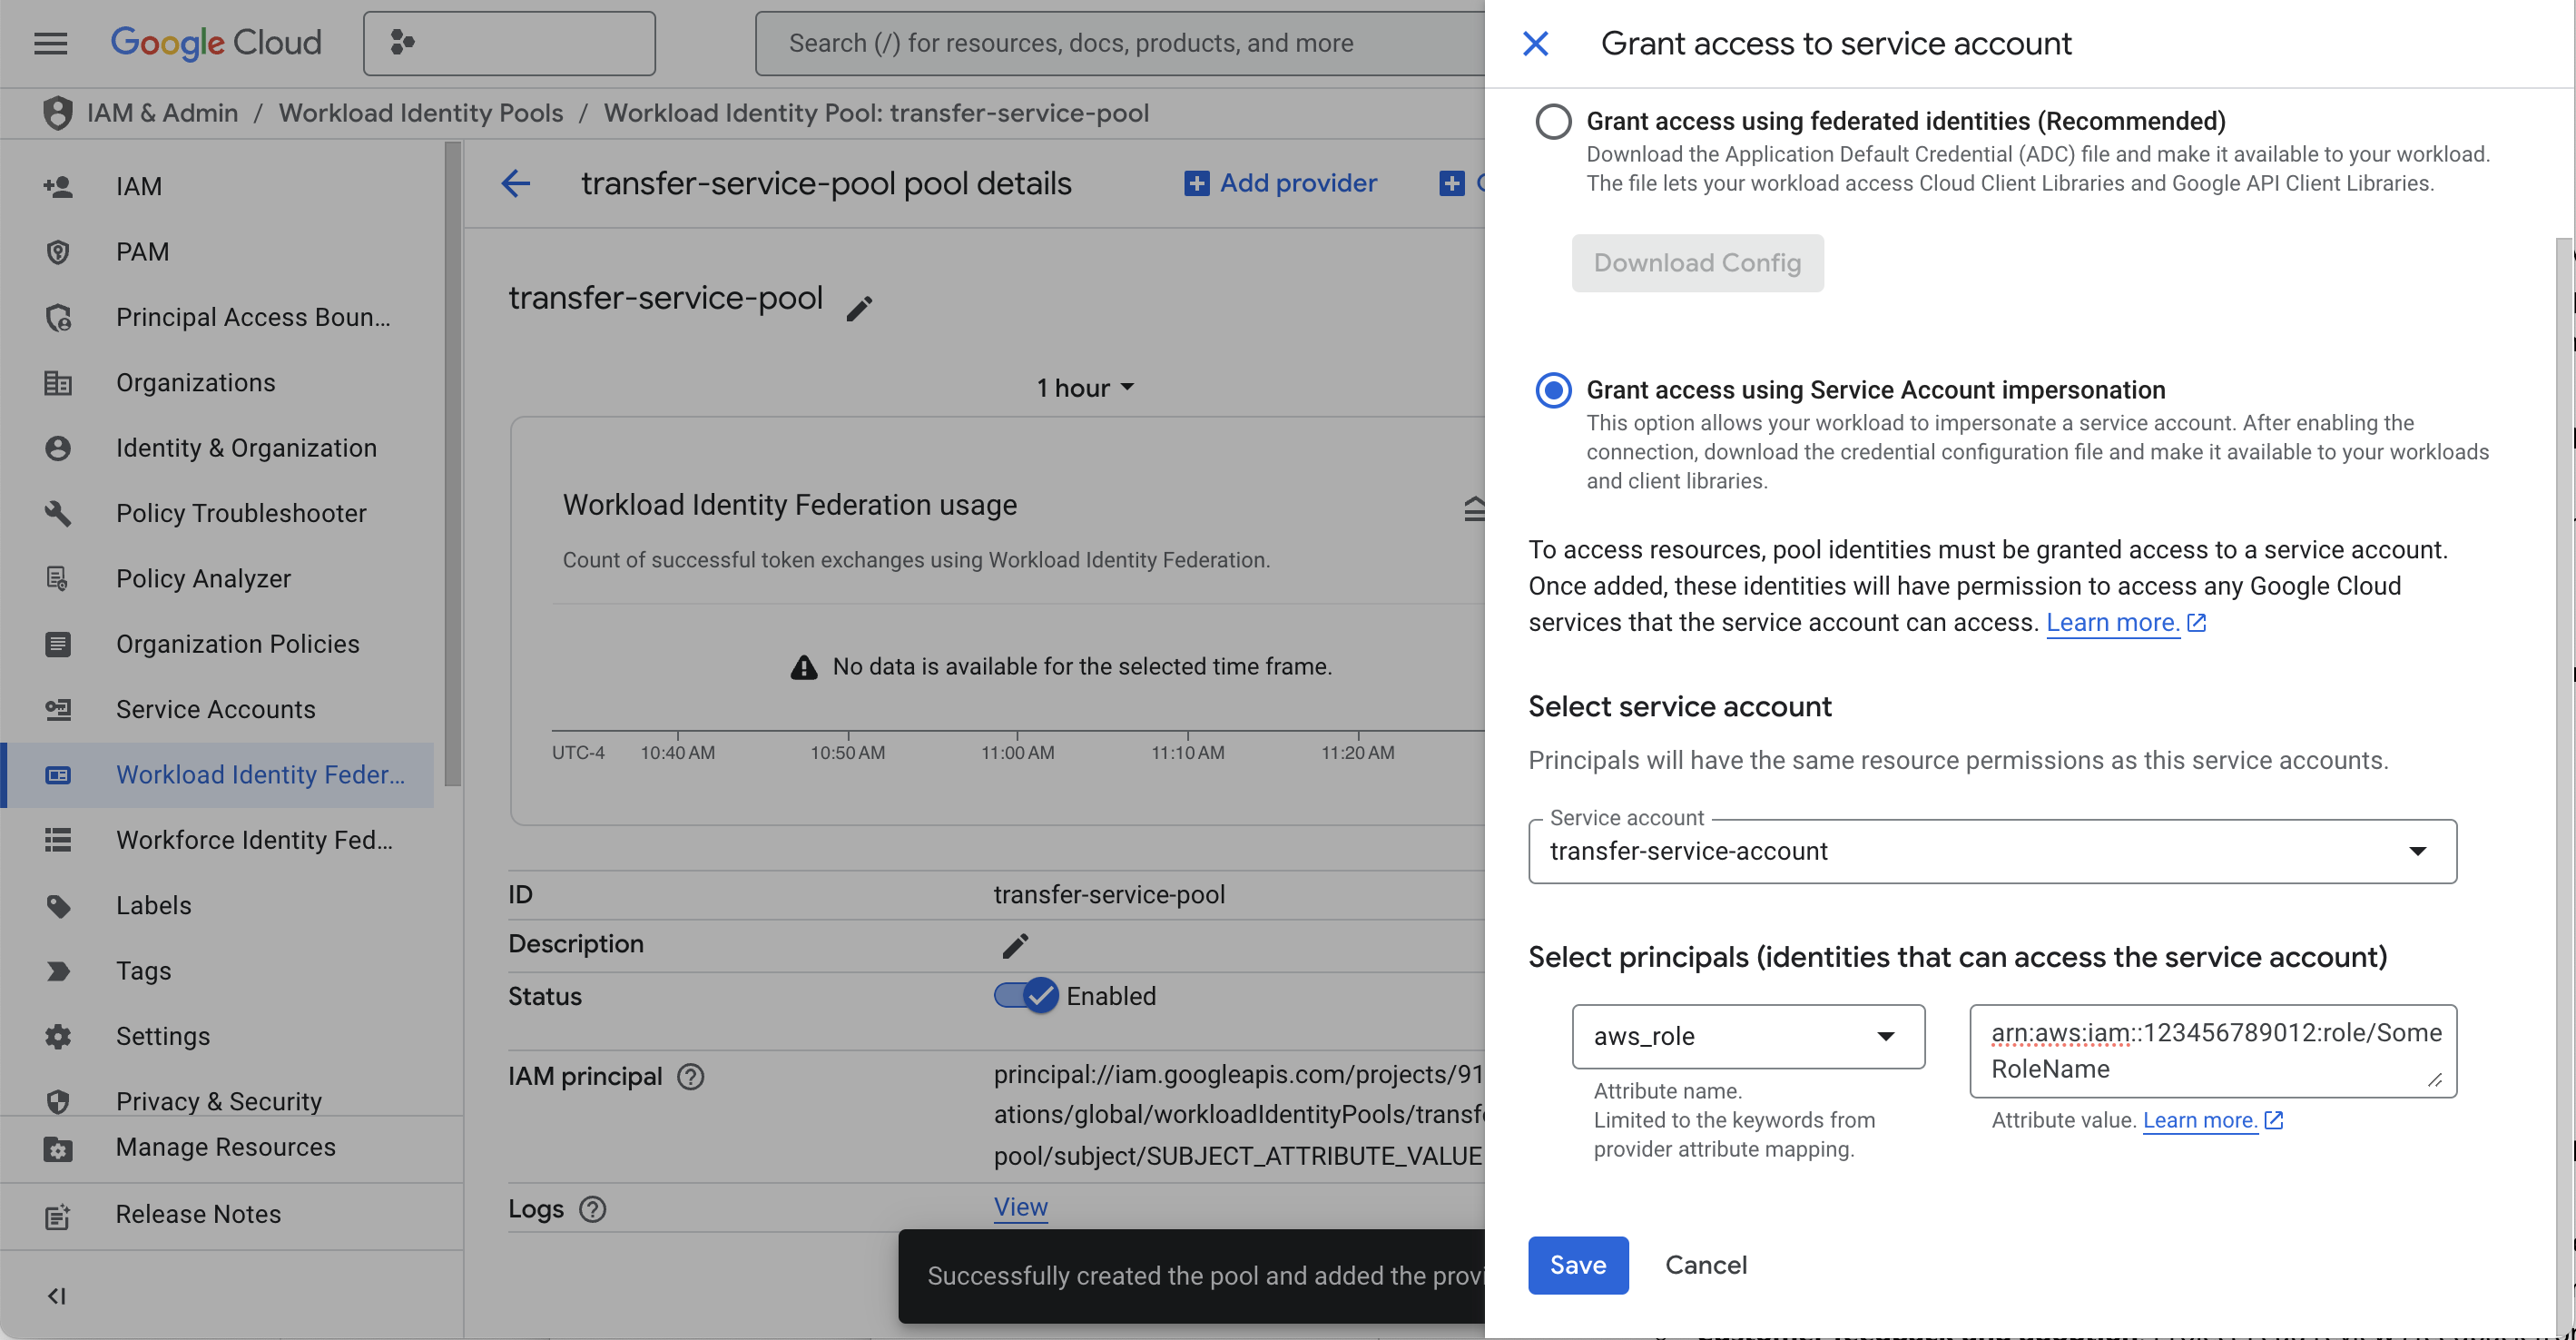
Complete the third step, leave the provider attributes mapping as is by default. Finish creating the pool.
-
In the overview of the created Workload Identity Pool, click Grant Access.

-
In the menu that appears, complete the setup flow:
-
Select Grant access using Service Account impersonation.
-
In the dropdown, select the Service Account you created (from the Prerequisite).
-
Enter the Service principals (identities that can access the Service Account):
- For the attribute name, select
aws_role. - For the attribute value, enter the AWS ARN (from the Prerequisite).
- For the attribute name, select
-
Click Save.
-
-
After saving, you will be able to download a JSON file of metadata. This is the metadata you will need to complete your connection.

Updated 8 months ago