

Unity Catalog requiredUnity Catalog is required for this integration. Tables in the legacy Hive metastore are not supported, including tables in the
hive_metastore catalog of a Unity Catalog workspace.Step 1: Identify or create your SQL warehouse
Queries run on a SQL warehouse in your workspace. You can create a dedicated warehouse or use an existing one for the connection.1
Open the SQL warehouse
In your Databricks workspace, click SQL Warehouses in the navigation pane. To create a dedicated warehouse, click Create SQL Warehouse, enter a Name, choose a Cluster size, and click Create. Otherwise, select the existing warehouse you want to use.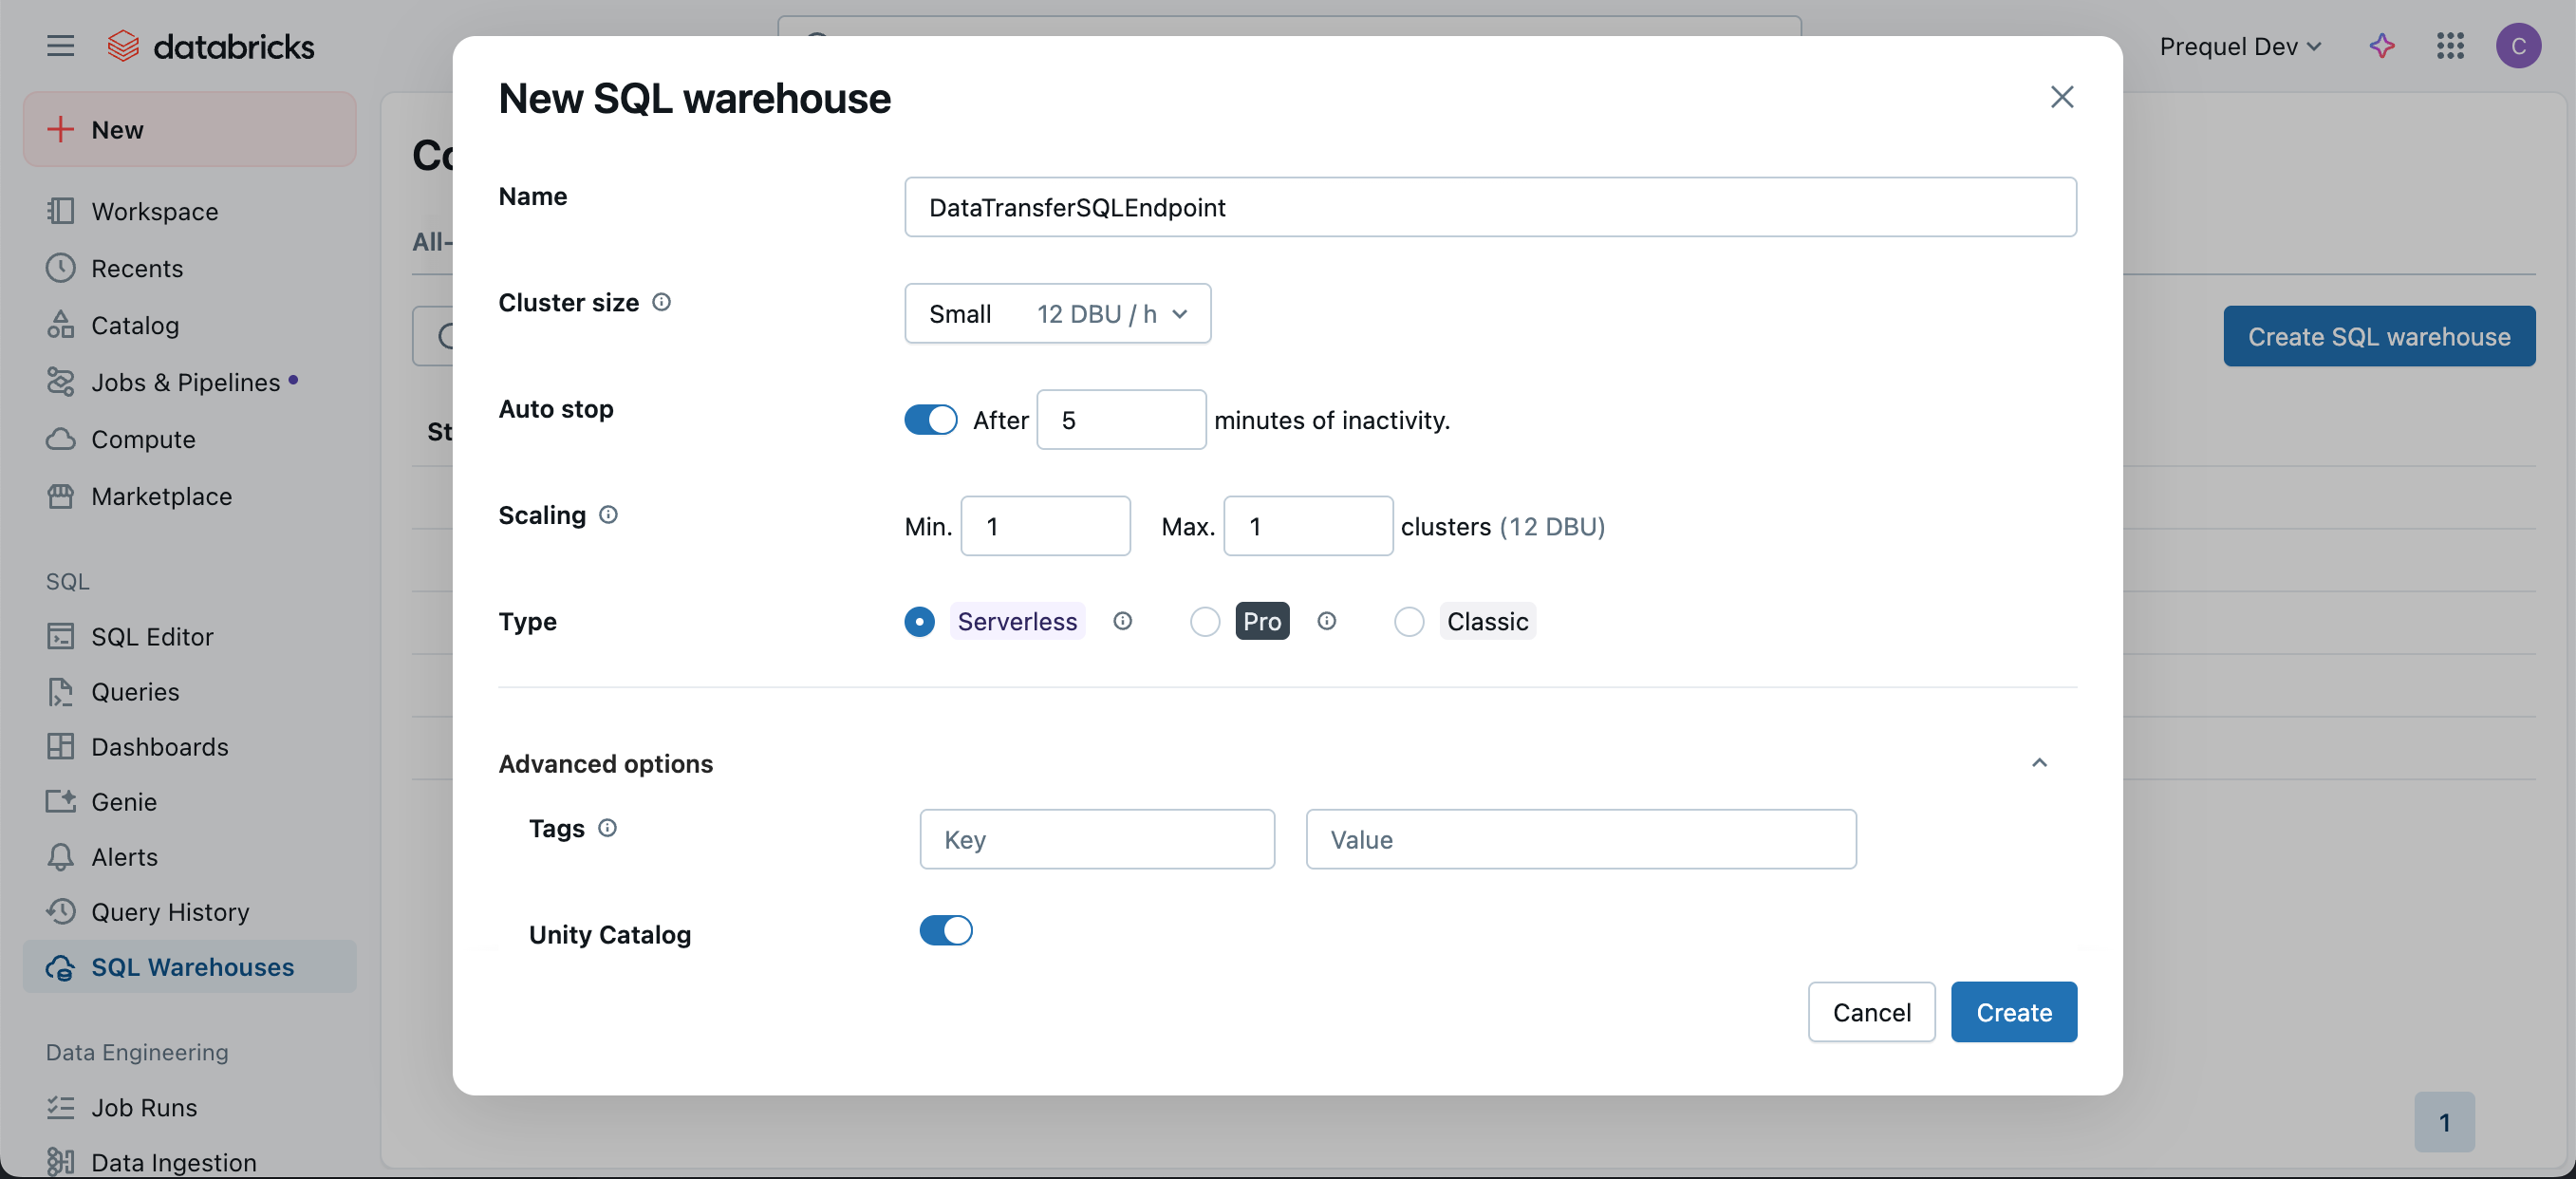
2
Note the connection details
Click the Connection details tab and make a note of the Server hostname, Port, and HTTP path. You will provide these in Step 5.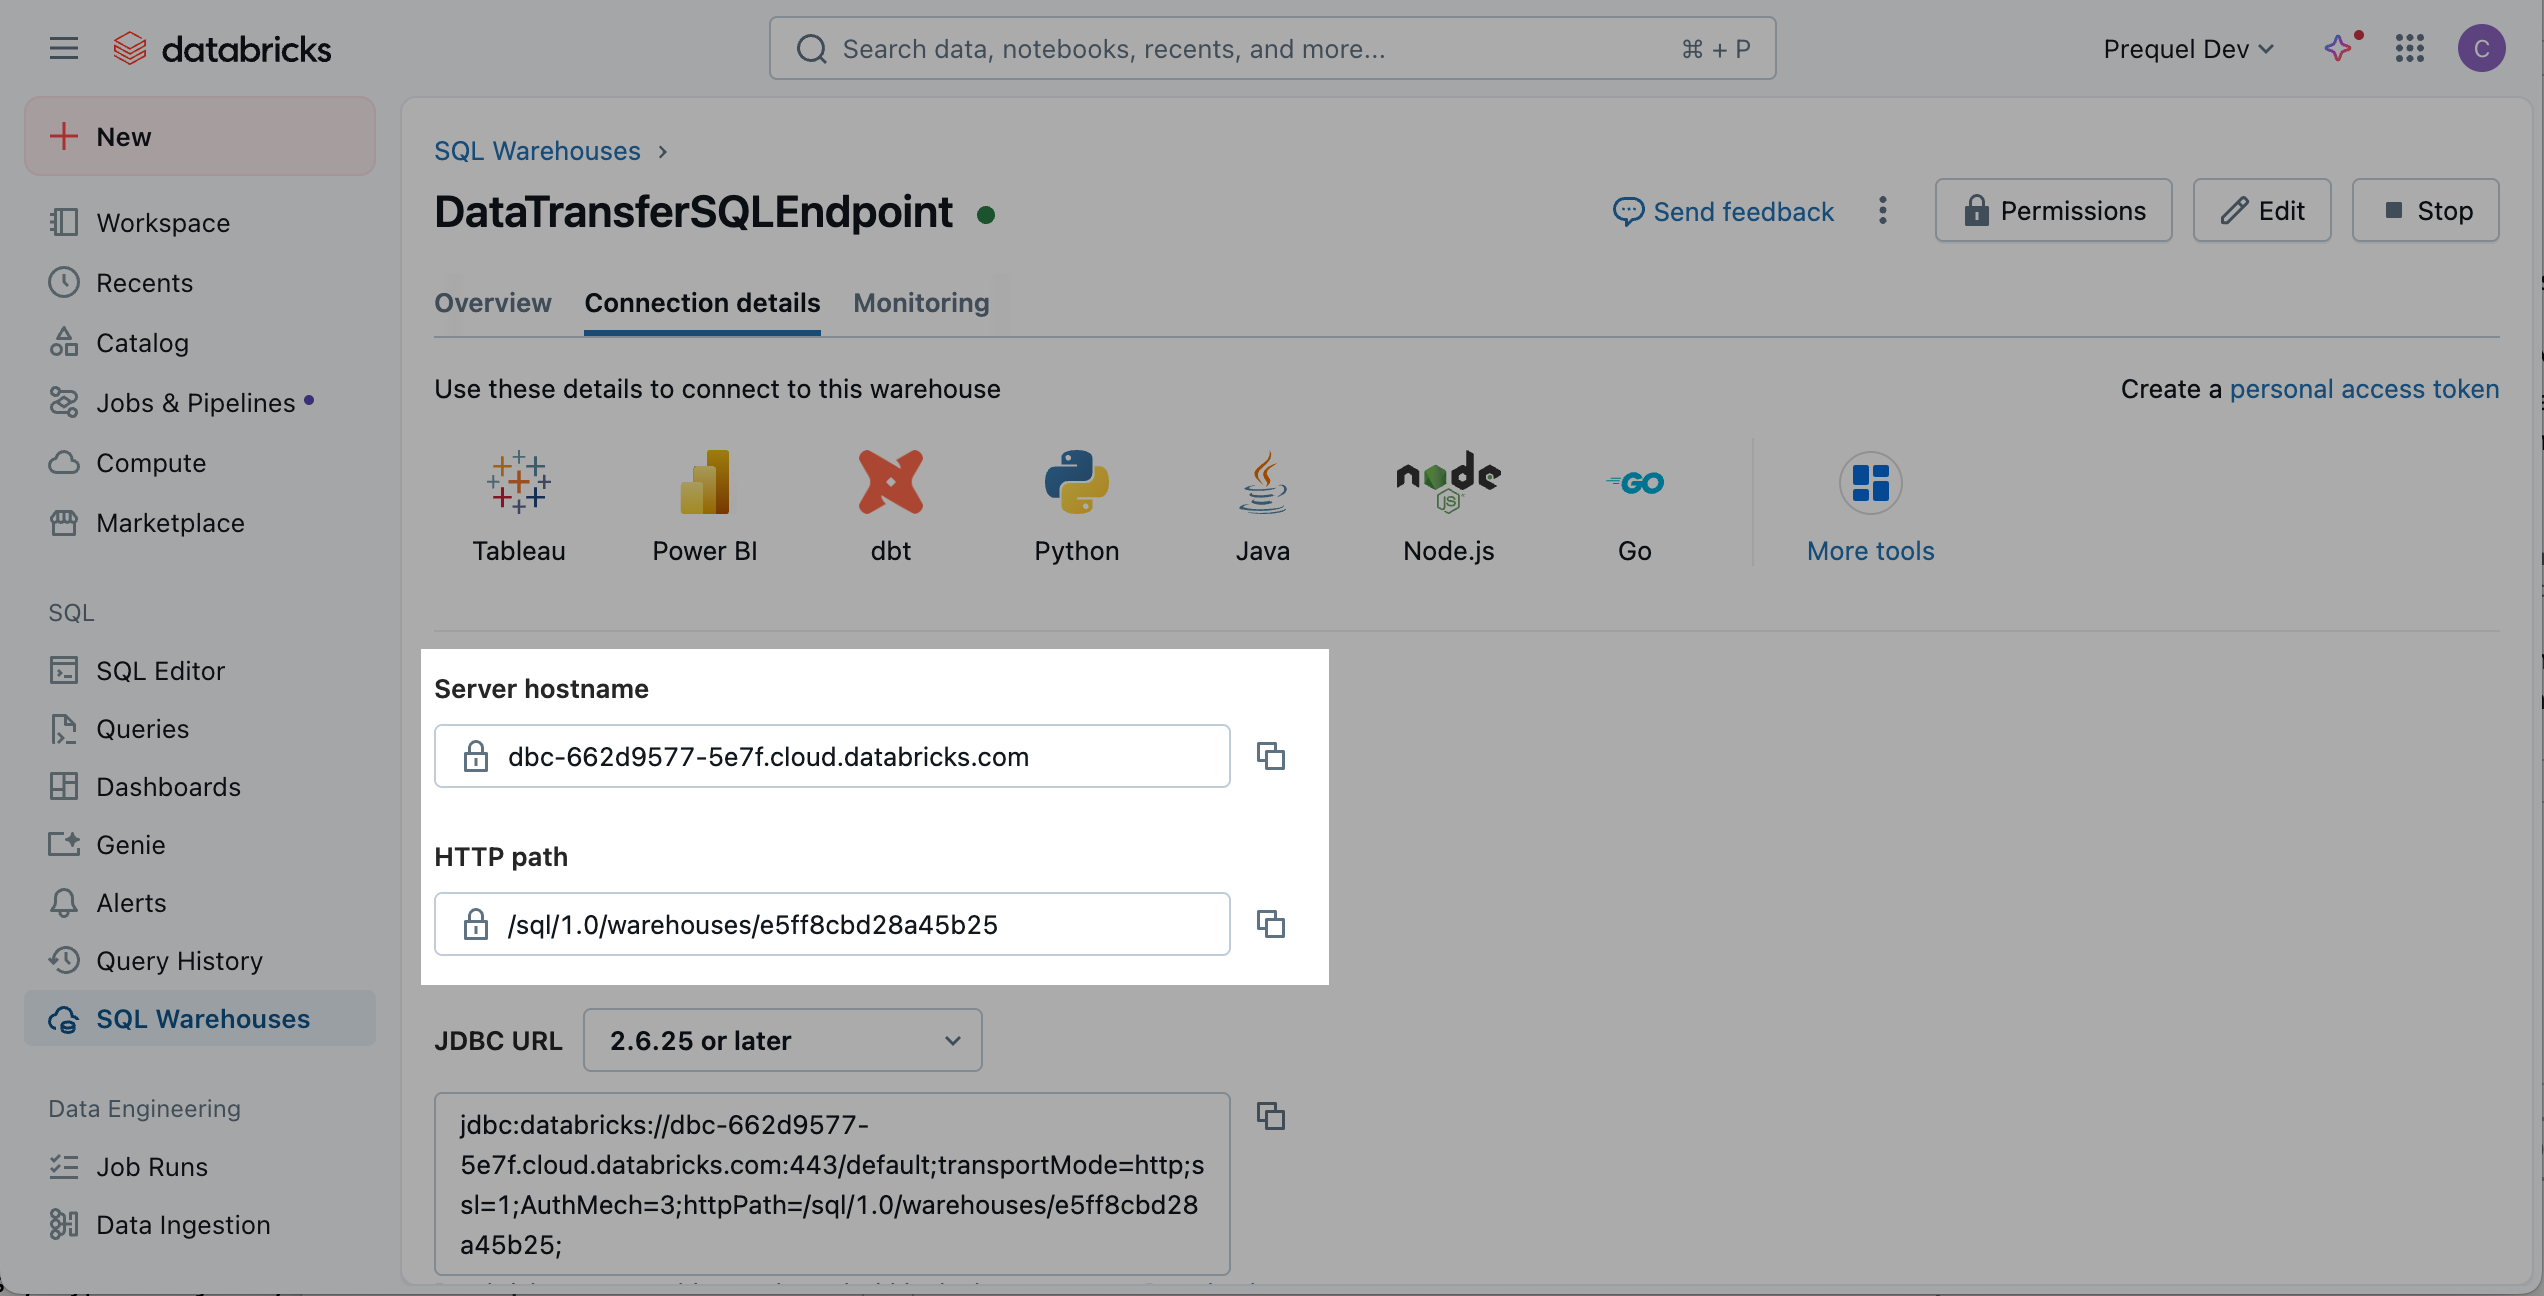
Step 2: Create a service principal
Workspace admin requiredTo complete the following steps, you or a Databricks admin on your team must be a workspace admin.
1
Add the service principal
Click your username in the top right, click Settings, then Identity and access. Next to Service principals, click Manage. Click Add service principal, click Add new, enter a display name, and click Add.
2
Grant the SQL access entitlement
Open the new service principal. Under Entitlements, select Databricks SQL access and click Update. Make a note of the Application ID, which you will use in the following steps.
3
Grant access to the SQL warehouse
Return to SQL Warehouses and select the warehouse from Step 1. Click Permissions, search for and select the service principal, choose Can use, and click Add.
Step 3: Grant read access to your data
Run the following statements in the SQL editor, replacing the catalog, schema, and table names with your own and<application_id> with the Application ID from Step 2. To run them, you must own the objects or have the MANAGE privilege on them. Only the tables and views you grant access to appear when you choose what to import.
Grant read access
Granting access to the whole schemaTo grant read access to every table and view in the schema instead of listing them individually, replace the per-table grants with a single grant on the schema. A schema-level grant also applies to tables and views created later.
Grant all tables
Step 4: Authorize authentication
Choose the authentication method that fits your security policy. An OAuth secret is recommended because it issues short-lived tokens and can be rotated or revoked centrally.- OAuth secret (recommended)
- Personal access token
1
Generate a secret
In Settings, open Identity and access, click Manage next to Service principals, and open the service principal from Step 2. On the Secrets tab, click Generate secret.
2
Note the client ID and secret
Enter a lifetime for the secret, select the all APIs scope if prompted, click Generate, and make a note of the Secret and Client ID. The Client ID is the Application ID of the service principal, not the ID of the secret.
Select the
all APIs scope when generating the secretThe OAuth connection method requires the all-apis scope. If Databricks prompts you to choose scoped OAuth secrets, select all APIs. Secrets limited to narrower scopes such as sql will fail to connect.This scope only controls which Databricks APIs the secret can call. What the service principal can read is still governed by the warehouse permission and Unity Catalog grants from the previous steps.IP access lists (optional)If your workspace enforces IP access lists, add our static IP address to your allow list. Reach out to your account representative for the static IP address to use.
SSH tunnel (optional)If your workspace is not reachable over the public internet, you can connect through an SSH tunnel instead. Provide the bastion host details in Step 5, and add the public key from your account representative to the bastion’s
authorized_keys file.Only SQL queries run through the tunnel. With an OAuth secret, token requests go directly to your workspace hostname, which must remain reachable from our static IP. If your workspace is only reachable through the tunnel, use a personal access token.If your workspace also enforces IP access lists, allow the bastion’s egress IP for SQL queries and our static IP for OAuth token requests.Step 5: Submit your connection details
Provide the following details to complete the source setup:- The name is a descriptive name of the source.
- The server hostname from Step 1 (e.g.,
dbc-a1b2c3d4-e5f6.cloud.databricks.com). - The port from Step 1 (e.g.,
443). - The HTTP path from Step 1 (e.g.,
/sql/1.0/warehouses/a1b2c3d4e5f6a7b8). - The catalog from Step 3.
- The authentication credentials from Step 4:
- If using an OAuth secret: the client ID and secret.
- If using a personal access token: the token.
Terraform
If your organization manages infrastructure with Terraform, you can use the configuration below instead of the steps above. It sets up the same resources and permissions, using OAuth secret authentication.- Use the official
databricks/databricksprovider. Run it as a workspace admin who can grant privileges oncatalogandschema_name. - In
terraform.tfvars, setcatalog,schema_name(an existing schema), andwarehouse_size. The optional inputs and their defaults aretable_names(empty, which grantsSELECTon the whole schema),warehouse_name(transfer-warehouse),serverless(true), andservice_principal_name(transfer-service-principal). - After
terraform apply, use theserver_hostname,port,http_path,catalog,client_id, andclient_secretoutputs to complete the connection setup. Print each withterraform output -raw <name>. - The client secret expires after 730 days. The next
terraform applyafter that creates a new secret, which you then update in the connection.