

Step 1: find cluster connection details
1
Select the cluster
- In the Redshift console, click Clusters.
- Select the cluster you would like to connect.

2
Make note of cluster details
In the General information pane, make note of the Endpoint details, the Cluster identifier, and the AWS region that the cluster is hosted in. You may need to use the copy icon to copy the full details to discover the full endpoint and port number.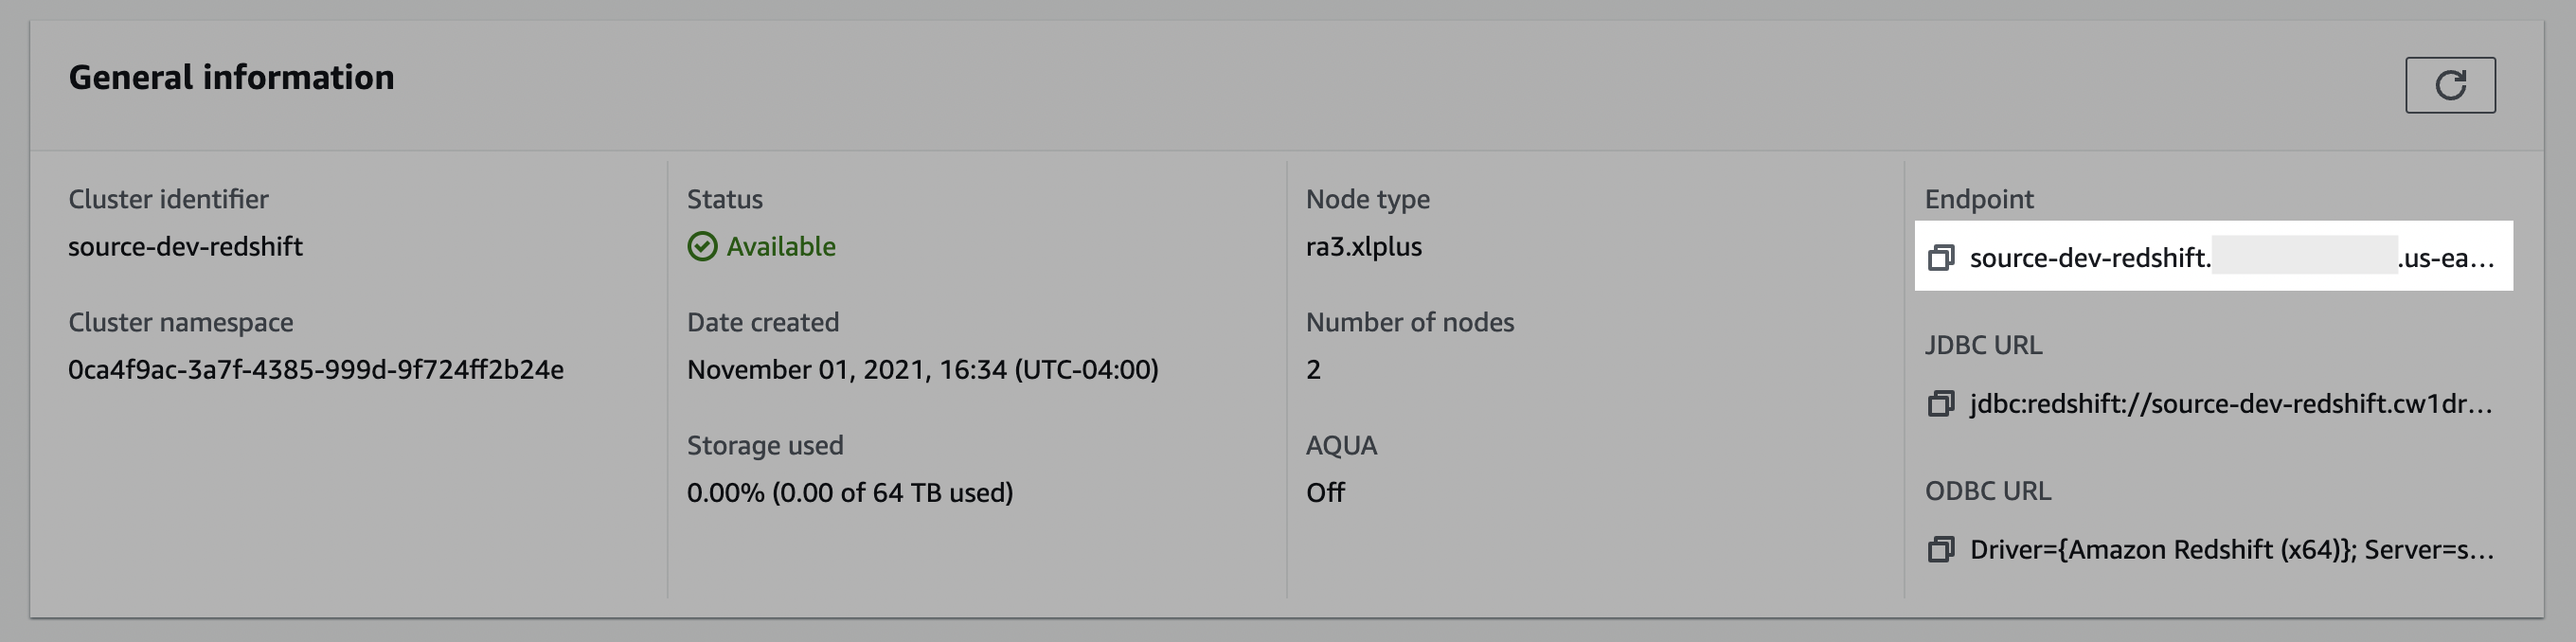
Step 2: whitelist connection
1
Open the VPC security group
- In the Redshift console, click Clusters.
- Select the cluster you would like to connect.
- Click the Properties tab.
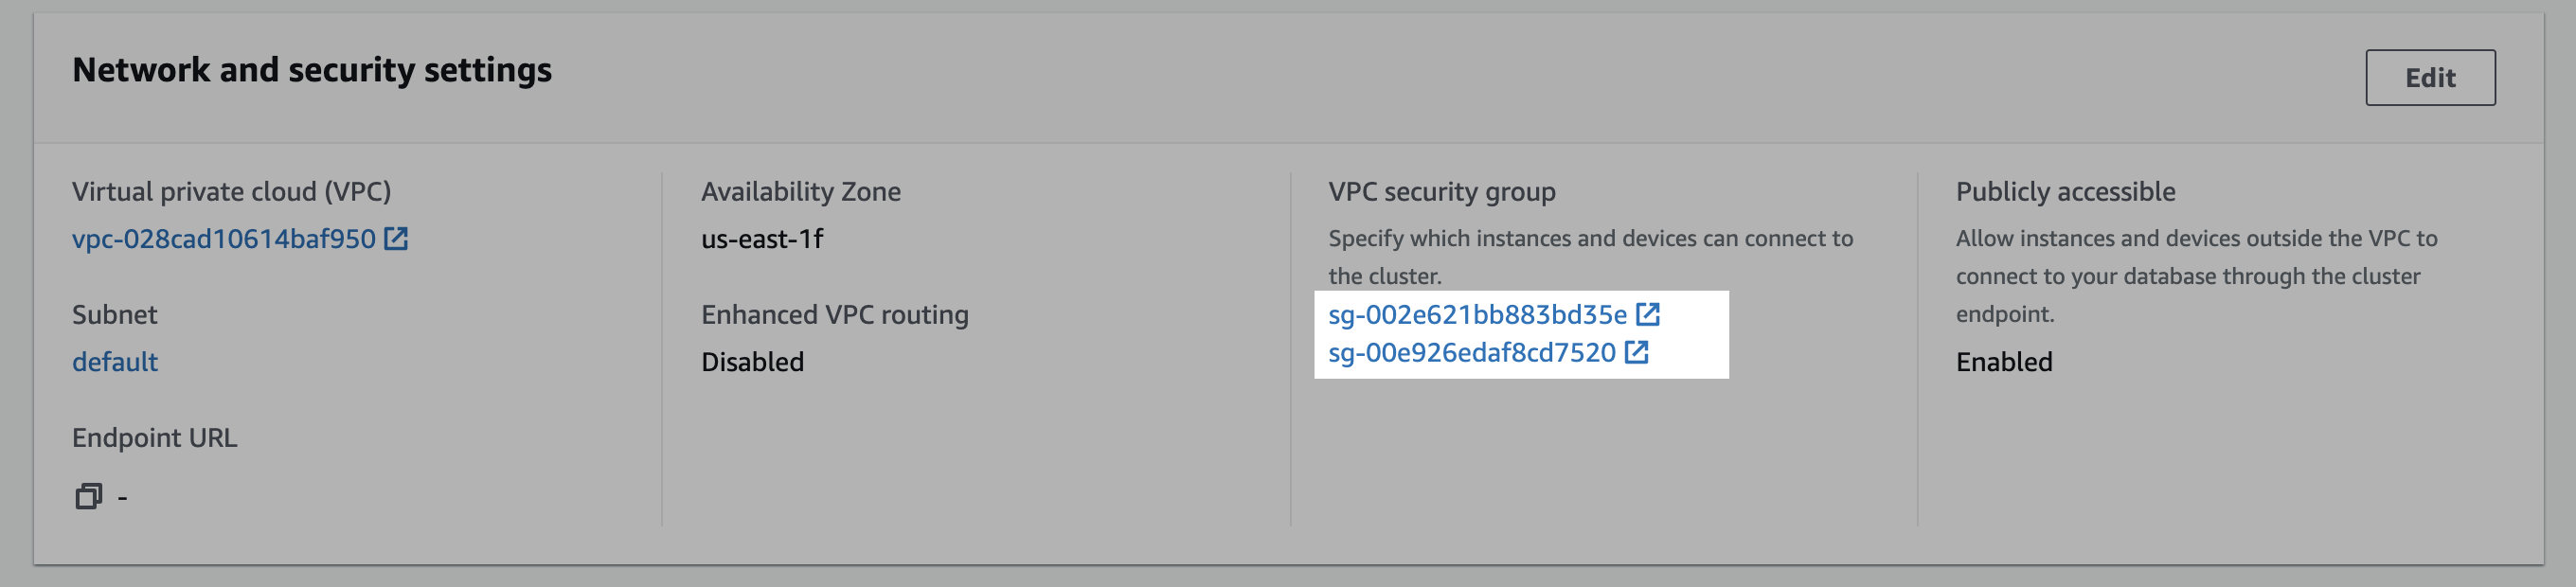
- Scroll down to the Network and security settings section.
- In the VPC security group field, select a security group to open it.
2
Edit inbound rules
- In the Security Groups window, click Inbound rules.
- Click Edit inbound rules.
-
In the Edit the Inbound rules window, create a custom TCP rule for the static IP:
- Select Custom TCP in the drop-down menu.
- Enter your Redshift port number (likely
5439). - Enter the static IP address.
- Click Add rule.
Step 3: create a limited user
1
Connect to Redshift
Connect to Redshift using the SQL client.
2
Create the user
Execute the following query to create a user (replace
<password> with a password of your choice).Create user
3
Grant read-only privileges
Execute the following query to grant the user read-only access to the specific tables you want to sync (replace
<schema> with your schema name):Grant table access
To grant access to every table in a schema instead of listing tables individually, grant
SELECT on all tables in the schema.Grant all tables
Step 4: configure AWS authentication
You must also provide AWS credentials for cluster access. You can authenticate with either an IAM role (recommended) or AWS access keys.- IAM role (recommended)
- AWS access keys
1
Create an IAM policy
In the AWS IAM console, create a new policy with the JSON below. Replace
REGION_NAME, ACCOUNT_ID, CLUSTER_NAME, USERNAME (the user from Step 3), and DATABASE_NAME with values that match your cluster.IAM policy
2
Create an IAM role
In the AWS IAM console, create a new role using the custom trust policy below, and attach the permissions policy you created in the previous step. Reach out to your contact for the value of
<some_service_account_identifier>.Trust policy
3
Note the role ARN
After the role is created, copy its ARN (for example,
arn:aws:iam::123456789012:role/source-redshift). You will provide this ARN in Step 5.Step 5: submit your connection details
Provide the following details to complete the source setup:- The name is a descriptive name of the source
- The host (e.g.,
source-redshift.cw1drqwgbdue.us-east-1.redshift.amazonaws.com) - The port [e.g.,
5439] - The database for your Redshift cluster.
- The cluster identifier from Step 1.
- The AWS region from Step 1.
- The username from Step 3.
- The authentication credentials from Step 4:
- If using an IAM role: the IAM role ARN
- If using AWS access keys: the password from Step 3, the AWS access key ID, and the AWS secret access key