
Quickstart Guide
Prerequisites: determine your data import strategy
- Mapped schema: require your customers to upload data that conforms to a predefined schema. Customers will need to complete a data mapping step.
- Replicated schema: allow your customer to import an arbitrary set of tables with no predefined schema.
This rest of this guide will assume you would like to import data using a mapped schema.
1. Gather your deployment details
Depending on your chosen deployment option, make sure you have the following details available to complete the next steps:
| Required Information | Example Values |
|---|---|
| Your service domain name | api.prequel.co,prequel.your_domain.com |
| Your API key | sk_staging_123e4567e89b12d3a456426655440000, sk_prod_123e4567e89b12d3a456426655440000 |
| Prequel static IP | 35.192.85.117 (see here for more details) |
2. Connect your destination
Before asking customers to begin transferring data, the destination for the data (a database, data warehouse, or object store) must be connected.
Configure your destination using one of the Destination configuration guides, and add it to Prequel using the destination POST request.
curl --request POST \
     --url https://api.prequel.co/import/destinations \
     --header 'Content-Type: application/json' \
     --header 'X-API-KEY: sk_staging_123e4567e89b12d3a456426655440000' \
     --data '
{
     "destination": {
          "name": "Postgres destination database",
          "host": "aurora-source-db-instance-1.cvyvtpjuillo.us-west-1.rds.amazonaws.com",
          "username": "data_transfer_reader_user",
          "port": 5432,
          "vendor": "postgres",
          "database": "postgres",
          "password": "reader_user_password_1234!"
     }
}
'
3. Configure your data model
After connecting a destination, the data model should be specified to help onboard customer data sources, including information around what columns to request and how to detect updates.
The Prequel config files should be written in a Github repository, linked to the official Prequel GitHub app, and can be validated by using the validate POST request.
{
  "model_name": "transactions",
  "description": "A history of all transactions to be analyzed",
  "columns": [
    {
      "name_in_destination": "transaction_id",
      "data_type": "string",
      "description": "Unique transaction identifier. Will be used to deduplicate imported transactions.",
      "is_primary_key": true
    },
    {
      "name_in_destination": "amount",
      "data_type": "integer",
      "description": "Transaction amount in cents."
    },
    {
      "name_in_destination": "currency",
      "data_type": "string",
      "description": "Standard 3-letter currency code."
    },
    {
      "name_in_destination": "updated_at",
      "data_type": "timestamp",
      "description": "Date when row was last modified. Should be ISO 8601 format.",
      "is_last_modified": true
    }
  ]
}
4. Create a provider and connect their source
Once the destination for the data is connected and the data model is configured and validated, you can begin adding data providers and their sources from which you'd like to transfer data.
The provider can be added using the provider POST request. Once created, you can use the provider_id to add the source.
The source should be configured using one of the Source configuration guides, and can be added to Prequel using the destinations POST request, Admin UI, or Magic Link.
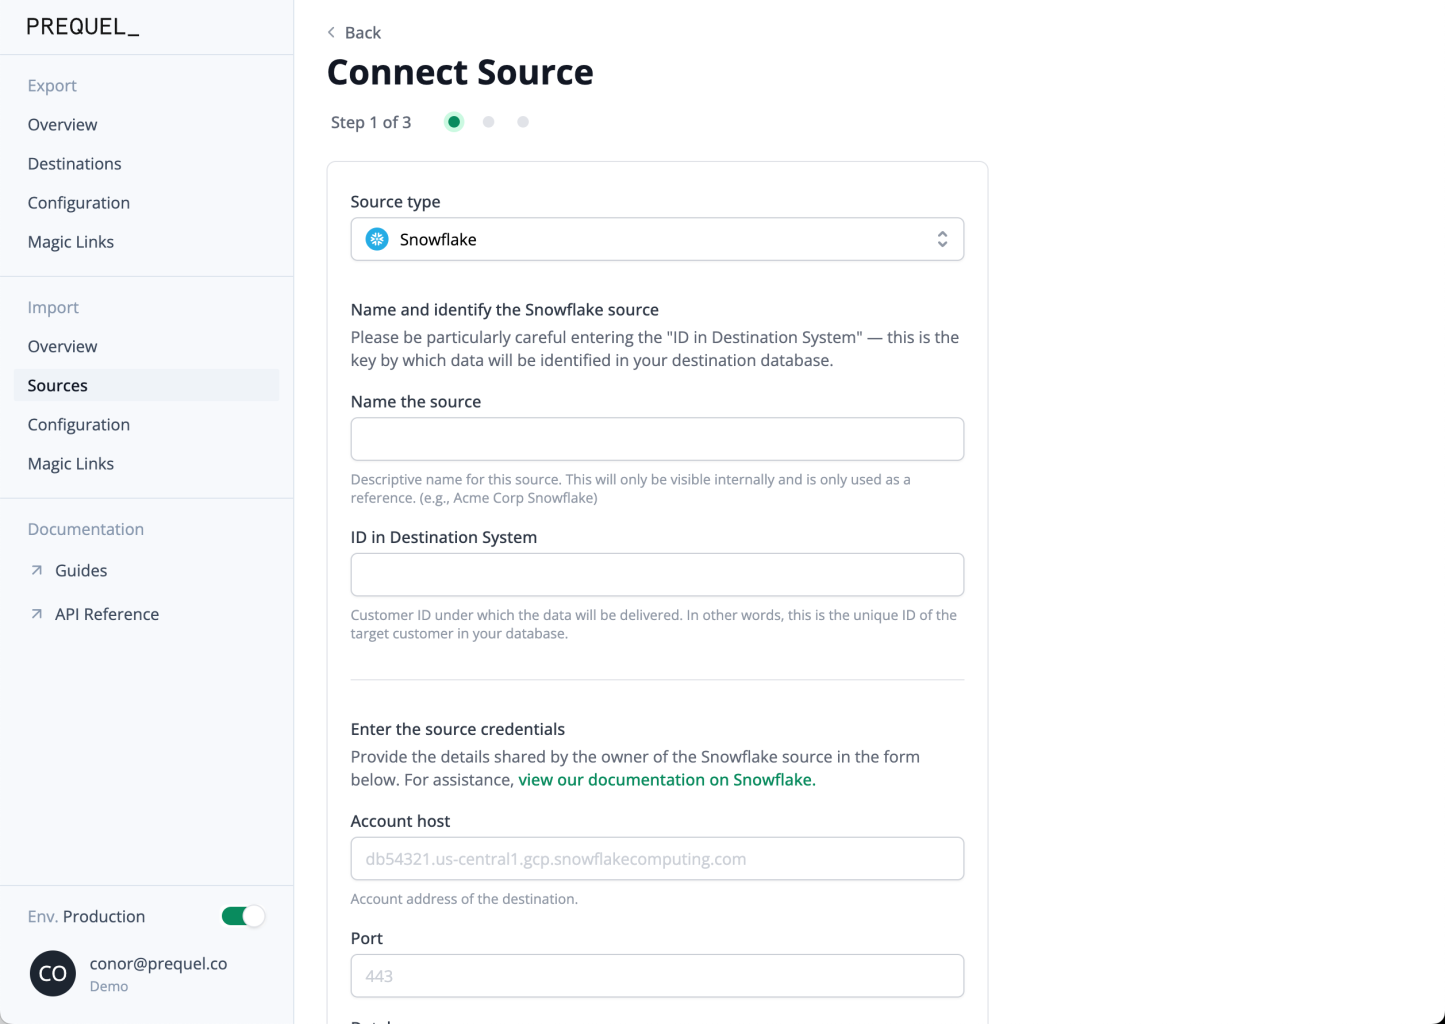
Adding a source to Prequel using the Admin UI
What is
id_in_recipient_system?
id_in_recipient_systemrefers to the data providers identifier by which data will be tenanted in the destination data store.
In mapped schema mode, an additional step of source-to-destination column mapping will be required before completing the connection. This can be accomplished visually in the Admin UI or Magic Link flow, or via our API using the model_mappings field.
5. Begin a transfer
Once a destination and at least one source is added, you can initiate a transfer. You can kick off a transfer using either the POST transfer request or Admin UI.
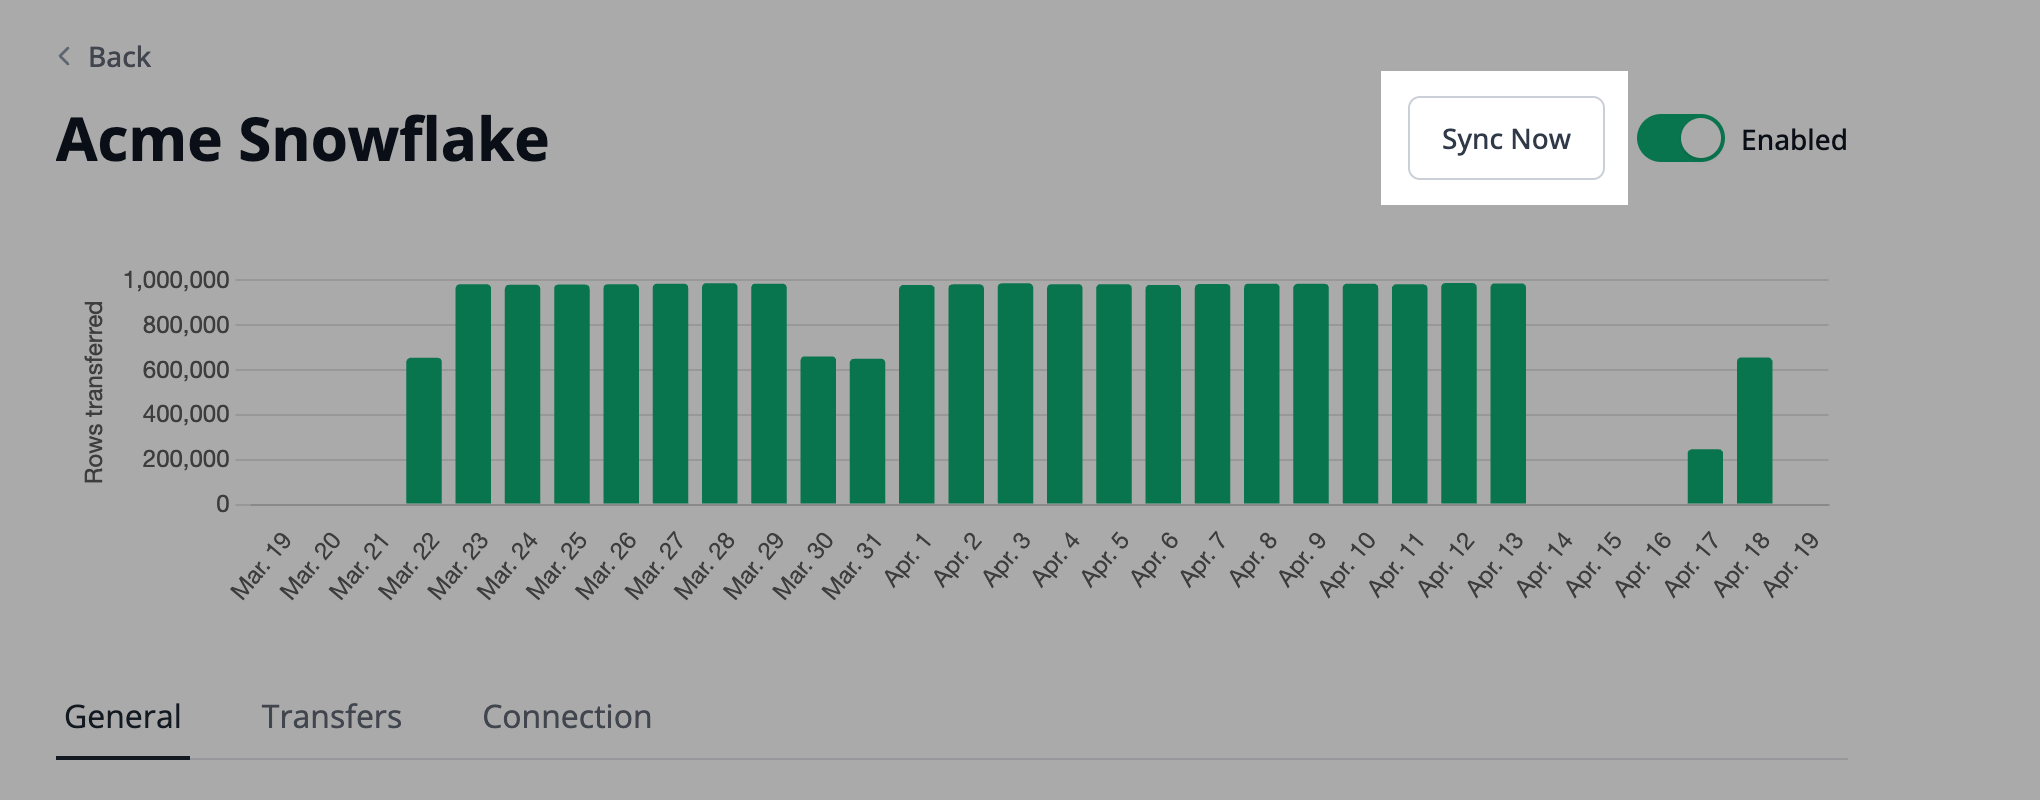
Begin a transfer manually using the Admin UI
That's it!
Once data has been successfully synced, you can query the destination database to validate successful data transfers.
Updated 5 months ago