> ## Documentation Index
> Fetch the complete documentation index at: https://docs.prequel.co/llms.txt
> Use this file to discover all available pages before exploring further.
# Redshift
> Connect your Redshift data warehouse as a source
## Step 1: find cluster connection details
1. In the Redshift console, click **Clusters**.
2. Select the cluster you would like to connect.

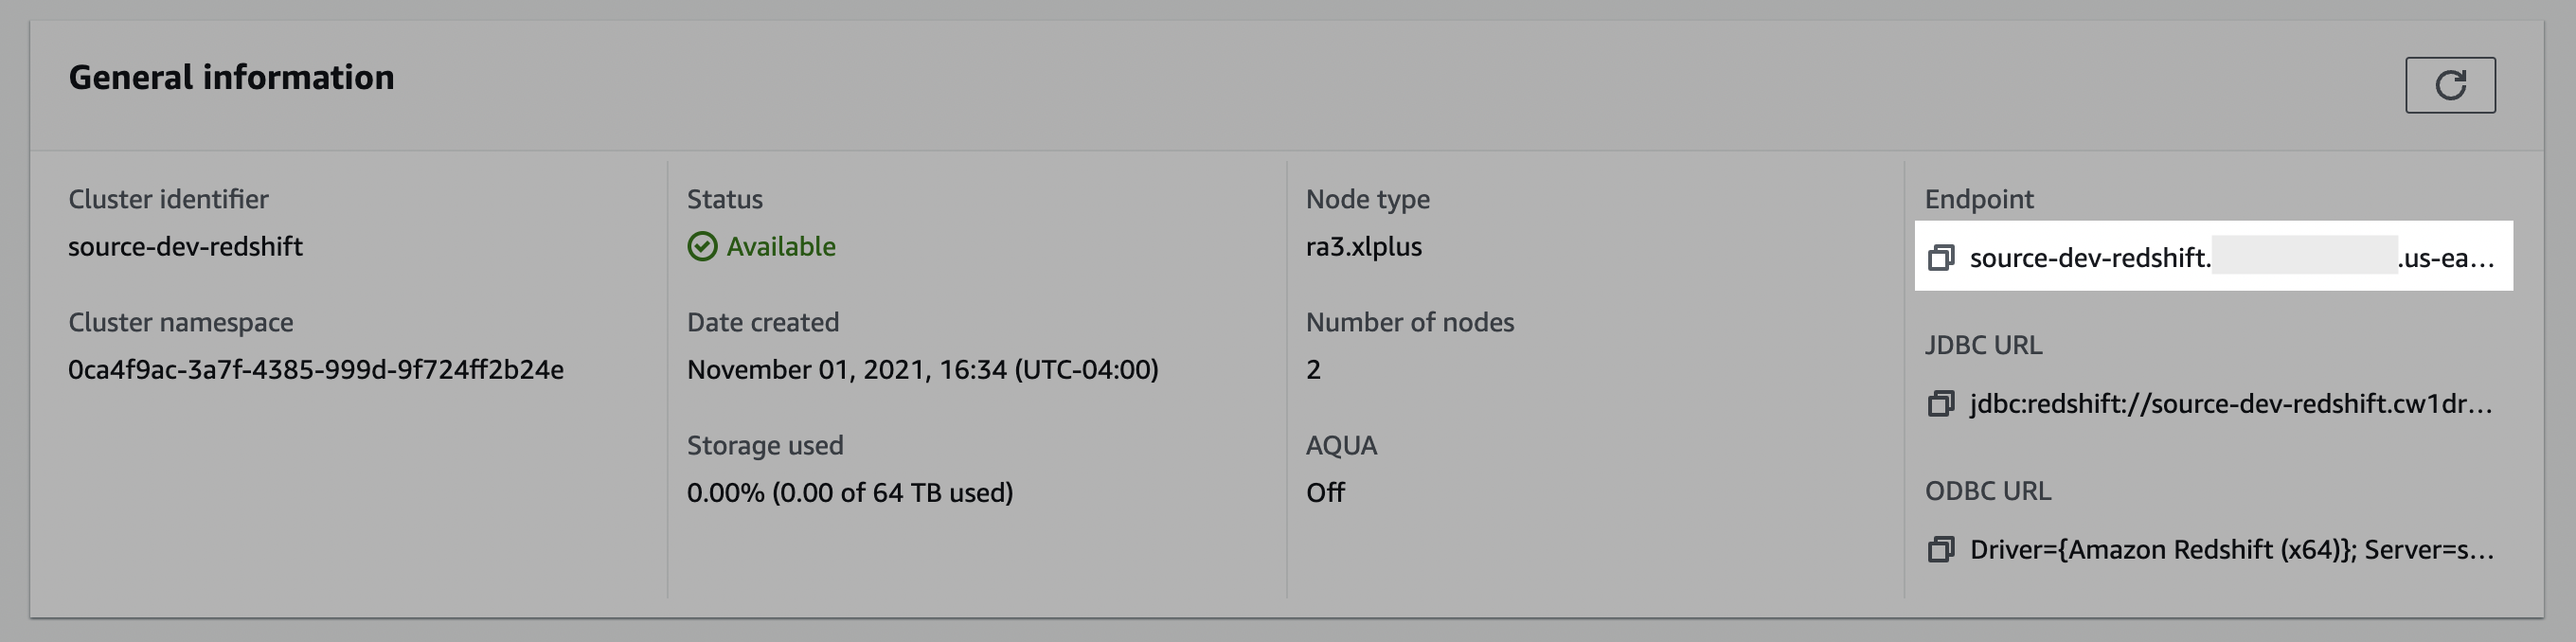
In the **General information** pane, make note of the **Endpoint** details, the **Cluster identifier**, and the **AWS region** that the cluster is hosted in. You may need to use the **copy** icon to copy the full details to discover the full endpoint and port number.
## Step 2: whitelist connection
1. In the Redshift console, click **Clusters**.
2. Select the cluster you would like to connect.
3. Click the **Properties** tab.
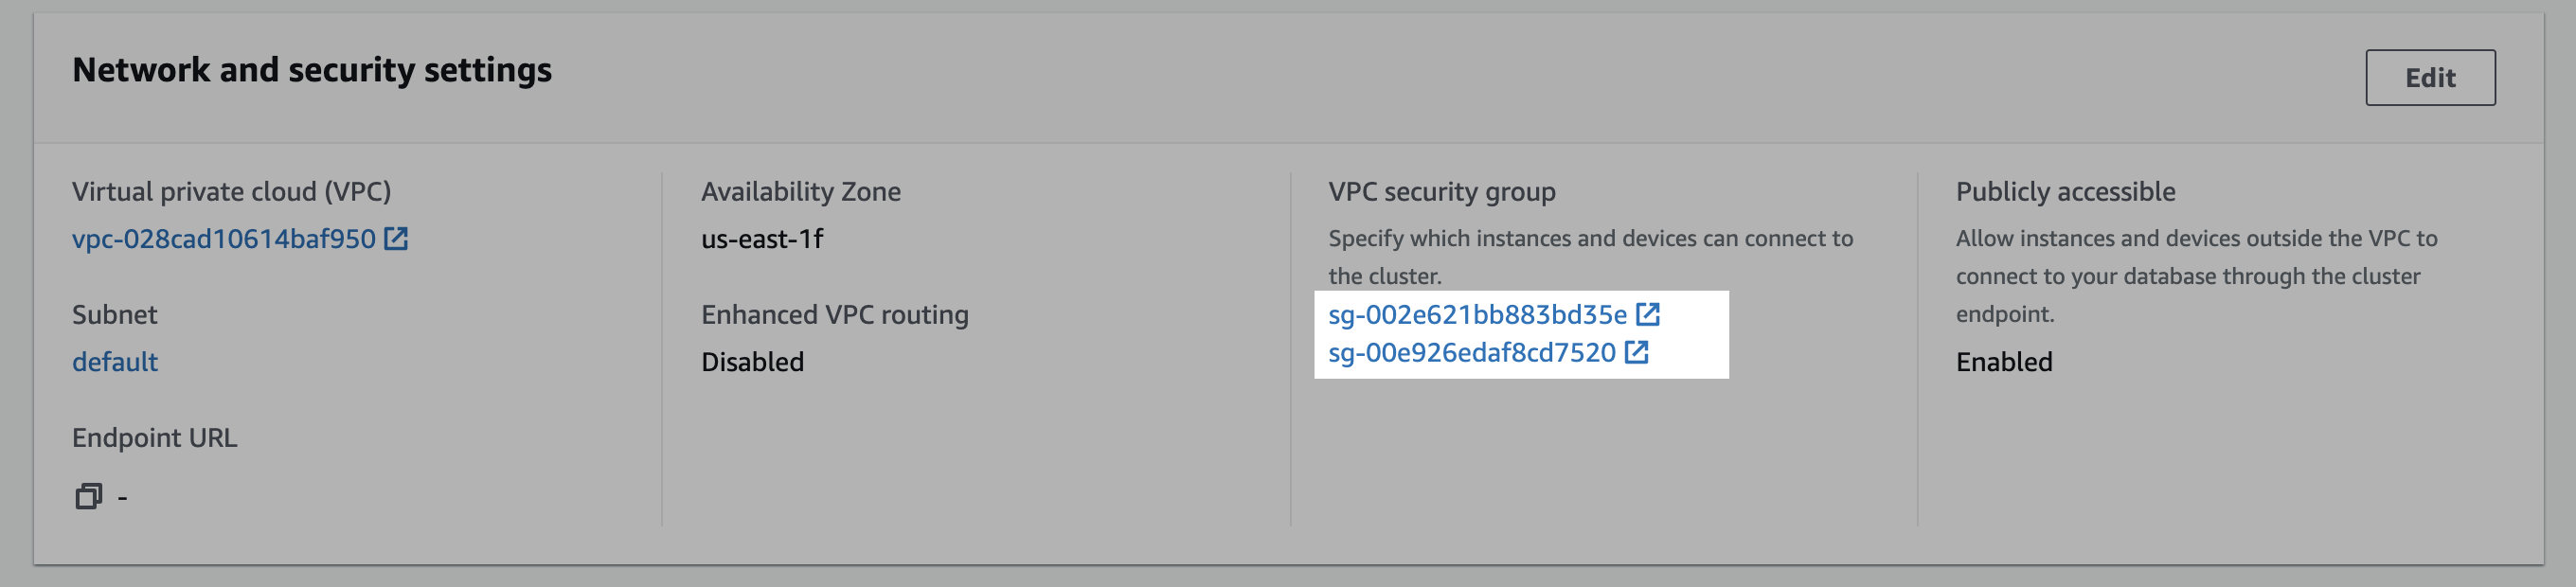
4. Scroll down to the **Network and security settings** section.
5. In the VPC security group field, select a security group to open it.
1. In the Security Groups window, click **Inbound rules**.
2. Click **Edit inbound rules**.
3. In the Edit the Inbound rules window, create a custom TCP rule for the static IP:
1. Select **Custom TCP** in the drop-down menu.
2. Enter your Redshift port number (likely `5439`).
3. Enter the static IP address.
4. Click **Add rule**.
## Step 3: create a limited user
Connect to Redshift using the SQL client.
Execute the following query to create a user (replace `` with a password of your choice).
```sql title="Create user" icon="database" theme={null}
CREATE USER PASSWORD '';
```
Execute the following query to grant the user read-only access to the specific tables you want to sync (replace `` with your schema name):
```sql title="Grant table access" icon="database" expandable theme={null}
GRANT USAGE ON SCHEMA TO ;
GRANT SELECT ON . TO ;
GRANT SELECT ON . TO ;
```
To grant access to every table in a schema instead of listing tables individually, grant `SELECT` on all tables in the schema.
```sql title="Grant all tables" icon="database" theme={null}
GRANT USAGE ON SCHEMA TO ;
GRANT SELECT ON ALL TABLES IN SCHEMA TO ;
```
## Step 4: configure AWS authentication
You must also provide AWS credentials for cluster access. You can authenticate with either an **IAM role** (recommended) or **AWS access keys**.
In the AWS IAM console, create a new policy with the JSON below. Replace `REGION_NAME`, `ACCOUNT_ID`, `CLUSTER_NAME`, `USERNAME` (the user from Step 3), and `DATABASE_NAME` with values that match your cluster.
```json title="IAM policy" icon="brackets-curly" expandable theme={null}
{
"Version": "2012-10-17",
"Statement": [
{
"Effect": "Allow",
"Action": "redshift:GetClusterCredentials",
"Resource": [
"arn:aws:redshift:REGION_NAME:ACCOUNT_ID:dbuser:CLUSTER_NAME/USERNAME",
"arn:aws:redshift:REGION_NAME:ACCOUNT_ID:dbname:CLUSTER_NAME/DATABASE_NAME"
]
}
]
}
```
In the AWS IAM console, create a new role using the custom trust policy below, and attach the permissions policy you created in the previous step. Reach out to your contact for the value of ``.
```json title="Trust policy" icon="brackets-curly" expandable theme={null}
{
"Version": "2012-10-17",
"Statement": [
{
"Effect": "Allow",
"Action": [
"sts:AssumeRoleWithWebIdentity"
],
"Principal": {
"Federated": "accounts.google.com"
},
"Condition": {
"StringEquals": {
"accounts.google.com:sub": ""
}
}
}
]
}
```
After the role is created, copy its **ARN** (for example, `arn:aws:iam::123456789012:role/source-redshift`). You will provide this ARN in Step 5.
In the AWS IAM console, create a new user with programmatic access to the Redshift cluster you configured in Step 1.
Generate an access key pair for the user. Make note of the **access key ID** and the **secret access key**. You will provide these values in Step 5.
## Step 5: submit your connection details
Provide the following details to complete the source setup:
1. The **name** is a descriptive name of the source
2. The **host** (e.g., `source-redshift.cw1drqwgbdue.us-east-1.redshift.amazonaws.com`)
3. The **port** \[e.g., `5439`]
4. The **database** for your Redshift cluster.
5. The **cluster identifier** from Step 1.
6. The **AWS region** from Step 1.
7. The **username** from Step 3.
8. The authentication credentials from Step 4:
* If using an **IAM role**: the **IAM role ARN**
* If using **AWS access keys**: the **password** from Step 3, the **AWS access key ID**, and the **AWS secret access key**