> ## Documentation Index
> Fetch the complete documentation index at: https://docs.prequel.co/llms.txt
> Use this file to discover all available pages before exploring further.
# Azure Blob Storage staging bucket
> Set up an Azure Blob Storage staging bucket for efficient destination data transfer.
Some sources or destinations without built-in staging resources require a staging bucket to efficiently transfer or ingest data.
### Create storage account
1. In the Azure portal, navigate to the **Storage accounts** service and click **+ Create**.
2. In the "Basics" tab of the "Create a storage account" form, fill in the required details.
3. In the "Advanced" settings, under "Security" make sure **Enable storage account key access** is turned on. You may turn off (deselect) "Allow enabling public access on containers". Under "Data Lake Storage Gen2", select **Enable hierarchical namespace**.
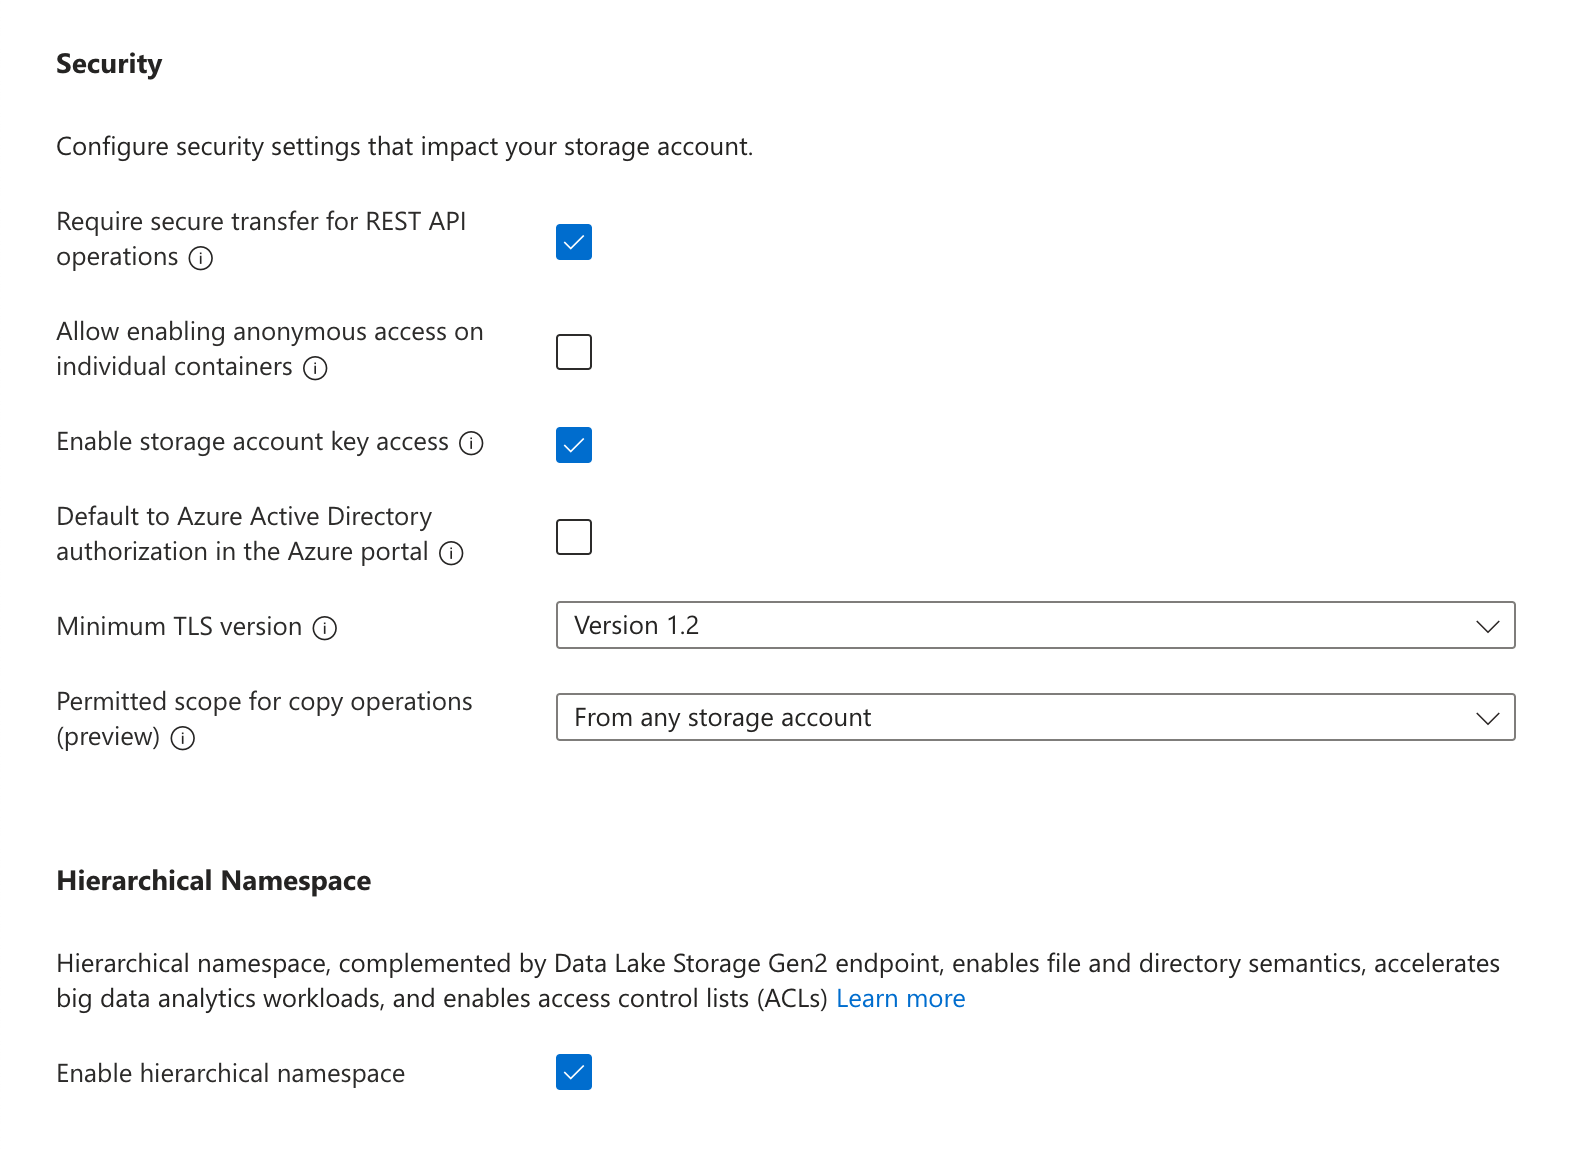
4. In the "Networking" settings, you may limit "Network access" to **Enable public access from select virtual networks and IP addresses**. All other settings can use the default selections.
5. In the "Data protection" settings, you must turn off **Enable soft delete for blobs**, **Enable soft delete for containers**, and **Enable soft delete for file shares**.
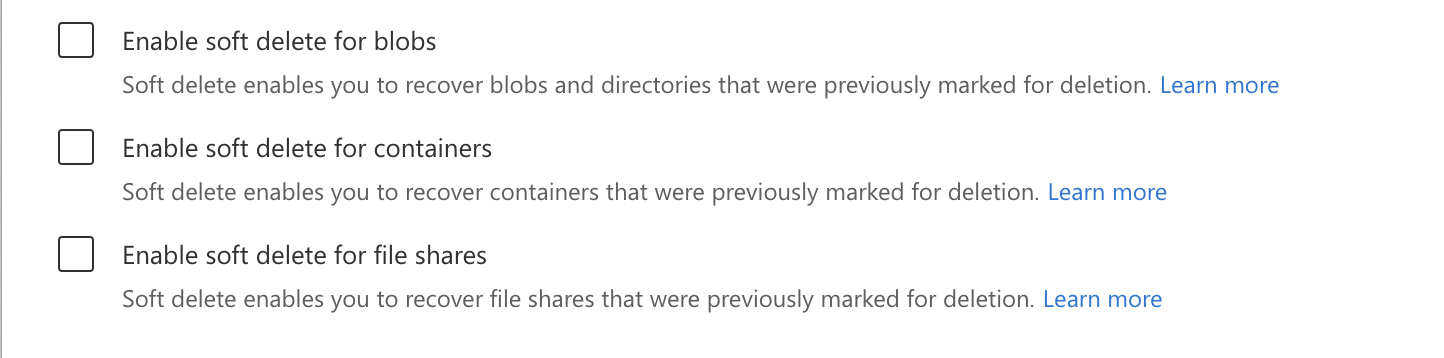
6. Once the remaining options have been configured to your preference, click **Create**.
### Create bucket and access token
1. In the Azure portal, navigate to the **Storage accounts** service and click on the account that was created in the previous step.
2. In the navigation pane, under "Data storage", click **Containers**. Click **+ Container**, choose a name for the container, and click **Create**.
3. In the navigation pane, under "Security + networking", click **Shared access signature**.
4. In the "Allowed services" list, select **Blob** and **File**. In the "Allowed resource types" list, select **Container** and **Object**. In the "Allowed permissions" list, select **Read**, **Write**, **Delete**, **List**, **Add**, **Create**, and **Permanently Delete**.
5. Select a "Start and expiry date/time" based on your security posture, and click **Generate SAS and connection string**.
6. Make a note of the **SAS token** that is generated.
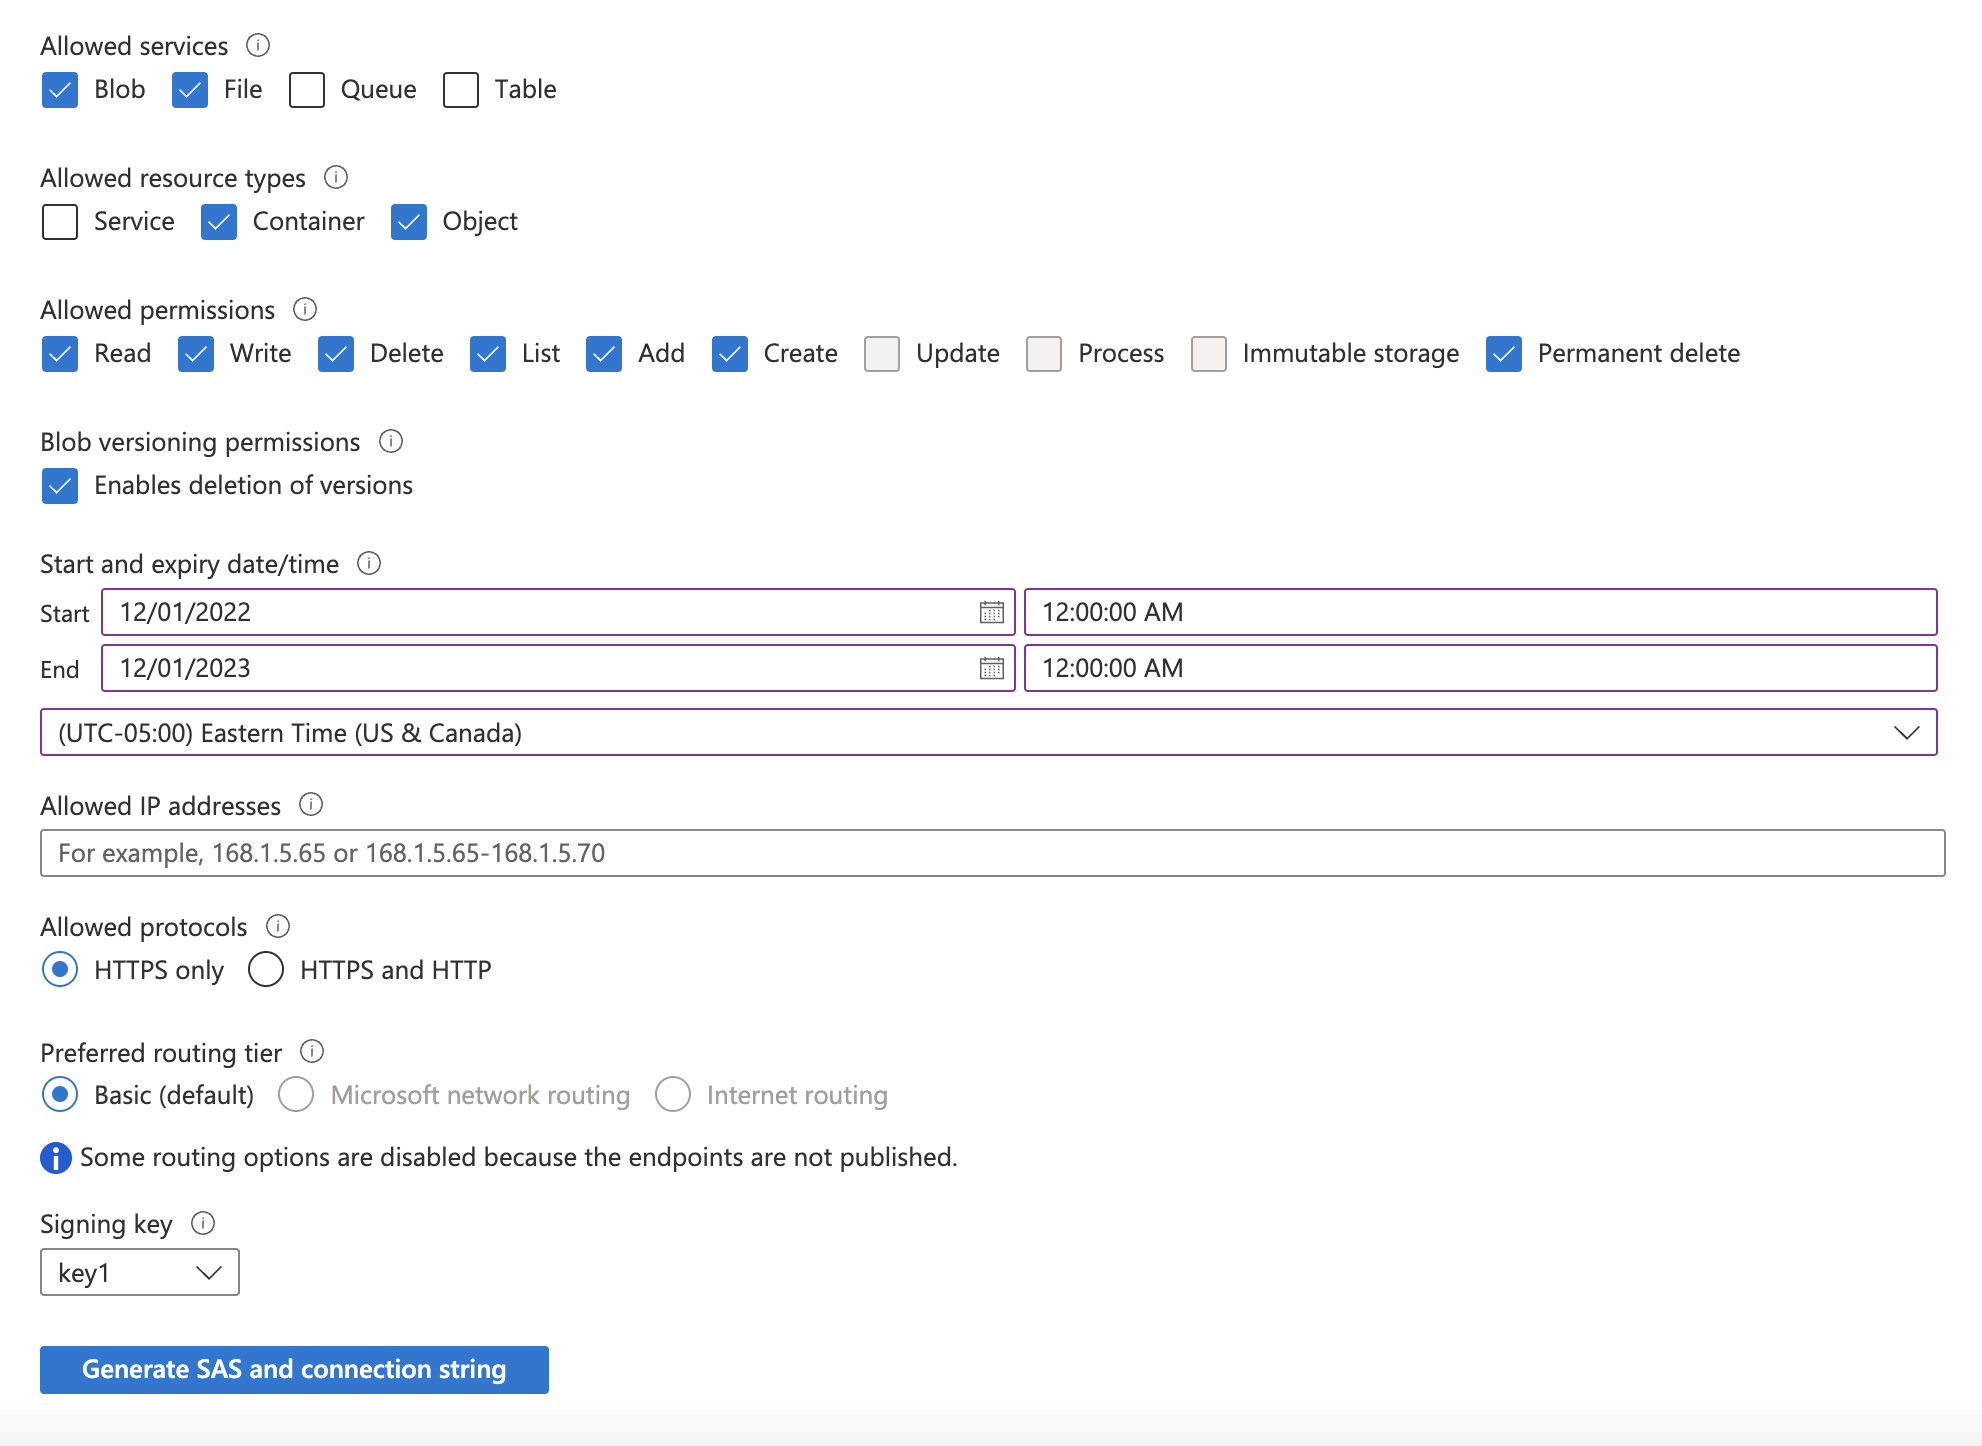
**Optional: Add a short retention lifecycle policy**
You may configure a lifecycle management rule on the container to automatically delete blobs older than 2 days as the container is not used to persist data. In the storage account's **Lifecycle management** settings, add a rule to delete blobs after 2 days. Note that transfer logic automatically cleans up files after transfer completion, so this is an optional step.
### You're done!
Use this configured Azure Blob Storage staging bucket during the connection of your preferred data destination.