> ## Documentation Index
> Fetch the complete documentation index at: https://docs.prequel.co/llms.txt
> Use this file to discover all available pages before exploring further.
# AWS RDS & AWS Aurora
> Configuring your AWS Postgres (RDS or Aurora) destination.
## Prerequisites
* If your Postgres database is protected by security groups or other firewall settings, you will need to have our static IP available to complete Step 1.
Allow write access to a portion of your RDS or Aurora PostgreSQL database.
### Configure the security group
1. In your **Amazon RDS** > **Databases** list, click the PostgreSQL instance you want to send data to.
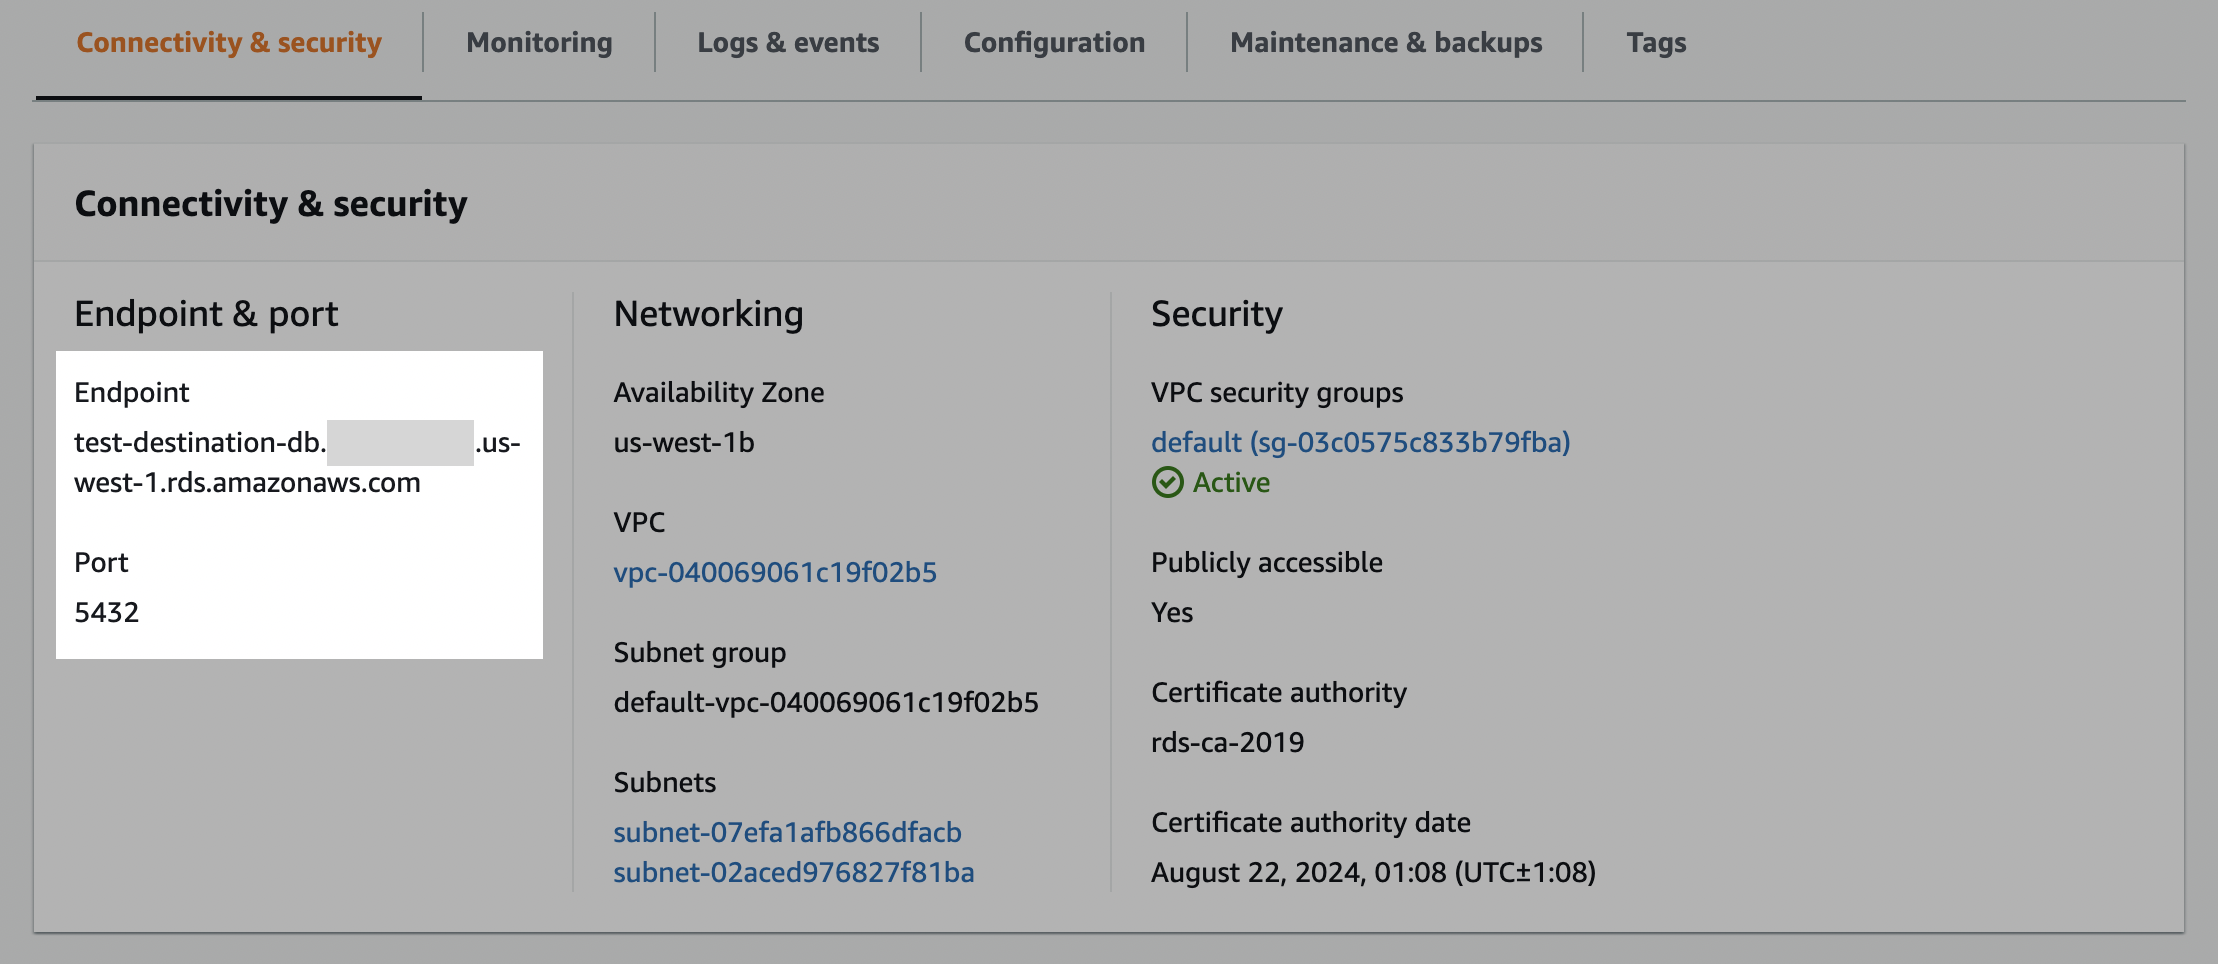
2. In the database page, in the **Connectivity & security** tab, make note of the **Endpoint** and the **Port** number.
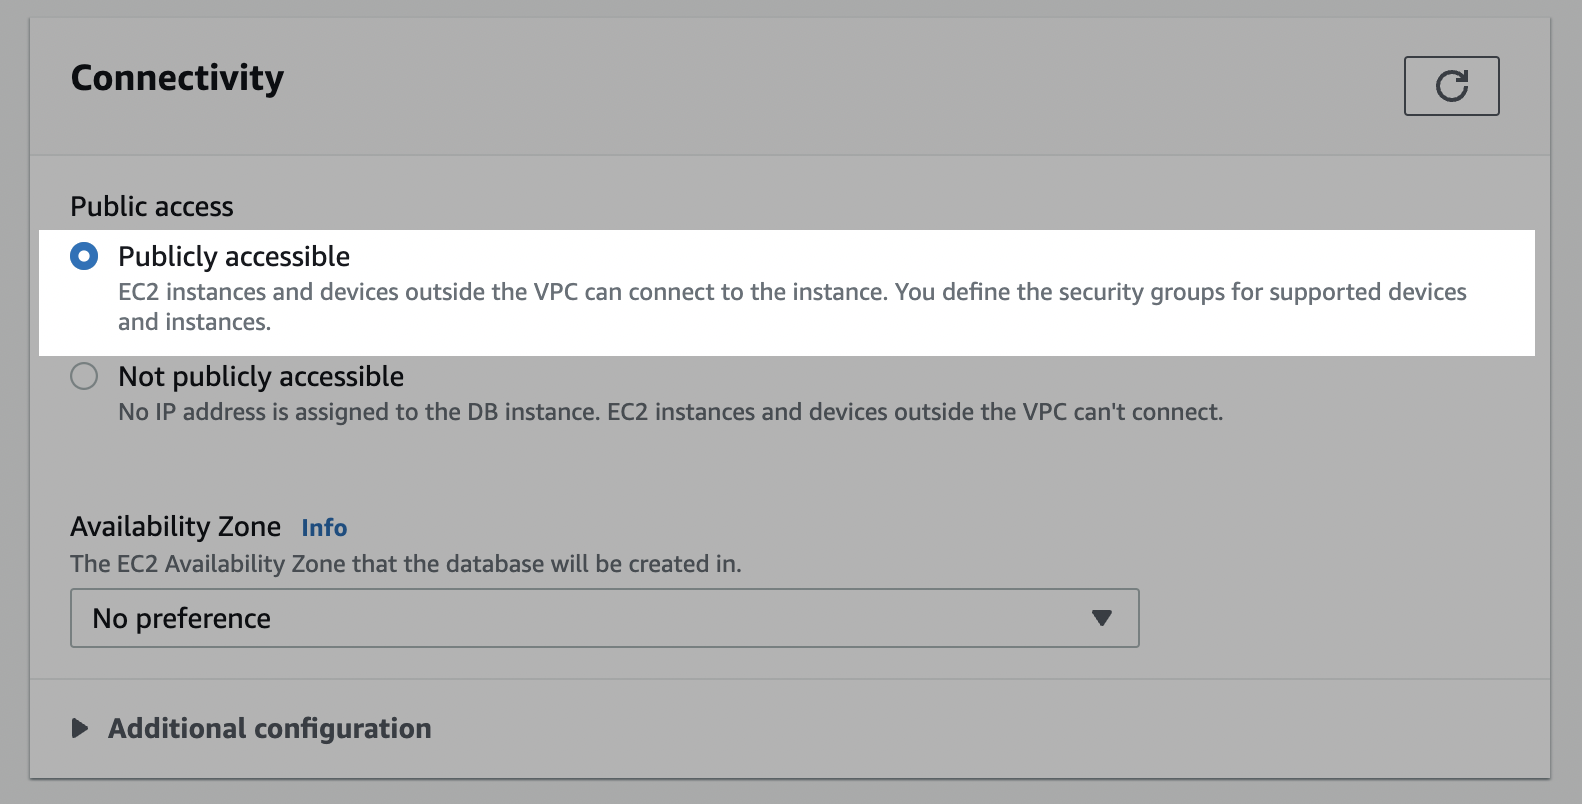
3. In the **Security** section, ensure that the **Publicly accessible** setting is set to **Yes** to ensure that the destination is accessible from outside your VPC. Note that it is still only accessible through whitelisted IPs at this point. If connecting via SSH tunnel, this can be set to **No**.
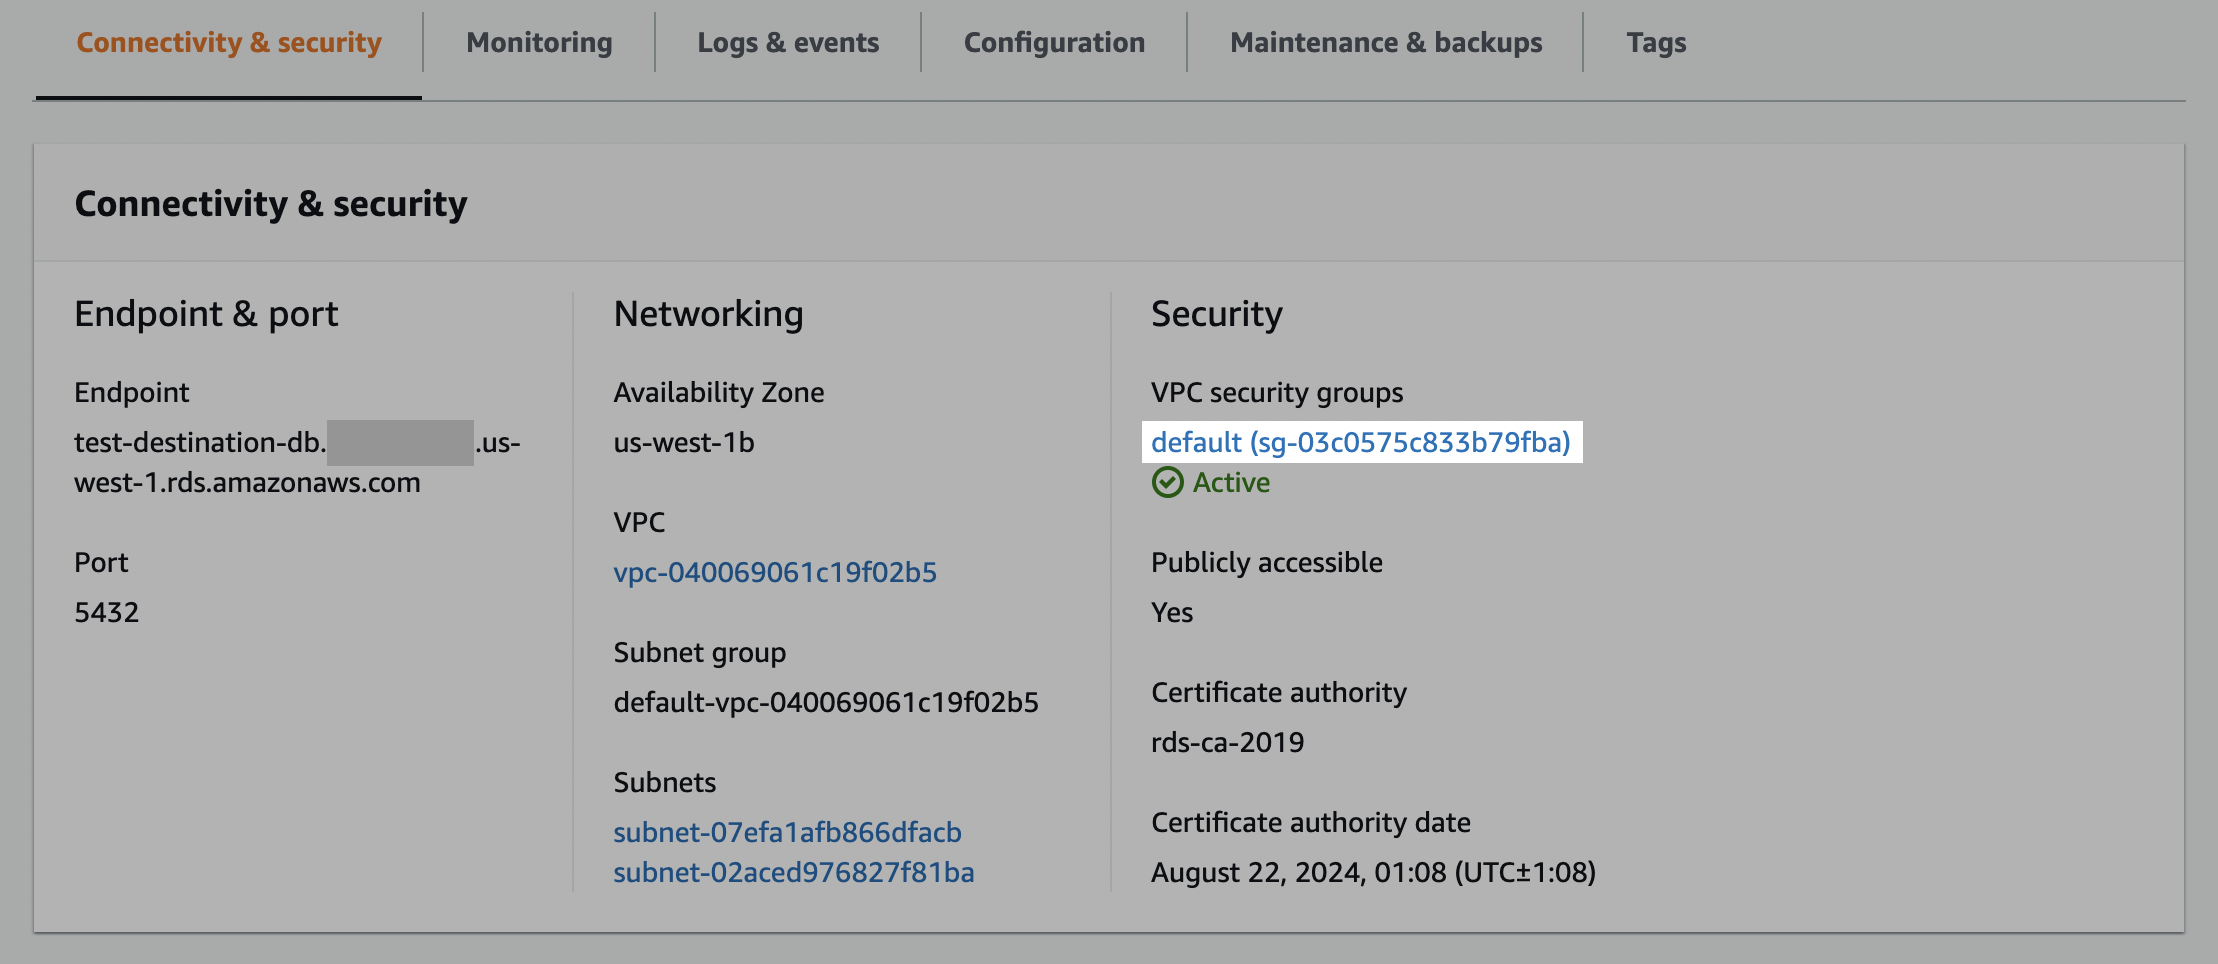
4. Click one of the VPC security groups (usually `default`). Note: VPC groups are permissive (vs. restrictive) and for instances with multiple VPC security groups, only one needs to be configured with the new inbound rule.
5. In the **Security Groups** section, select the **Inbound rules** tab.
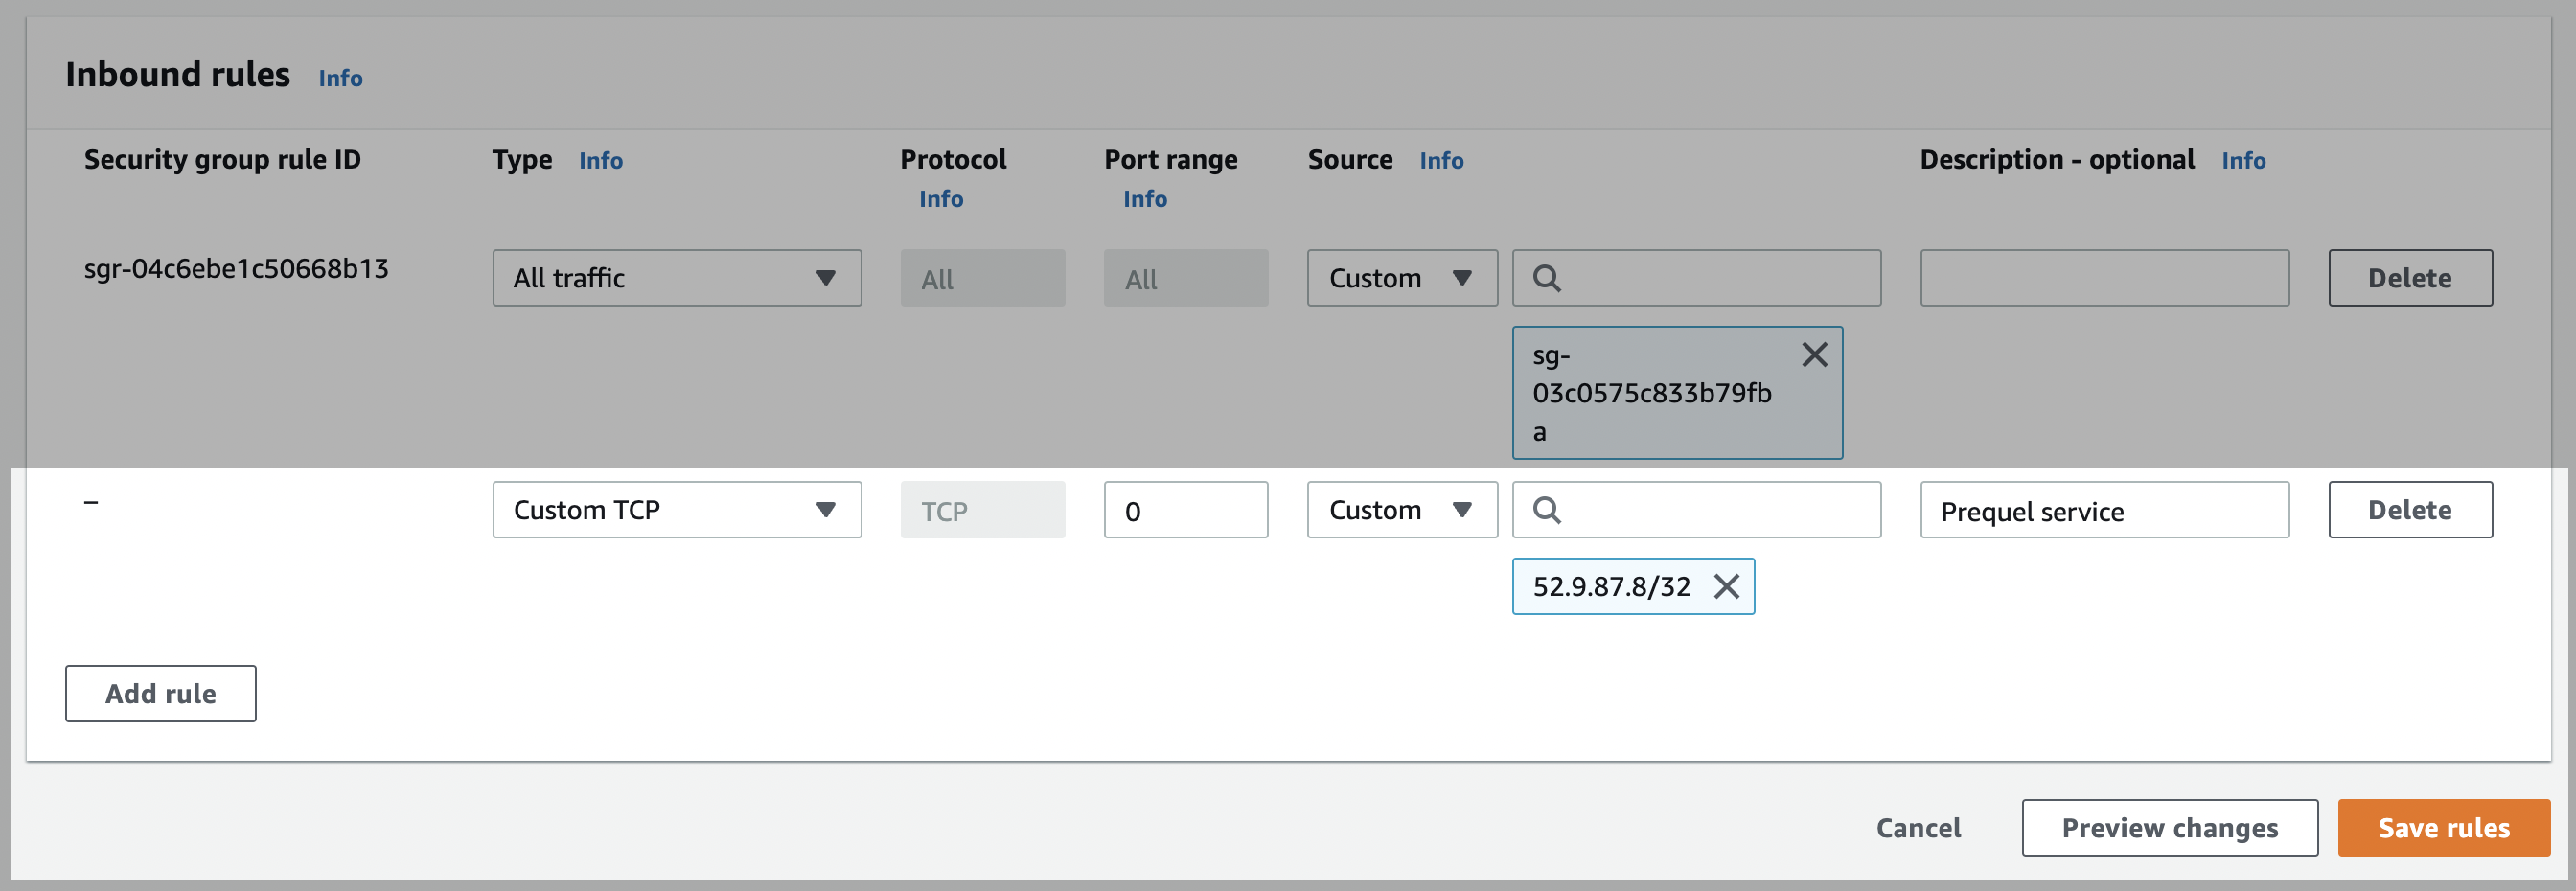
6. Click **Edit inbound rules** and then click **Add rule**.
7. Edit the newly created rule of type **Custom TCP** with the **Port range** noted in the first step (usually `5432`) and a `Custom` **Source** value that includes all of the service IPs. Note: you will need to add `/32` to the end of each IP (CIDR notation). If connecting via SSH tunnel, use the bastion server's security group as the **Source** instead.
8. Click **Save rules**.
### Configure network ACLs (access control list)
For database instances in a VCP
1. In your RDS dashboard, select the PostgreSQL instance.
2. Click the link to the instance's VPC.
3. Click the **VPC ID**.

4. In the **Details** section, click on the link under **Main network ACL**.
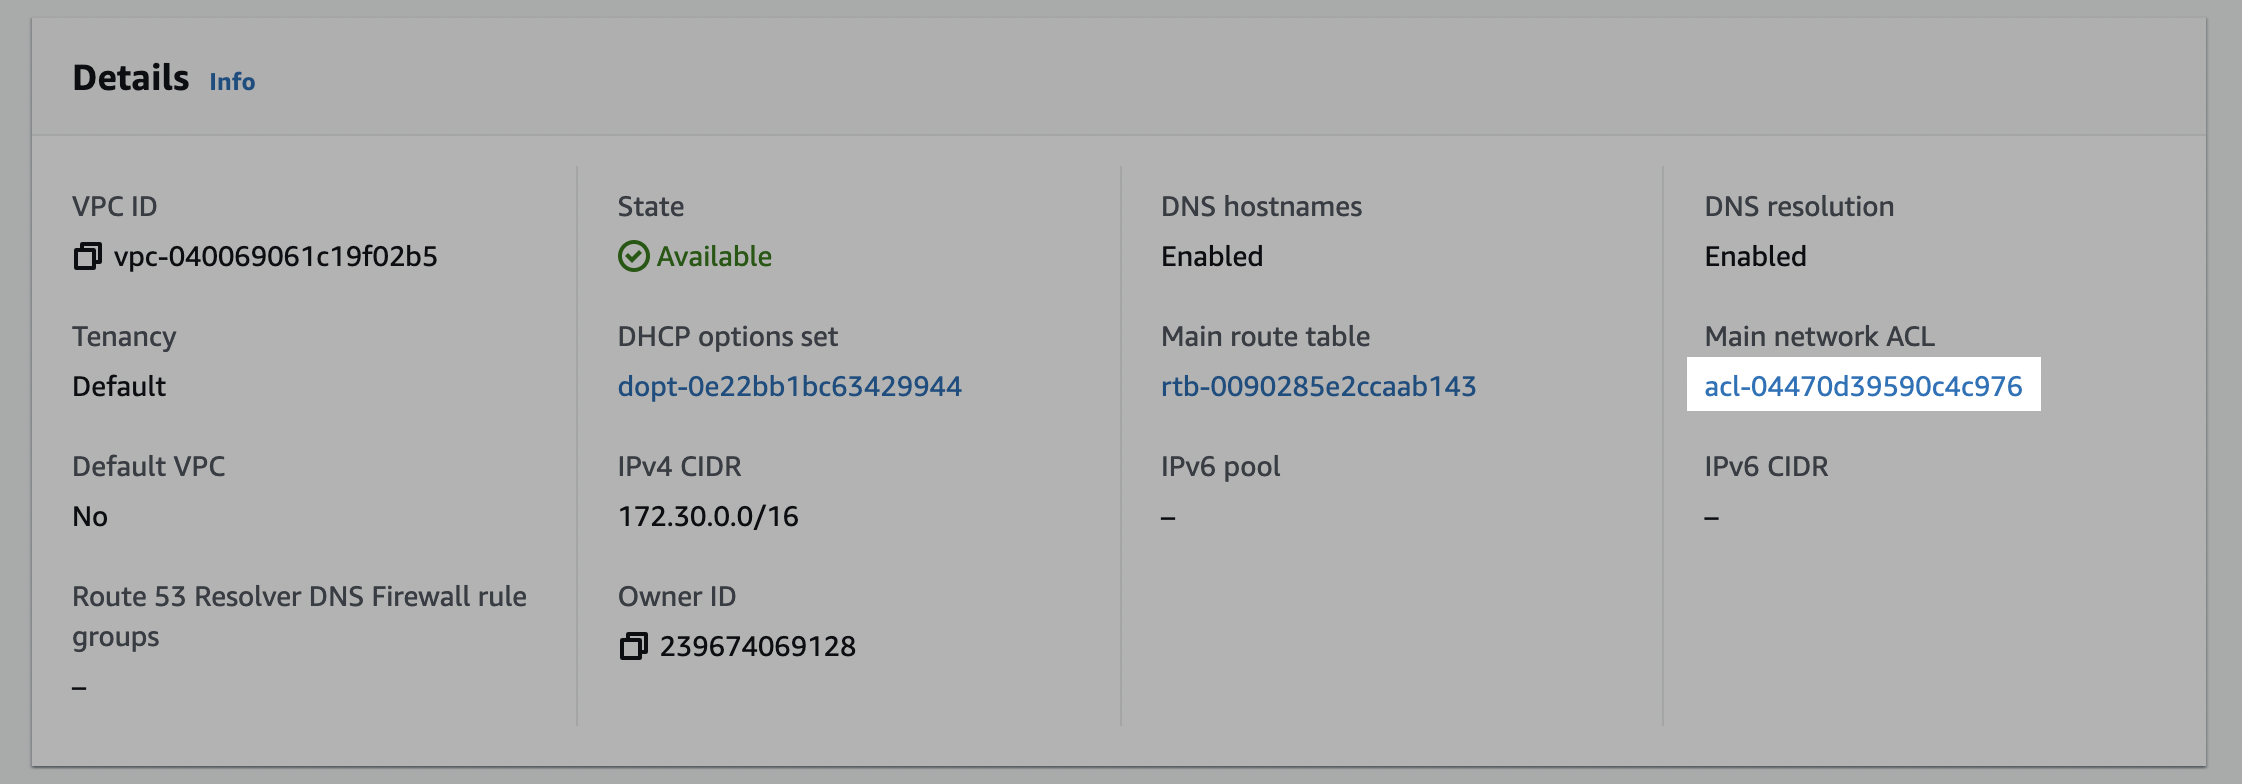
5. Click on the network ACL ID.

#### Edit the inbound rules
6. Click on the **Inbound rules** tab, and check if there is an existing rule with a Source of `0.0.0.0/0` set to `Allow`. (This is a default rule created by AWS. If this rule already exists, skip to **Edit outbound rules**.)
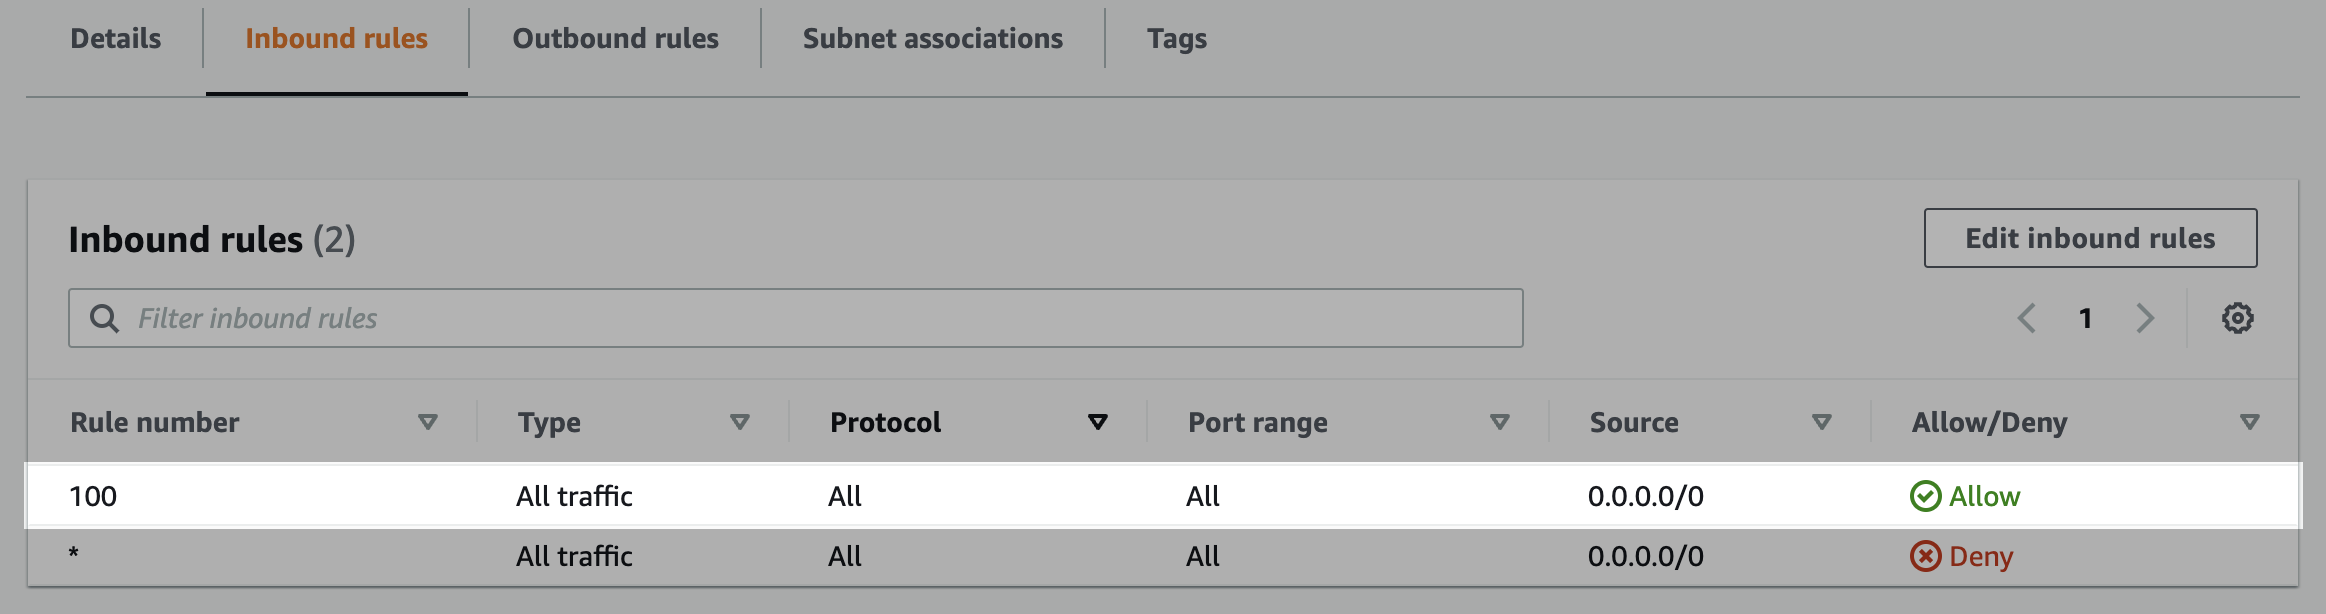
7. Create the inbound rule (if it doesn't exist). Click **Edit inbound rules** and either **Add new rule** or edit an existing rule to allow access to the **port number** of your database instance (usually `5432`) from the Prequel static IP. Click **Save changes**.
#### Edit the outbound rules
8. In the ACL menu, select the **Outbound rules** tab, and check if there is an existing rule with a Destination of `0.0.0.0/0` set to `Allow`. (This is a default rule created by AWS. If this rule already exists, skip to the next step.)
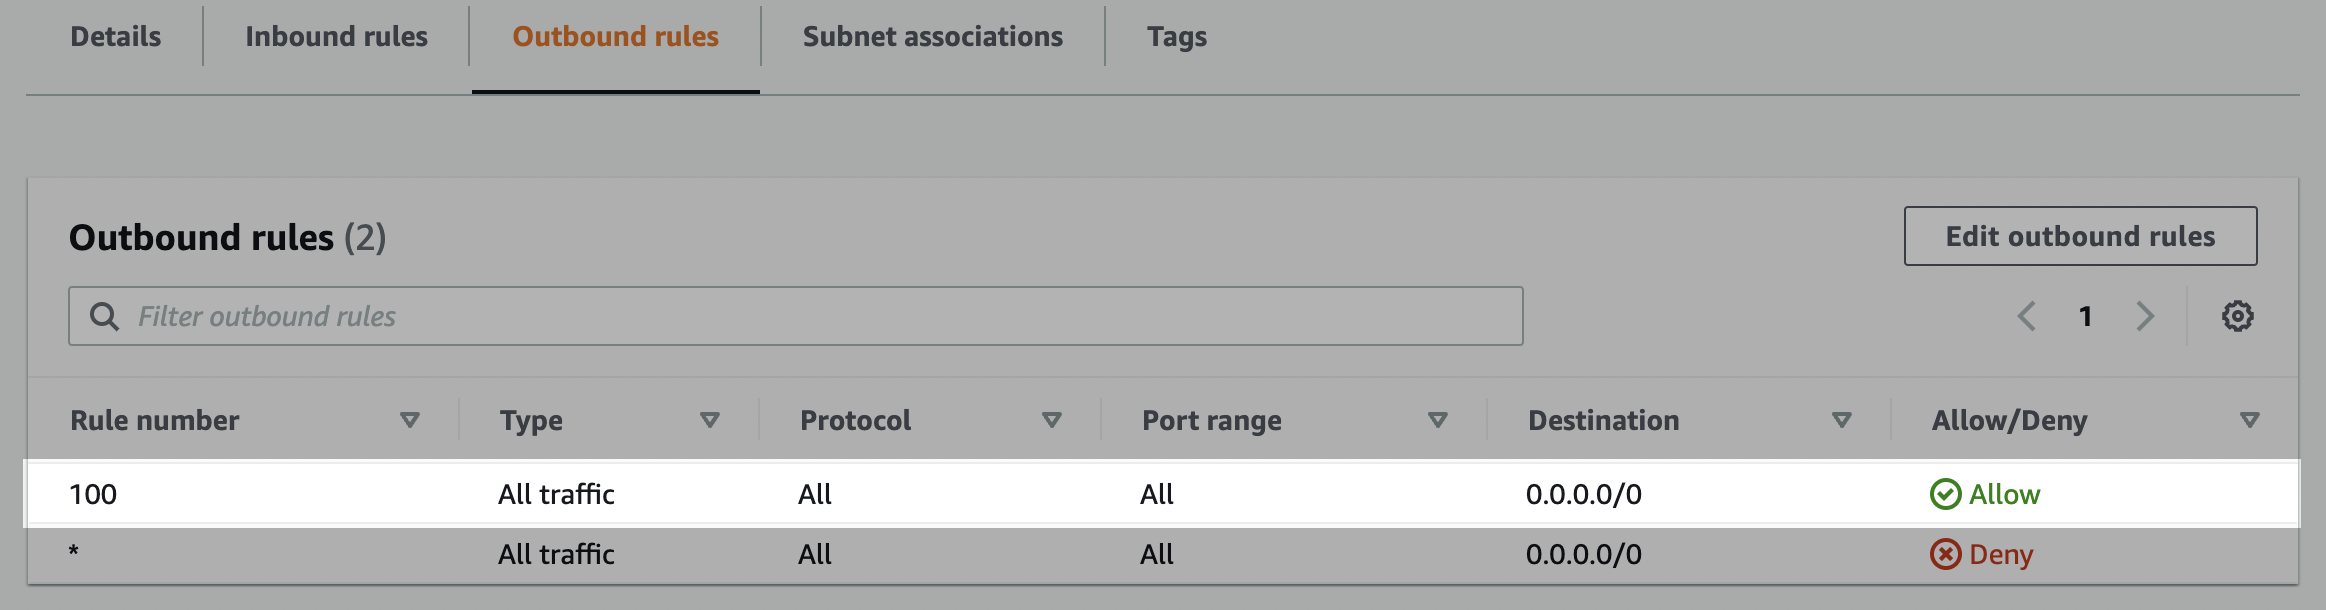
9. Create the outbound rule (if it doesn't exist). Click **Edit outbound rules** and edit the rules to allow outbound traffic to ports 1024-65535 for **Destination** `0.0.0.0/0`.
### Optional: SSH tunneling
If your database is not publicly accessible, SSH tunneling through a bastion host is supported.
1. Allow inbound SSH (port `22`) from the static egress IP on the bastion host's security group.
2. On the bastion host, create an SSH user and add the service's public key to `~/.ssh/authorized_keys`. Contact support to obtain the public key.
3. Add the bastion host's security group to the database's inbound rules in place of the static egress IP (see step 7 above).
4. Supply the bastion host address, port, and username when configuring the destination.
Create a database user to perform the writing of the source data.
1. Open a connection to your Amazon RDS PostgreSQL database.
2. Create a user for the data transfer by executing the following SQL command.
```sql title="Create user" icon="database" theme={null}
CREATE USER PASSWORD '';
```
3. Grant user `create` and `temporary` privileges on the database. `create` allows the service to create new schemas and `temporary` allows the service to create temporary tables.
```sql title="Grant privileges" icon="database" theme={null}
GRANT CREATE, TEMPORARY ON DATABASE TO ;
```
**If the `schema` already exists:**
By default, the service creates a new schema based on the destination configuration (in the next step). If you prefer to create the schema yourself before connecting the destination, you must ensure that the writer user has the proper permissions on the schema, using `GRANT ALL ON schema TO ;`
Use the following details to complete the connection setup: **host name**, **database name**, **port**, your chosen **schema name**, **username**, and **password**.
## Permissions checklist
* RDS security group inbound rules allow the service's egress IP on the configured port (usually `5432`). If using SSH tunneling, allow the egress IP on port 22 on the bastion host's security group instead.
* Network ACL inbound rules allow traffic on the configured database port; outbound rules allow ports 1024-65535.
* Database user has `CREATE` and `TEMPORARY` on the target database.
* If using a pre-created schema: user has `GRANT ALL ON SCHEMA `.
## FAQ
We connect using the credentials you provide over TCP. Access is restricted by the RDS security group inbound rules, which should allow only the service's static egress IP on the configured port. SSH tunneling through a bastion host is supported for databases not publicly accessible.
Aurora PostgreSQL versions compatible with PostgreSQL 13 and above are fully supported. PostgreSQL 12-compatible versions are best-effort only.
No. The schema provided in the destination configuration is created automatically on first sync. If you pre-create it, grant `ALL` on the schema to the writer user and you may remove the database-level `CREATE` permission (retain `TEMPORARY`).