> ## Documentation Index
> Fetch the complete documentation index at: https://docs.prequel.co/llms.txt
> Use this file to discover all available pages before exploring further.
# Azure Blob Storage
> Configuring your Azure Blob Storage destination.
1. In the Azure portal, navigate to the **Storage accounts** service and click **+ Create**.
2. In the "Basics" tab of the "Create a storage account" form, fill in the required details.
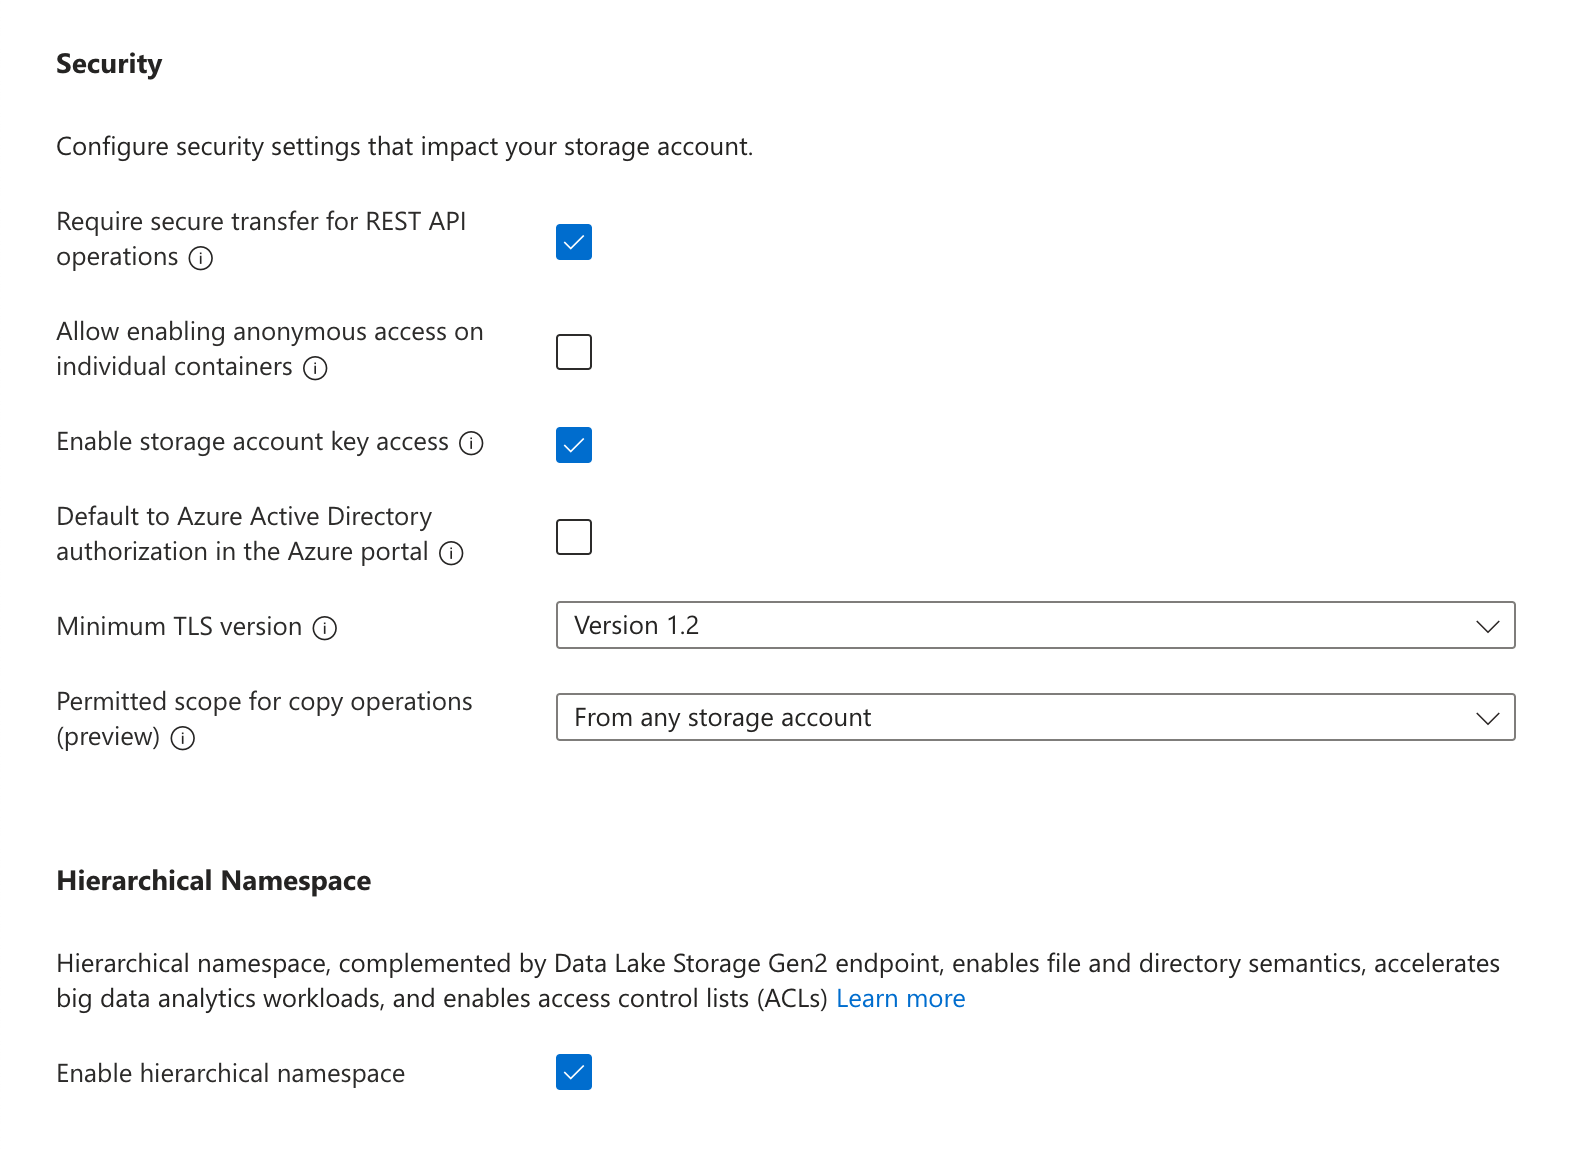
3. In the "Advanced" settings, under "Security" make sure **Enable storage account key access** is turned on. You may turn off (deselect) "Allow enabling public access on containers". Under "Data Lake Storage Gen2", select **Enable hierarchical namespace**.
4. In the "Networking" settings, you may limit "Network access" to either **Enable public access from all networks** or **Enable public access from selected virtual networks and IP addresses**. If the latter is selected, be sure to add the service's static IP to the address range of the chosen virtual network. All other settings can use the default selections.
**Static IP**
Cloud Hosted (US): `35.192.85.117/32`
Cloud Hosted (EU): `104.199.49.149/32`
If private-cloud or self-hosted, contact support for the static egress IP.
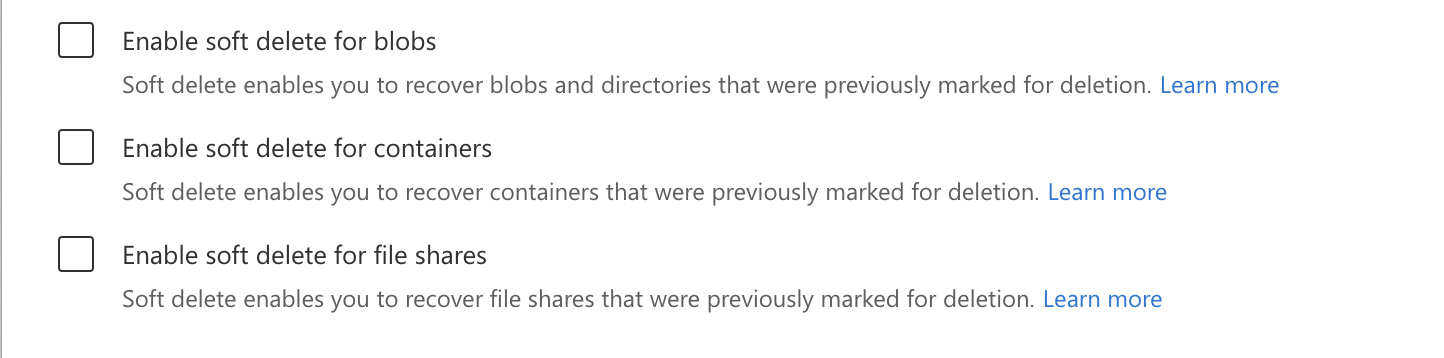
5. In the "Data protection" settings, you must turn off **Enable soft delete for blobs**, **Enable soft delete for containers**, and **Enable soft delete for file shares**.
6. Once the remaining options have been configured to your preference, click **Create**.
1. In the Azure portal, navigate to the **Storage accounts** service and click on the account that was created in the previous step.
2. In the navigation pane, under "Data storage", click **Containers**. Click **+ Container**, choose a name for the container, and click **Create**.
**Recommendation: dedicated container for data transfers**
Use a unique container for these transfers. This:
* Prevents resource contention with other workloads
* Avoids accidental data loss from mixed lifecycle or cleanup rules
* Improves security by reducing surface area and enabling tighter, destination-scoped policies
3. In the navigation pane, under "Security + networking", click **Shared access signature**.
4. Update the required accessible services and permissions:
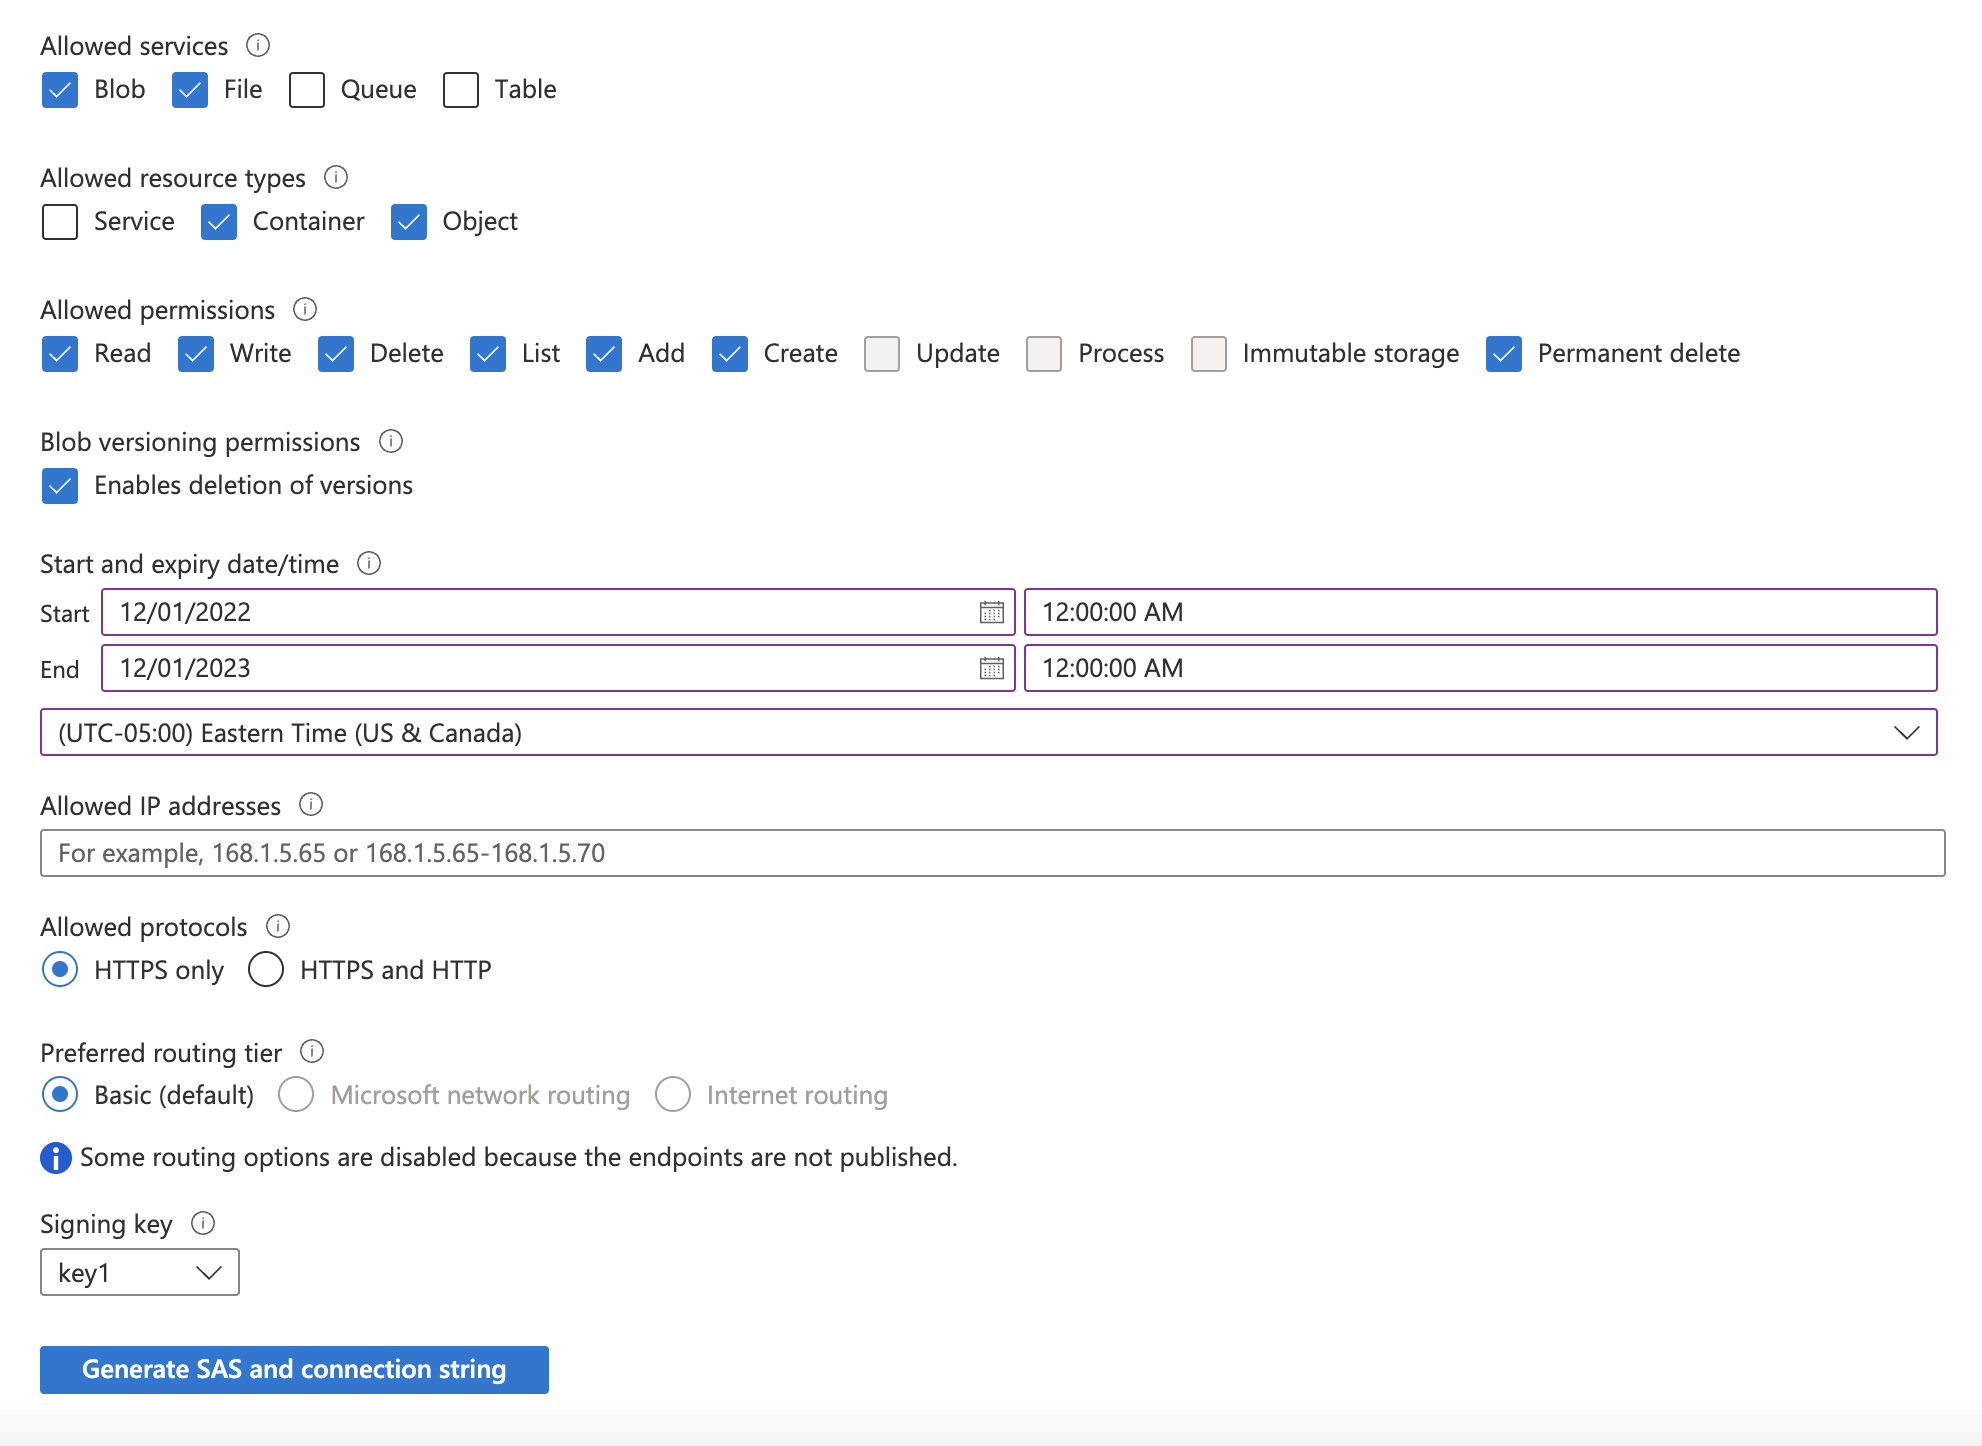
1. Under "Allowed services": select **Blob** and **File**.
2. Under "Allowed resource types": select **Container** and **Object**.
3. Under "Allowed permissions": select **Read**, **Write**, **Delete**, **List**, **Add**, **Create**, and **Permanently Delete**.
5. Select a "Start and expiry date/time" based on your security posture (e.g., set the expiration date 6 months into the future), and click **Generate SAS and connection string**.
6. Make a note of the **SAS token** that is generated.
Use the following details to complete the connection setup: **storage account name**, **container name**, your chosen **folder name** for the data, and your **Storage account SAS token**.
## Permissions checklist
* SAS token includes: read, write, delete, list, add, create, and delete permissions on the target container
* Container exists in the intended account/region
* If using network restrictions, the egress IP is allowed
## FAQ
Data lands in Hive-style partitions per model: `//dt=/_.`. To write to the container root, enter `.` as the folder name.
`Parquet` (default/recommended), `CSV`, and `JSON`/`JSONL`.
Files are automatically split; multiple files may be written per model per transfer.
Each transfer writes a manifest file per model under `_manifests`. Files are written per model per transfer in the format: `_manifests//dt=/manifest_{transfer_id}.json`.
Object storage is append-only. The change detection process uses a lookback window to ensure no data is missed, which can create duplicates. Downstream pipelines should deduplicate on primary keys prioritizing the most recent transfer window; manifest files can help bound the set of files to read.
No explicit size/row limits for Blob Storage; files are split automatically based on volume and performance heuristics.